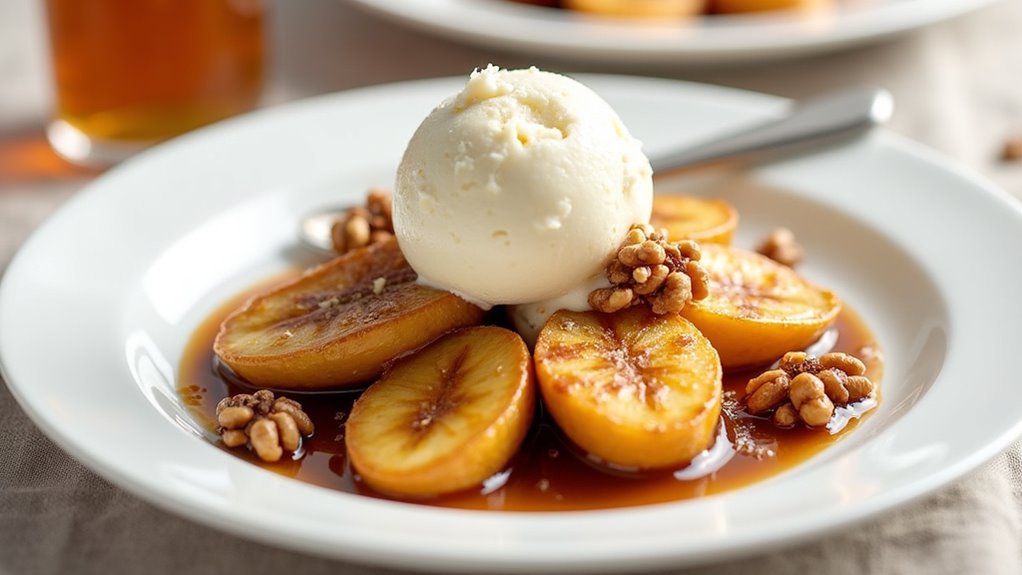
When it comes to indulgent desserts, nothing quite beats a French crème brûlée. Just imagine that creamy custard, rich with vanilla, crowned with a crispy, caramelized sugar crust—absolutely divine. I remember the first time I made it; let’s just say the torch and I had a bit of a struggle. But even with those little kitchen mishaps, it’s a total joy to impress friends and family. Want to know how to whip up this elegant treat? Keep on reading.
Why You’ll Love This Recipe
If you’ve ever found yourself craving a burger that’s not only juicy but also packed with flavor and a lovely green touch, you’re in for a treat.
I can’t tell you how much I adore these white cheddar spinach chicken burgers. Seriously, the combination of spicy garlic, tender chicken, and that rich white cheddar makes each bite an explosion of goodness.
And let’s not forget the fresh spinach—it adds that nice pop of color and a healthy twist. Plus, they’re pretty easy to whip up, even if you’re juggling an exploding laundry basket or a toddler’s meltdown.
Just mix the ingredients, form those patties, and let the skillet work its magic. Trust me, you’ll be hooked after the first bite.
Equipment List
When I whip up these white cheddar spinach chicken burgers, I’m always on the lookout for the right tools to make my life easier. First, a good mixing bowl is essential—I prefer one that won’t slide off the counter. A sturdy spatula helps merge all those lovely ingredients without making a mess; trust me, I’ve had my fair share of clingy mixtures. Don’t forget a skillet! A non-stick one is a game-changer, preventing those golden patties from playing hide-and-seek. I also like having a meat thermometer ready to verify that my chicken reaches the perfect temperature. Finally, a trusty pair of tongs saves me from burning my fingers while flipping those burgers. Cooking can be fun, but there’s no need to injure myself. Having quality kitchen shears on hand can also significantly streamline food preparation, especially when it comes to trimming herbs and cutting poultry.
Our Ingredients
When it comes to making crème brûlée, it may feel like a sophisticated dessert that requires an expert chef. But you know what? It’s easier than it sounds, and you’ll soon see that you can whip up this classic treat right in your own kitchen, impressing everyone around you in the process. Gather your ingredients, roll up your sleeves, and let’s get to it!
Here’s what you’ll need for a delicious homemade crème brûlée:
- 2 cups heavy cream
- 1 vanilla bean or 1 tsp of vanilla extract
- 5 large egg yolks
- 1/2 cup granulated sugar (plus extra for the topping)
- A pinch of salt
Now, let’s chat a bit about these ingredients. Fresh, high-quality cream makes a huge difference—your crème brûlée deserves the best, after all. If you can snag a real vanilla bean, do it; it adds that lovely depth and aroma that makes this dessert special.
But if you’re in a pinch, vanilla extract works too. Also, remember that a pinch of salt isn’t just a formality. It balances the sweetness, making each bite complex and delightful.
And don’t forget, granulated sugar isn’t just your regular sweetener; it’s the magic behind that perfectly caramelized crust on top. Trust me, your future self will thank you for taking these little details to heart.
Step-by-Step Instructions

Making crème brûlée is a delightful culinary adventure that will elevate your dessert game to a whole new level. With just a handful of ingredients—2 cups of heavy cream for richness and a hit of vanilla—this treat is surprisingly simple to prepare. So, let’s roll up our sleeves and immerse ourselves in the indulgent world of homemade crème brûlée. You’ll impress your friends, family, and maybe even earn yourself an honorary chef’s hat.
1. Preheat Your Oven: First things first, Preheat Your Oven to 325°F (160°C). The perfect crème brûlée needs a gentle bake, and starting with a preheated oven puts you in a good position for success.
2. Heat the Cream: In a saucepan, pour in 2 cups of heavy cream and add either a whole vanilla bean (split and scraped) or 1 teaspoon of vanilla extract. Heat over medium heat until the mixture is just about to simmer—think bubbles forming around the edges.
This will infuse your cream with flavor, and your kitchen will smell divine.
3. Mix Egg Yolks and Sugar**: In a bowl, whisk together 5 large egg yolks, 1/2 cup of granulated sugar, and a pinch of salt** until the mixture lightens in color and is smooth.
This step is essential, as it helps dissolve the sugar and guarantees your custard will be silky.
4. Combine Cream and Yolks: Gradually pour the hot cream into the egg yolk mixture, stirring constantly to prevent the eggs from scrambling. It’s all about creating that luscious custard base without turning it into scrambled eggs.
(No one wants that.)
5. Strain the Mixture: To provide a super smooth texture, Strain the Mixture through a fine-mesh sieve into a large measuring cup or bowl.
This removes any little bits that might’ve formed—consider it a spa day for your custard.
6. Prepare the Ramekins: Place your ramekins in a baking dish. Carefully pour the custard mixture into each ramekin, filling them about ¾ full.
7. Add the Water Bath****: Fill the baking dish with hot water until it reaches halfway up the sides of the ramekins.
This water bath (or bain-marie, if you’re feeling fancy) helps cook the crème brûlée evenly, preventing cracks.
8. Bake: Place the dish in your preheated oven and bake for about 30–35 minutes, or until the custards are set but still slightly jiggly in the center.
They’ll firm up as they cool, so don’t worry if they look a little underdone.
9. Cool and Chill: Remove the ramekins from the water bath and allow them to cool for about 30 minutes at room temperature.
Then, cover them and chill in the fridge for at least 2 hours, or overnight if you can wait. Patience is key here—the longer they chill, the better!
10. Caramelize the Top: When you’re ready to serve, sprinkle a thin, even layer of granulated sugar over the top of each chilled custard.
Using a kitchen torch, slowly move the flame over the sugar until it melts and turns golden brown. If you don’t have a torch, you can put them under the broiler for a minute or two, but watch closely—it goes from perfectly caramelized to burnt faster than you can say “crème brûlée.”
11. Let it Set: Allow the caramelized sugar to cool for a minute until it hardens.
This is the part where you get that satisfying crack when you dig in with a spoon—pure bliss.
And just like that, you’ve created your own inspiring crème brûlée. Seriously, who knew you could make something so fancy in your own kitchen? Enjoy the sweet satisfaction that comes with every creamy spoonful! Additionally, consider enhancing your culinary experiences with quality porchetta roasting equipment to elevate your home cooking endeavors even further.
Tips & Variations
There are countless ways to make crème brûlée your own, and I can’t wait to share some tips and fun twists that’ll spice up your dessert game.
First off, try infusing your cream with flavors—think vanilla bean, lavender, or even coffee. If you’re feeling adventurous, add a splash of citrus zest for a revitalizing kick.
Feeling a little mischievous? Swap out half the sugar with brown sugar for a deeper caramel flavor. Trust me, you’ll love that rich taste!
Getting the texture just right is key, so don’t rush the chilling time—patience is rewarding here.
And if you ever find yourself in a kitchen mishap, remember, we all make mistakes, and they often lead to delicious surprises!
How to Serve?
Serving crème brûlée is all about that wow factor, and trust me, it’s easier than it looks.
Once your beautiful custards are cool, sprinkle a thin layer of sugar on top.
Now, here’s where the magic happens—torch it until that sugar melts and caramelizes.
You know you’ve nailed it when it shatters like glass under a spoon.
For presentation, I love using colorful ramekins; it adds a pop to the table.
You can garnish with fresh berries or a mint leaf, just for fun.
Who doesn’t enjoy some color?
Serve with a side of giggles, because everyone’s going to want that first crack.
And let’s be real, it’ll steal the show at any gathering.
Storage & Reheating Guide
Once the crème brûlée has delighted your taste buds, you might wonder how to best keep those little treasures for later enjoyment.
First, let them cool completely, then cover each ramekin with plastic wrap, but don’t put the sugar topping on just yet.
Trust me, soggy sugar isn’t a good look. You can store them in the fridge for up to three days.
When you’re ready to indulge again, take them out and sprinkle on that sugar layer—don’t skimp!
Torch them until bubbly and caramelized, and, oh boy, it’s like magic all over again.
I’ve burned my fingers plenty of times trying to bring that lovely crunch back, but it’s always worth it.
For optimal storage, consider using airtight food storage containers to maintain the dessert’s freshness.
Enjoy every creamy bite!
Final Thoughts
As I settled down to enjoy my crème brûlée, the smooth, creamy custard danced on my taste buds, and I couldn’t help but think about how special this dessert is.
It’s fancy, yet so simple to make. I mean, who knew cracking that caramelized sugar top would feel like a mini triumph?
Every spoonful transports me to a cozy bistro in Paris—minus the plane ticket, of course. Honestly, if I can make this without setting off the smoke alarm, anyone can.
Just remember, patience is key with the chilling time. So whether it’s a special occasion or just a Tuesday, whip up this delight.
You won’t regret it. Trust me, your friends will be begging for the recipe.