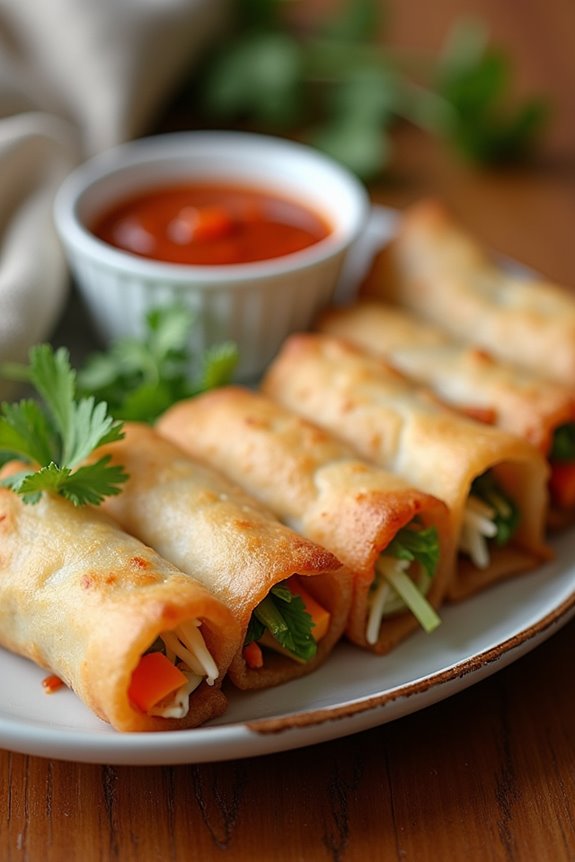
When it comes to whipping up something fresh and colorful, veg spring rolls have a special place in my kitchen. I mean, who doesn’t love a crispy wrap bursting with veggies? These rolls are not just tasty; they’re fun to make too, trust me. I’ve had my fair share of mishaps with rolling—let’s just say some didn’t quite make the cut. Still, the satisfaction of nailing it is worth it. Are you ready to roll up your sleeves and get started?
Why You’ll Love This Recipe
You know, when you’re craving something crispy and packed with flavor, you might feel tempted to order takeout. But why not whip up some homemade veg spring rolls instead? Trust me, the first bite of that golden exterior, bursting with fresh vegetables, is pure magic.
They’re super fun to make too. I mean, who doesn’t love the art of rolling? You’ll feel like a pro chef.
And the best part? You can customize the filling to your liking. Want more crunch? Throw in some extra bean sprouts. Can’t handle spice? Skip the hot sauce.
Plus, your friends will be wowed when you serve them—you’ll feel like the star of the kitchen. Seriously, give it a shot; you won’t regret it.
Equipment List
When it comes to making delicious veg spring rolls, having the right equipment on hand makes all the difference.
First, you’ll need a large frying pan or wok for stir-frying the veggies. A trusty cutting board and a sharp knife are essential for all that chopping; trust me, you don’t want to spend an eternity on prep.
Don’t forget a mixing bowl to combine all those tasty sauces. For rolling, a clean surface helps, but a silicone mat is even better.
And of course, you’ll need a deep fryer or a large pot for frying; please be careful, hot oil can be a little temperamental.
Finally, let’s not overlook some paper towels for draining those golden crisp rolls—no one likes greasy fingers. Additionally, incorporating a professional kitchen torch can elevate the texture and appearance of your spring rolls, giving them a delightful finish.
Our Ingredients
Making vegetable spring rolls is such a delightful way to spice up your meal planning. These crispy, savory treats aren’t just a hit at parties; they also make for a wholesome dinner option during the week. The great thing is, you probably have most of the ingredients in your kitchen right now, which is always a win.
So, let’s explore what you’ll need to assemble this flavourful feast.
Here’s the ingredient list for your veggie spring rolls:
- 2 carrots, peeled and julienned
- 140 g cabbage, thinly sliced
- ½ red bell pepper, thinly sliced
- 140 g fresh bean sprouts
- 2 cloves garlic, minced
- 4 tbsp light soy sauce
- 2 tbsp hoisin sauce
- ¼ tsp white pepper
- 2 tsp cornflour mixed with 2 tbsp cold water (slurry)
- 10 spring roll wrappers
- Oil for deep frying
Now, when it comes to these ingredients, let’s talk about freshness. You want to use the freshest veggies possible for that crisp bite – the kind that crunches when you take a bite.
And don’t be shy about the garlic; it adds a punch of flavor that you won’t regret. If you’re feeling adventurous, you can add other veggies that you love, maybe some mushrooms or zucchini. Just think of all the delicious possibilities!
Also, the spring roll wrappers can sometimes be a little delicate, so be gentle. And remember, hot oil can be quite the diva, so make sure your oil is heated up properly before frying for that perfect, golden crust.
Trust me, no one enjoys soggy rolls.
Step-by-Step Instructions

Making vegetable spring rolls is a fun and rewarding experience that brings a delicious crunch to your dining table. Just imagine that warm, savory filling wrapped in a crispy shell—that’s precisely what awaits you, and it comes together in just a few easy steps. Plus, you can always customize the filling to suit your taste or what you have handy in the kitchen. Elevate your cooking with premium kitchen gadgets to enhance your preparation and frying experience.
Ready to get rolling? Let’s plunge into the steps!
1. Heat Up the Oil
In a large pan, heat 1 tablespoon of sunflower oil**** and 1 tablespoon of sesame oil**** over medium heat. This mixture isn’t just about flavor; it’s about getting that perfect fry later on.
2. Sauté the Veggies
Once the oil is hot, toss in 2 carrots (peeled and julienned), 140 grams of thinly sliced cabbage, ½ red bell pepper (thinly sliced), 140 grams of fresh bean sprouts, and 2 cloves of minced garlic. Stir-fry these colorful veggies for just a couple of minutes—until they soften a bit but still retain that perfect crunch. You want a vibrant mix here, something that really tempts you with its color and aroma.
3. Flavor It Up
Now, let’s mix things up a bit. Add 4 tablespoons of light soy sauce**, 2 tablespoons of hoisin sauce, and ¼ teaspoon of white pepper** to your veggie mixture. Stir everything together until it’s well-coated. Now, imagine that wonderful smell wafting through your kitchen. Delicious, right?
4. Thicken the Filling
Here comes the magic. Stir in 2 teaspoons of cornflour mixed with 2 tablespoons of cold water (your slurry). This will help bind everything together and give it that slightly sticky texture. Cook for another minute until the mixture thickens slightly. If it feels too loose, don’t worry; it’ll cool down and become nice and cohesive.
5. Prepare Your Wrappers
Once your filling is cool enough to handle, it’s time to roll those babies up! Take your 10 spring roll wrappers**** and lay one out on a clean surface. Spoon a good amount of the filling onto the wrapper—about 2 tablespoons in the middle should do.
6. Roll Them Up
To wrap, fold the edges of the wrapper over the filling, then start rolling from the bottom up, tucking it in as you go. Use a little water to seal the edges—think of it as the glue that holds your delicious surprise together.
Don’t worry if a few wrappers tear; you’re a superstar chef in the making, and the taste will overshadow any imperfections.
7. Fry to Perfection
Now, heat your oil in a deep pot. Make sure it’s nice and hot before adding the rolls—this is the secret to that crispy exterior we all crave. Carefully drop in your spring rolls, frying them in batches until they’re golden brown (about 3-4 minutes). Remember, we’re looking for crispiness, so keep an eye on them!
8. Drain & Serve
Once they’re perfectly crispy, scoop them out and let them drain on paper towels. This will help soak up any extra oil, leaving you with a perfectly crunchy snack. Serve them hot with your favorite dipping sauce—sweet chili sauce is a classic choice that pairs especially well.
There you have it—the step-by-step guide to making your very own vegetable spring rolls. Now the hardest part is waiting for them to cool just a bit before indulging.
What’s your favorite way to customize these rolls? I think I’m going to try adding some mushrooms next time, but you know, you do you!
Tips & Variations
While you might think spring rolls are just about the crispy exterior, there’s a whole world of possibilities when it comes to tips and variations.
For a twist, try adding finely chopped mushrooms or even some tofu to the filling. It’s amazing how a little creativity can elevate a simple recipe.
I’ve also experimented with different sauces—sriracha mixed with soy sauce works wonders for those who like a bit of heat.
Don’t forget, keeping the oil hot before frying is essential for that delightful crunch, or you’ll end up with soggy rolls, which is a total bummer.
Finally, if you’re feeling fancy, try baking them for a healthier option. Just remember, they won’t be as crispy, but hey, who’s judging?
How to Serve?
After putting all that effort into frying up those delicious spring rolls, it’s time to think about how to serve them.
First, I love to present them on a big, colorful platter—nothing says “I’m fancy” like a nice plate, right? Then, I usually arrange some dipping sauces around them, like soy sauce or sweet chili. It gives guests options and makes me look like a culinary genius.
Don’t forget to sprinkle some sesame seeds on top for that extra touch. You can even add a side of fresh herbs for garnish.
Oh, and serve ’em hot; there’s nothing worse than a room-temperature spring roll. Trust me, I’ve learned the hard way.
Storage & Reheating Guide
When it comes to storing those crispy spring rolls, you’ve got a couple of options that’ll keep them tasty for later. If I know I’m not devouring them all at once, I usually pop them in the fridge—just wrap them in plastic wrap or place them in an airtight container. They can last about 3 days, but let’s be real: they never last that long in my house.
For reheating, I prefer using an oven. I preheat it to 375°F, then place the spring rolls on a baking sheet for about 10-15 minutes until they’re crisp again. Plus, using a Lazy Susan Organizer can make it easier to manage leftover spring rolls and other snacks in the fridge.
Try not to nuke them in the microwave, or you’ll end up with sad, soggy rolls. Trust me; nobody wants that.
Final Thoughts
Making veggie spring rolls isn’t just about following a recipe; it’s an adventure in your kitchen that can bring a smile to your face.
Seriously, who doesn’t love a crunchy bite filled with colorful veggies? I remember the first time I tried making them—I had more filling on the counter than inside the wrapper. But hey, it’s the effort that counts, right?
Just think about the endless combinations of vegetables you can use. Whether it’s that leftover cabbage or that half an onion, get creative. Serve them with your favorite dipping sauce and watch your friends’ eyes light up.


