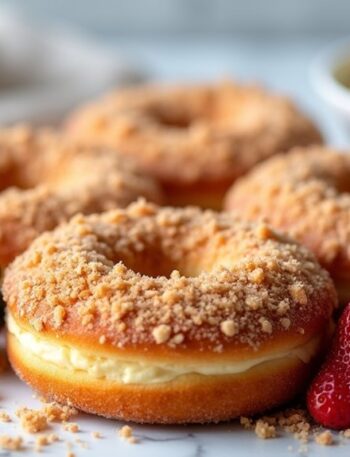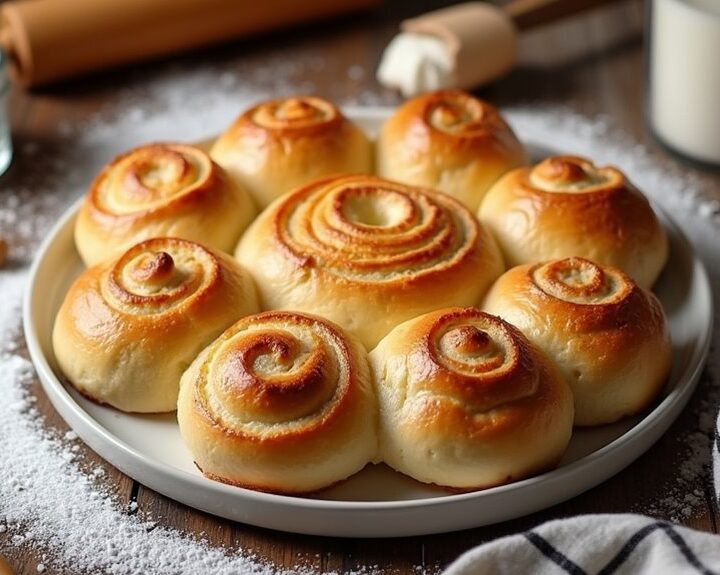
Have you ever craved a warm, fluffy roll that smells like a bakery kissed it? That’s what you get with vanilla pan de Mallorca. I remember the first time I tried it; I nearly demolished the entire pan in one sitting. With simple ingredients, it’s ridiculously easy to whip up, yet the taste feels fancy. Want to impress your friends or just treat yourself? Let’s get into the nitty-gritty of making these delightful rolls.
Why You’ll Love This Recipe
You’re going to love this recipe for Vanilla Pan de Mallorca rolls; trust me, it’s like a warm hug on a chilly day.
These rolls are soft, fluffy, and bursting with vanilla goodness. I mean, who doesn’t want to bite into a sweet, spiral delight that practically melts in your mouth?
Just imagine the aroma filling your kitchen as they bake—it’s pure magic. Plus, the best part? You can get creative with them.
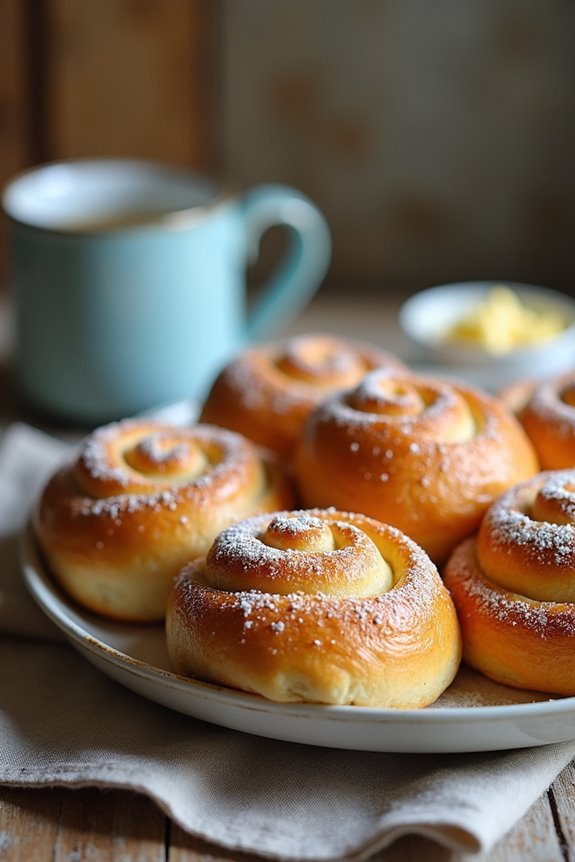
Serve ‘em warm with a sprinkle of powdered sugar, or enjoy one with your morning coffee. I’ve even used day-old rolls for sandwiches, and let me tell you, it’s a game-changer.
What’s not to love about these vanilla pan de Mallorca rolls? They’re simply irresistible.
Equipment List
When diving into the delightful world of Vanilla Pan de Mallorca, having the right equipment makes all the difference. Trust me, you don’t want to be scrambling for a tool halfway through.
You’ll need a mixing bowl, a whisk for those awkward egg-swirling moments, and a rolling pin—oh, the joy of rolling dough! A measuring cup and spoons are handy, too, for precise amounts.
Don’t forget a baking tray lined with parchment paper; it saves you from the dreaded sticky situation. A kitchen towel helps cover the dough, letting it rise without snooping.
And if you’re like me, a good pair of oven mitts is a must. You really don’t want to burn your fingers. Furthermore, investing in premium kitchen cookware can enhance your overall cooking experience and make the preparation even more enjoyable.
Cooking’s all about enjoying the process, right?
Our Ingredients
Let’s talk about the ingredients you need to whip up some amazing Vanilla Pan de Mallorca rolls. You might be thinking, “How many things do I need to gather?” Don’t fret; the list is pleasantly manageable.
These ingredients work together to create those oh-so-soft, fluffy rolls that make breakfast, snack time, or even afternoon tea feel a bit more special. If you’ve got a sweet tooth like mine, the warmth and vanilla aroma that fills your kitchen will have you wanting to dive right in.
Just gathering your ingredients is half the fun—so roll up your sleeves, and let’s get started!
Here’s what you’ll need:
- 330 g all-purpose flour
- 150 ml warm milk
- 55 g sugar
- 4 g dry yeast
- 1 egg
- Pinch of salt
- 55 g softened butter (plus an extra tablespoon for the filling)
- 1 teaspoon vanilla extract
- Powdered sugar (for dusting)
Now, while it’s easy to get lost in the numbers and measurements, consider a few things before you start mixing.
For instance, ensuring the milk is warm (not hot—think cozy, not furnace) helps wake up that yeast, making your rolls fluffier. Also, choosing high-quality vanilla extract can make a world of difference. You’ll be glad you took the extra step when those tasty vanilla aromas hit your nose!
You might even want to buy an extra little bottle to keep at hand for future baking adventures because who doesn’t want to sprinkle a bit of vanilla magic into everything?
Trust me; you won’t regret it. So gather, measure, and prepare! You’re on your way to some delicious rolls.
Step-by-Step Instructions
Making Vanilla Pan de Mallorca rolls isn’t just a rewarding kitchen project; it’s a delightful way to fill your home with irresistible aromas and to treat yourself and loved ones to something fluffy and sweet. Using the right artisan baking equipment can elevate your baking experience and enhance the quality of your rolls.
Mixing the dough is simple—just follow these easy steps, and you’ll be well on your way to enjoying these delicious rolls. Let’s get started!
- Activate the Yeast: Start by mixing 150 ml of warm milk with 4 g of dry yeast. Add in 55 g of sugar, and give it a gentle stir. Let it sit for about 5-10 minutes until it becomes frothy. (This is your yeast coming to life, so don’t rush it; a bubbly surface is your green light!)
- Mix the Wet Ingredients: Once your yeast is bubbling, whisk in 1 egg, a pinch of salt, 55 g of softened butter, and 1 teaspoon of vanilla extract. Stir it well, bringing everything together into a lovely mixture.
- Create the Dough: Gradually add 330 g of all-purpose flour. Start stirring until the flour is integrated, forming a sticky dough. (If you feel like you’re wrestling with the dough, it’s okay! Sometimes it takes a little elbow grease to get it to come together.)
- Let it Rise: Cover the bowl with a clean kitchen towel and let the dough rise in a warm spot for about 1-2 hours, or until it’s doubled in size. (Be patient—this is when the dough gets all fluffy and dreamy.)
- Roll Out the Dough: After it has risen, turn the dough out onto a floured surface. Roll it into a rectangle about 1/4 inch thick. Make sure your rolling pin is dusted with flour—no one wants a sticky situation!
- Add the Filling: Spread 1 tablespoon of softened butter evenly over the rectangle. Now, sprinkle on a bit of vanilla extract (if you want to throw in more flavor here, go for it!). (It’s like painting—but edible and way tastier!)
- Cut and Shape: Using a sharp knife, cut the rectangle into strips. Roll each strip up into a spiral shape and place them on a baking tray lined with parchment paper. (Don’t worry if they aren’t perfect; a little rustic charm adds character.)
- Second Rise: Cover those beauties again with the kitchen towel and let them rise for about 30-45 minutes until they look puffy. (It’s like watching your dough grow and come into its own—truly a proud baker moment!)
- Bake the Rolls: Preheat your oven to 180°C (350°F). Bake the rolls for about 20 minutes or until they turn a lovely golden color. (The smell alone will have you drooling, trust me.)
- Finish with Butter and Sugar: Once out of the oven, brush the warm rolls with a bit of melted butter and dust them generously with powdered sugar. (This is like giving your rolls a cozy blanket of sweetness.)
And there you have it—just follow these steps, and you’ll create Vanilla Pan de Mallorca rolls that are perfect for breakfast, a snack, or an afternoon treat. Just make sure to enjoy them fresh, but if they last more than a day, they can also double as sandwich bread.
Who knew the magic of baking could also sneak in versatility? Happy baking!
Tips & Variations
Baking Vanilla Pan de Mallorca rolls is just the beginning; there are so many ways you can change things up or make the experience even better.
For instance, if you find the dough tough to roll, just let it rest a bit. It’ll become more cooperative, trust me.
And those day-old rolls? Perfect for making sandwiches or French toast—no waste here, right?
Ever thought about adding almond extract for a nutty twist? Or maybe sprinkle some cinnamon to spice things up?
Oh, and avoid those dark pans—they love to over-brown your precious rolls. Let’s just say I’ve learned that lesson the hard way.
Each variation can give your rolls a personality of their own. What could be better?
How to Serve?
There’s something magical about how warm Vanilla Pan de Mallorca rolls can transform any gathering into a cozy celebration.
When I serve them, I like to start with a warm batch, maybe right from the oven if I can manage. I place them on a pretty platter, dust with powdered sugar, and watch the delight on my family’s faces.
Pairing them with a simple spread of butter or fruit preserves is a game-changer. They’re also perfect alongside coffee or hot chocolate, elevating the experience.
If I’m feeling fancy, I’ll even add some fresh berries for a splash of color. Honestly, who can resist?
Just be careful; they disappear faster than you can say “delicious!”
Storage & Reheating Guide
While you mightn’t finish an entire batch of Vanilla Pan de Mallorca rolls in one sitting—that’s just a recipe for regret—it’s important to know how to keep them fresh for the days that follow.
I like to wrap each roll in plastic wrap or store them in an airtight container to keep their fluffiness intact. You can pop them in the fridge for up to a week, but trust me, they’ll disappear way before then. A good storage method helps to maintain their flavor as well.
When you’re ready to dive back in, just warm them up in the oven at 180°C for about 10 minutes. That way, they regain their soft, buttery goodness.
If only my self-control were as good as my baking skills.
Final Thoughts
When you finally take a bite of your homemade Vanilla Pan de Mallorca rolls, you’ll know all those steps were worth it.
Seriously, these fluffy little gems are the kind of treat that makes you feel like a baking superstar.
Sure, there were moments when the dough felt more like a sticky science experiment than a dessert, but isn’t that part of the fun?
If I can master this recipe, so can you.
Just imagine sharing these with friends or family—people will think you’ve been baking for years.
And hey, if they disappear faster than you can say “delicious,” don’t worry.
Just promise to make another batch.
Trust me, the joy that comes from baking these rolls is contagious.