I’ve got to say, the Decadent Vanilla Cream Tart with Raspberries is one of my favorite desserts—rich, creamy, and oh-so-satisfying. It’s surprisingly easy to whip up, even for someone like me who once mistook salt for sugar in a cake (don’t ask). Imagine that buttery crust cradling velvety vanilla cream, topped with bright red raspberries. If you’re wondering how something so elegant can be so simple, stick around. I promise you won’t want to miss the details.
Why You’ll Love This Recipe
If you’re looking for a dessert that feels special but doesn’t involve hours in the kitchen, you’ve hit the jackpot with this Vanilla Cream Tart.
Trust me, these vanilla cream tarts with fresh raspberries will be a showstopper at any gathering. The buttery shortbread crust is easy to whip up, and the pastry cream? Well, it’s like a cloud of vanilla happiness.
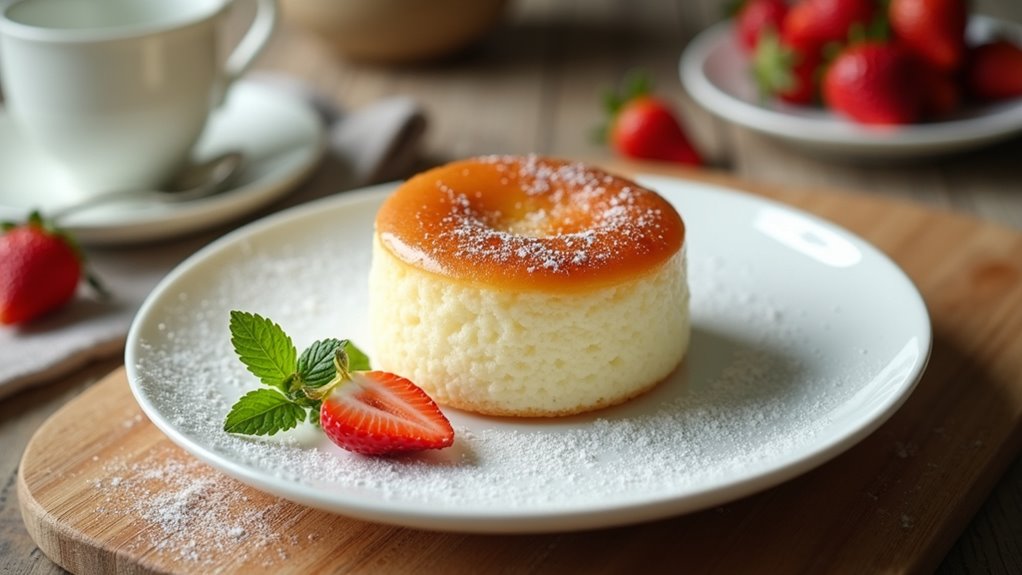
Picture it: smooth, creamy goodness, topped with vibrant raspberries that burst in your mouth. Honestly, it’s almost too pretty to eat—almost.
And you can impress your friends without turning your kitchen into a disaster zone. Plus, who doesn’t love that moment when they take a bite and the smiles just keep coming?
You’ll cherish this recipe for years to come.
Equipment List
When whipping up a delightful Vanilla Cream Tart, having the right equipment can make all the difference.
You’ll need a mixing bowl for that luscious pastry cream, a whisk to blend things together, and a tart pan for the perfect shape.
Trust me, a sturdy rolling pin is a must for that buttery shortbread crust, and don’t forget a sharp knife to slice those beautiful raspberries.
A rubber spatula helps in getting every bit of that creamy goodness into the crust, while measuring cups and spoons are essential for, well, measuring.
If you’ve got a cooling rack, that’s great for chilling the tart. Investing in premium baking equipment will elevate your baking experience significantly.
With these tools, I promise you’ll be on your way to dessert glory without any kitchen disasters.
Our Ingredients
When diving into the delicious world of Vanilla Cream Tarts, gathering your ingredients is the first step in this sweet adventure. Trust me; having everything prepped and ready to go makes the process feel a lot less chaotic and much more enjoyable.
After all, we all want the end result to be absolutely stunning, right? Plus, who doesn’t love that cozy feeling of checking off each ingredient as you go? So, roll up your sleeves and get ready because here’s what you’ll need to create this delightful treat.
Ingredients:
- Shortbread Crust:
- 1 1/4 cups all-purpose flour
- 1/3 cup white sugar
- 1/8 tsp salt
- 1/2 cup butter (cut into chunks)
- 1 large egg yolk
- Vanilla Pastry Cream:
- 1/3 cup white sugar
- 2 tbsp cornstarch
- 4 large egg yolks
- 1 1/3 cups whole milk
- 1/2 vanilla bean (optional)
- 1/2 tsp vanilla extract
- Topping:
- Fresh raspberries
- Powdered sugar
Now, as you gather these ingredients, there are a few things to keep in mind. For instance, using really good quality butter in your crust will elevate the flavor—trust me, it makes a world of difference.
And about the vanilla bean—if you can snag one, go for it. There’s a certain luxe vibe that comes from those tiny specks of real vanilla in your cream. But hey, if it’s not in the budget, a splash of vanilla extract will do the trick just fine.
And don’t skimp on the fresh raspberries; they add both flavor and a pop of color, making your tart not just tasty, but visually stunning too.
Step-by-Step Instructions

Making a Vanilla Cream Tart with Fresh Raspberries is a delightful experience that combines a buttery shortbread crust with rich vanilla pastry cream, all topped with sweet, juicy raspberries. It’s more than just a dessert; it’s a show-stopping masterpiece that’s surprisingly achievable. So, let’s roll up our sleeves and get started on creating this wonderful treat.
Step-by-Step Instructions
1. Prepare the Shortbread Crust: In a mixing bowl, combine 1 1/4 cups all-purpose flour**, 1/3 cup white sugar, and 1/8 tsp salt. Mix them together** until combined.
Then, cut in 1/2 cup butter (cut into chunks) using a pastry cutter or your fingers until the mixture resembles coarse crumbs. I won’t lie, this part can get a bit messy, but that’s half the fun.
2. Form the Dough: Next, add 1 large egg yolk**** to the crumb mixture. Mix until the dough just comes together—don’t overdo it, or your crust may turn out tough.
Now, press this dough into your tart pans evenly, making sure to cover the bottom and sides.
3. Bake the Crust: Preheat your oven to 350°F (175°C) and bake the crust for about 15 minutes, or until it’s lightly golden.
You want it to have that slight golden brown hue, which means you’ve nailed it. Let it cool completely before moving on. Maybe take a moment to admire your handiwork?
4. Make the Vanilla Pastry Cream: In a separate bowl, whisk together 1/3 cup white sugar, 2 tbsp cornstarch**, and 4 large egg yolks** until smooth.
In a saucepan, heat 1 1/3 cups whole milk** over medium heat with 1/2 vanilla bean (optional)**, scraping the seeds into the milk, and adding the pod as well. This is where your kitchen will start to smell heavenly—trust me.
5. Combine and Cook: Once the milk is warm but not boiling, slowly whisk it into your egg mixture to temper the eggs (this prevents scrambling, and we definitely don’t want that).
Then, return the mixture to the saucepan and cook on medium heat, stirring constantly, until it thickens—around 3-5 minutes. Just keep stirring; it’s like a workout for your arm!
6. Cool the Pastry Cream: Remove the saucepan from heat and stir in 1/2 tsp vanilla extract if you didn’t use a vanilla bean.
Transfer the cream to a bowl and place it in the fridge to cool completely. (Trust me, letting it chill will make a difference in texture!)
7. Assemble the Tart: Once your pastry cream is cool and your crust has cooled completely, fill the tart shell with the creamy goodness.
Smooth it out nicely—give it some love.
8. Top with Raspberries: Now comes the fun part! Generously top your tart with fresh raspberries.
Feel free to play around with how you arrange them; this is your moment to shine.
9. Finish with Powdered Sugar: Before serving, dust some powdered sugar over the tart for that gorgeous, elegant finish.
It’s like giving your dessert a little powdered sugar shower—so fancy!
Now sit back, take a moment to admire your creation (I mean, wow, you did that), and get ready to impress your friends and family with this stunning Vanilla Cream Tart. Just be prepared for the compliments—I recommend practicing your gracious smile. Enjoy your delicious labor of love!
Incorporating gourmet kitchen gear can elevate your baking experience and make the process even more enjoyable.
Tips & Variations
After assembling your beautiful Vanilla Cream Tart, it’s only natural to think about how to elevate it even further.
One tip I’ve learned is to chill your pastry cream for a while before filling the crust—it makes such a difference!
And if you want those raspberries to really pop, a light apricot glaze brushed on top can give them a lovely shine.
Feeling adventurous? Blend in some lemon zest for a zesty twist that cuts through the creaminess.
If fresh raspberries aren’t your thing, consider using strawberries or even blueberries.
You could get crazy and add a sprinkle of sea salt—trust me, it brings out the flavors beautifully.
Just remember, have fun! Tarts are all about creativity, right?
How to Serve?
Serving your Vanilla Cream Tart is just as important as making it, don’t you think? After all that hard work, you want it to shine.
First, slice the tart carefully; a warm knife helps keep the edges neat. I like to use a pie server for that fancy touch, but hey, a regular spatula works too.
Arrange the slices on charming dessert plates, and don’t forget to sprinkle some powdered sugar on top—it’s like magic dust that makes everything better.
If you’re feeling extra, add a dollop of whipped cream on the side or maybe a few more raspberries for flair. I once forgot that—talk about a rookie move.
Your guests will be raving, and trust me, you’ll be the star of the evening.
Storage & Reheating Guide
Now that you’ve impressively sliced and served your Vanilla Cream Tart, it’s time to think about how to store any leftovers.
First off, wrap your tart tightly in plastic wrap or keep it in an airtight container. Trust me, you don’t want it drying out like my last sponge cake attempt.
Pop it in the fridge, where it’ll stay fresh for about three days—though I doubt it’ll last that long with that creamy goodness calling your name.
When you’re ready to enjoy it again, just slice a piece and eat it cold—no reheating necessary. The tart is best served chilled, but if you like, a quick whip of cream can elevate your slice even more.
Additionally, if you’re planning to make soup to pair with your tart, consider using soup freezer containers to keep your leftovers fresh for longer.
Enjoy!
Final Thoughts
While enjoying your Vanilla Cream Tart, you might find yourself reflecting on just how easy it was to create such a delightful dessert. Honestly, who knew a tart could be so impressive and yet so simple? I mean, it practically makes itself!
The rich vanilla cream paired with fresh raspberries is just a match made in dessert heaven. Plus, the shortbread crust? Absolute perfection. I sometimes can’t believe I’m the one who whipped this up in my kitchen.
Did I mention it’s as beautiful as it’s delicious? If a baking novice like me can pull this off, you can too. So go ahead, give this recipe a whirl. You won’t regret it, and your friends will think you’re a dessert genius!