Have you ever baked a loaf of bread that made your whole kitchen smell like a cozy Italian restaurant? That’s what happens when you whip up this Soft Garlic Herb Cheddar Cheese Bread. I’ve had my fair share of bread fails—trust me, I can tell you stories about brick-like loaves. But this recipe is foolproof, and it’s got that irresistible gooey cheese and aromatic herbs that’ll have everyone asking for the recipe. Ready to get started?
Why You’ll Love This Recipe
When it comes to baking, there’s something magical about the aroma of freshly baked bread wafting through the kitchen, isn’t there?
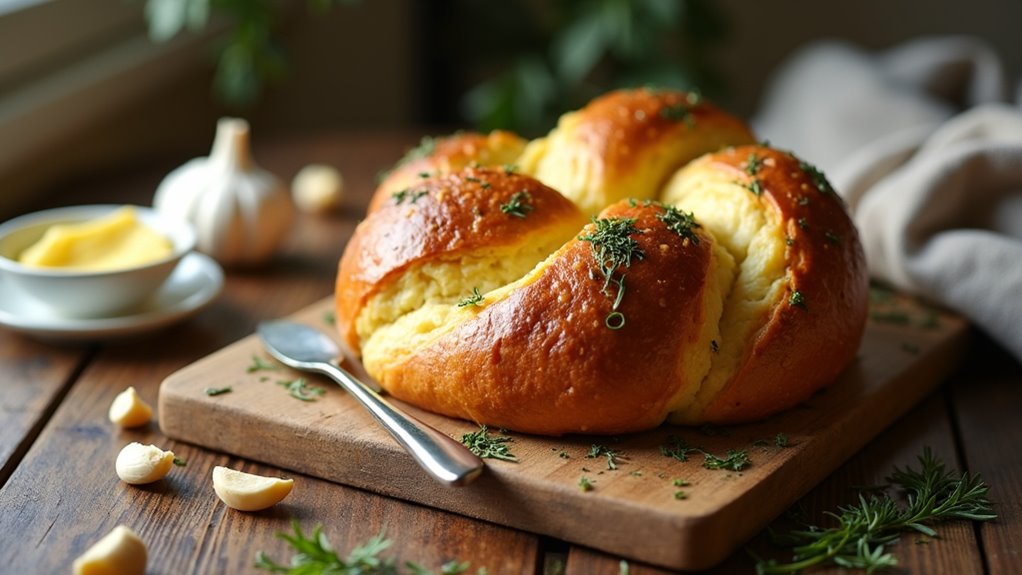
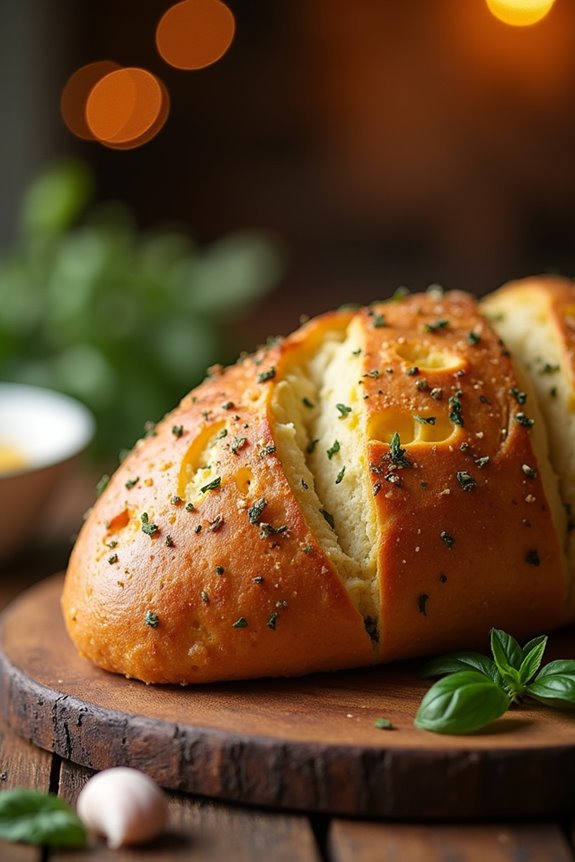
You’ll absolutely love this soft garlic herb cheddar cheese bread. Envision this: golden, fluffy bread bursting with melted cheese and savory garlic. It’s like a hug for your taste buds.
Plus, it’s a true crowd-pleaser at gatherings. Imagine your friends’ faces lighting up as they tear into a warm loaf, gooey cheese stringing between their fingers.
The best part? It’s surprisingly easy to make. Even if you’ve never baked bread before, this recipe will give you that warm, fuzzy feeling of accomplishment.
Trust me, you won’t want to share it, but you probably should. Just don’t forget the butter.
Equipment List
To whip up this delectable cheddar cheese bread, you’ll need a few key pieces of equipment that’ll help make the entire process smoother.
First off, grab a big mixing bowl; trust me, you’ll want the space. A sturdy wooden spoon or spatula is essential for mixing everything together—just don’t go crazy with it, or you’ll send flour flying everywhere.
A rolling pin will help when it’s time to shape the dough, and a baking sheet lined with parchment paper can save a lot of cleanup later.
Oh, and don’t forget a clean kitchen towel for covering the dough while it rises. A sharp knife is also important for slicing that beautiful loaf. You’ll thank yourself later! Additionally, investing in high-quality cooking equipment gourmet kitchen can elevate your baking experience to new heights.
Our Ingredients
Making this Cheddar Cheese Bread is truly a delightful adventure, and you’ll be amazed at how simple it’s with just a few key ingredients. Whether you’re baking for a cozy dinner or a casual get-together, the aroma of garlic paired with melted cheddar is sure to bring everyone to the table.
But before we get our hands doughy, let’s take a look at what you’ll need to gather.
Here’s your grocery list:
- 3 cups bread flour
- 1 cup buttermilk (or whole milk)
- 1 tablespoon instant yeast
- 1 teaspoon sugar
- 1 teaspoon salt
- 2 large eggs
- 4 tablespoons salted butter, softened
- 3 cloves garlic, minced
- 2 tablespoons fresh herbs (basil, oregano, thyme), chopped
- 2 cups sharp cheddar cheese, shredded
Now, let’s consider some things about these ingredients. Using fresh herbs is a game-changer for flavor; you’ll want to hit up your local farmer’s market or grab some from your garden if you have one.
And while I’m all for using what you have, opting for sharp cheddar really lifts the flavor profile and gives that extra zing. If you find yourself sneaking a bite of the cheese before it’s mixed in, don’t worry; we’ve all been there (I might’ve eaten half the block myself once).
And if you don’t have buttermilk on hand, whole milk will do just fine. Just be sure to let your dough rise to its full potential—good things come to those who wait, right?
Step-by-Step Instructions
Making Soft Garlic Herb Cheddar Cheese Bread is a rewarding experience, and trust me, you’ll be glad you took the time to bake this heavenly loaf. The process is straightforward—just follow these easy steps, and soon you’ll have a warm, cheesy bread fresh out of the oven that everyone will be raving about.
Step-by-Step Instructions
1. Mix the Dry Ingredients: In a large mixing bowl, combine 3 cups of bread flour**, 1 tablespoon of **instant yeast**, 1 teaspoon of sugar, and 1 teaspoon of salt**. Stir it all together until it’s well blended.
It’s your base, so make sure the yeast is evenly distributed; that’s what’ll help your bread rise.
2. Combine Wet Ingredients: In a separate bowl, whisk together 1 cup of buttermilk (or whole milk) and 2 large eggs**. Once combined, add 4 tablespoons of softened salted butter**.
Mix it until the butter is nicely incorporated. No need to stress about it being perfect—just make sure the butter is soft enough to blend in.
3. Make the Dough: Pour the wet ingredients into the dry ingredient bowl. Stir it all together until a shaggy dough forms.
Then, get in there and knead the dough for about 5–7 minutes on a floured surface until it’s smooth and elastic. Now’s when you can really take your frustrations out—kneading is your friend here.
4. First Rise: Place the dough in a lightly greased bowl, cover it with a clean kitchen towel, and let it rise in a warm spot until it doubles in size, which should take about 1 hour.
This is when all the magic happens. You can almost hear it puffing up!
5. Prepare the Filling: While the dough rises, prepare your filling. In a small bowl, mix 3 cloves of minced garlic**, 2 tablespoons of chopped fresh herbs (like basil, oregano, or thyme), and 2 cups of shredded sharp cheddar cheese**.
The aromas of the garlic and herbs are already making me hungry.
6. Shape the Bread: After the dough has risen, punch it down gently to release the gas and roll it out into a rectangle.
Evenly sprinkle your garlic-herb-cheese mixture over the dough. Now, roll it up tightly starting from one long edge to create a log.
7. Twist It Up: Carefully slice the log in half lengthwise, revealing all that cheesy goodness.
Twist the two halves together, then coil it into a round loaf shape. Don’t worry if it’s not perfect; rustic is the new chic.
8. Second Rise: Place your shaped loaf on a parchment-lined baking sheet. Let it rise again for about 30 minutes while you preheat your oven to 350°F (175°C).
It’s important to let it puff up just a bit more.
9. Brush with Butter: Before baking, brush the surface of the loaf with extra melted garlic herb butter if you have some on hand.
This will add a golden sheen and extra flavor. Who doesn’t love a little more butter?
10. Bake to Perfection: Pop it in the oven and bake for 30–35 minutes, or until it’s golden brown and cooked through.
You should see it puff up nicely and the cheese start to ooze out ever so slightly. Just like magic, right?
11. Cool and Serve: Once baked, let it cool slightly before slicing.
Trust me, no one wants to burn their mouth on molten cheese, even if it’s tempting.
Enjoy the warm, soft, garlicky bread—you’ve earned it. Don’t be surprised if it disappears faster than you can say “cheddar cheese”! Plus, for the best results, consider using an adjustable rolling pin that can help you achieve the perfect dough thickness for your bread.
Tips & Variations
While you can absolutely stick to the classic Soft Garlic Herb Cheddar Cheese Bread recipe, why not have a little fun and mix things up?
For instance, try swapping out cheddar for feta or pepper jack to kick things up a notch. I once added sun-dried tomatoes, and wow—game changer!
Don’t forget to play with your herbs; fresh dill or a sprinkle of chili flakes could spice things up too.
You can even bake mini loaves or rolls for easy sharing at parties—just watch ’em vanish.
And honestly, who wouldn’t brush on a little extra garlic butter after baking? That gooey, buttery goodness is simply irresistible.
Trust me, you’ll find yourself inventing reasons to bake this again.
How to Serve?
When it comes to serving this Soft Garlic Herb Cheddar Cheese Bread, the possibilities are as tempting as the smell wafting from your oven.
Imagine this: warm, gooey slices fresh out of the oven, perfect for sharing with friends or enjoying solo. I love serving it straight from the oven—who can resist that cheesy goodness?
Dipping it in marinara sauce or a zesty olive oil blend adds an extra punch. Want to impress? Serve it alongside a hearty soup or a simple salad.
Oh, and if you happen to have leftovers—which is rare in my house—don’t worry, it’s still great the next day. Trust me, it makes a fantastic snack, especially toasted!
Storage & Reheating Guide
You’ve enjoyed that warm, cheesy goodness straight from the oven, and now you’re left wondering what to do with any leftovers—if there are any.
First off, I recommend wrapping the bread tightly in plastic wrap or aluminum foil. It’ll keep that soft texture intact for about three days at room temperature. If you want it to last longer, toss it in the freezer—just don’t forget to slice it first for easier reheating later.
When it’s time to indulge again, I suggest popping it back in the oven at 350°F for about 10-15 minutes, or until it’s warmed through and the cheese starts to get all melty again.
For a premium cheese making kit, this method of storage will ensure your leftovers maintain their delicious quality. Can you say mouthwatering? Trust me, it’s worth the wait.
Final Thoughts
Cooking this Soft Garlic Herb Cheddar Cheese Bread really brings a sense of comfort and joy to the table, doesn’t it?
Every time I make it, the rich aroma fills my kitchen, teasing my taste buds. It’s hard not to sneak a little piece while it’s still cooling.
Trust me, you’ll want to slice into it right away because who can resist gooey, melted cheese?
Sure, it’s a little messy, but isn’t that part of the fun?
This bread’s an instant crowd-pleaser and perfect for gatherings, or simply indulging yourself.
So go ahead, give it a try, and I promise you’ll be patting yourself on the back.
You might even earn a new title in your family: “The Bread Magician.”