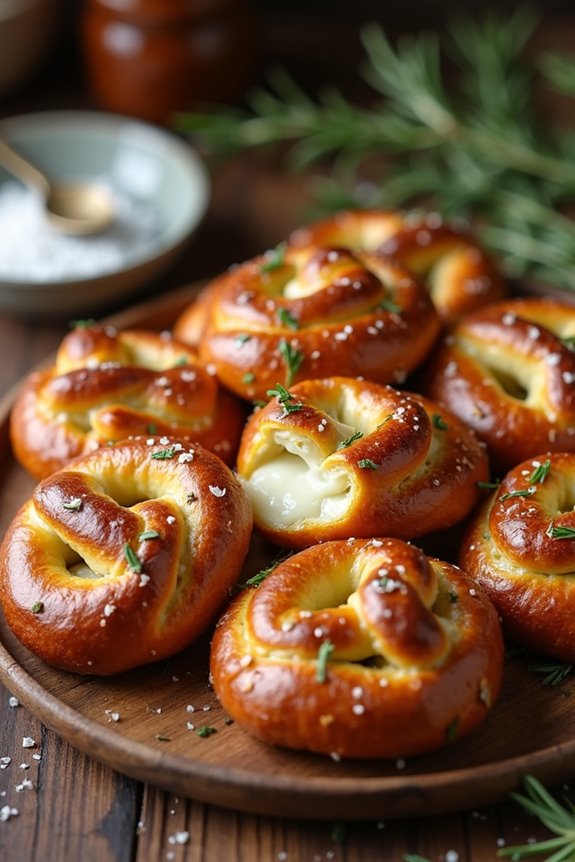
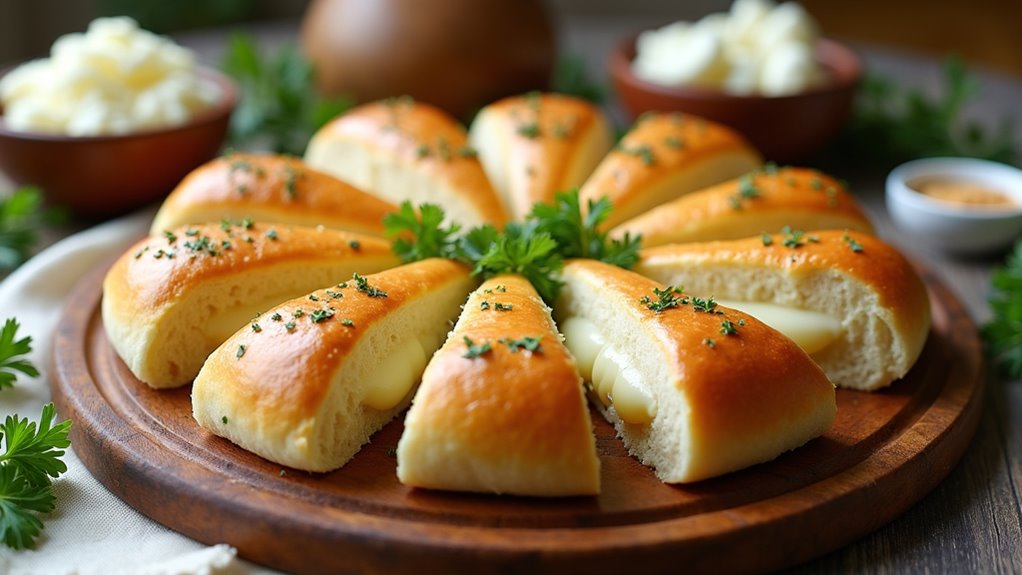
You know those snacks that just hit the spot? Well, these rosemary parmesan mozzarella pretzels are definitely one of them. Imagine this: a golden, crispy shell giving way to a gooey, cheesy center, all tossed with fragrant rosemary. I mean, who doesn’t want to bite into something that screams comfort? I’ve tried to make pretzels a few times, and let’s just say, some turned out more like rock sculptures than snacks. But these? They’re totally doable. And trust me, you won’t want to miss the next steps.
Why You’ll Love This Recipe
When it comes to comfort food, I think we can all agree that pretzels hit the spot.
But have you tried rosemary parmesan mozzarella pretzels? They’re like a warm hug for your taste buds. Imagine biting into a soft, chewy dough, only to discover that gooey mozzarella melted inside—pure bliss.
The rosemary adds that fresh pop of flavor, while the parmesan gives it a savory twist. I once made these for a movie night, and let’s just say the only thing missing was a golden retriever joyfully begging for scraps.
These pretzels aren’t just delicious; they’re playful to make! So, why not roll up your sleeves and treat yourself to a batch? Trust me, you won’t regret it.
Equipment List
Before we plunge into making these delicious pretzels, let’s talk equipment—you won’t want to be scrambling around your kitchen looking for stuff when you’re knee-deep in dough.
First off, grab a large mixing bowl and a sturdy wooden spoon for those epic kneading sessions.
You’ll also need a clean countertop, or a rolling mat, to shape your pretzels.
Don’t forget a pot for boiling and a baking sheet lined with parchment paper.
An egg wash brush will make your pretzels shine.
And, if you’re like me and can’t find your measuring cups half the time, keep some handy.
Oh, and a sharp knife for cutting the dough—trust me, you’ll want that.
For an extra kitchen essential, consider using a potato masher(essential tool for perfectly mashed potatoes) which can help if you’re incorporating potatoes into your dough for added flavor.
Let’s get started!
Our Ingredients
Making these Rosemary Parmesan Mozzarella Pretzels isn’t just about biting into something delicious; it’s about the process, too. It’s the thrill of mixing the ingredients, watching the dough come together, and the tantalizing aroma that fills your kitchen as they’re baking.
Just imagine pulling a golden-brown pretzel out of the oven, the gooey cheese warmly inviting you inside. Trust me, once you have all your ingredients in front of you, you’ll feel that excitement build!
Here’s what you’ll need for this tasty adventure:
- 1½ cups warm water (110-115°F)
- 1 package Rapid Rise yeast
- 1½ tbsp sugar
- 1¾ tsp salt
- 2 tbsp fresh rosemary, chopped (because fresh is always best)
- 4¼ cups all-purpose flour
- 6 tbsp unsalted butter, soft
- 10 cups water (for boiling, and boy, it’s necessary)
- ¾ cup baking soda
- 1 cup shredded mozzarella (the star of the show)
- ¼ cup grated parmesan (for that cheesy goodness)
- 1 egg, beaten (this is your egg wash)
- 1 tbsp water (to mix with your egg)
- 2 tbsp melted butter (optional, but why not?)
- ½ tbsp fresh rosemary (for topping)
- ½ tsp garlic powder (hello flavor)
- ½ tsp black pepper (for a little kick)
- Pinch of salt (because a little seasoning goes a long way)
Now, before we plunge into the next steps, let’s chat about a couple of things regarding these ingredients.
First, using fresh rosemary will elevate the flavor of your pretzels greatly, so if you can get it, do. Also, I can’t stress enough how important the water temperature is when activating the yeast; too hot and you’ll kill it, too cold and it simply won’t wake up.
It’s all about that sweet spot. You want happy yeast because happy yeast makes happy dough. Trust me, you want that gooey, cheesy goodness waiting for you when you bite into a pretzel.
Step-by-Step Instructions

Making these Rosemary Parmesan Mozzarella Pretzels isn’t just about the delightful end result; it’s about enjoying the whole process. The mixing, the kneading, the enthusiastic anticipation as they bake… you’ll be tempted to sneak a taste even before they’re golden brown. So, ready your kitchen and your spirits—let’s plunge into the step-by-step instructions that will take you from a pile of ingredients to a platter of mouth-watering pretzels.
- Activate the yeast: In a large mixing bowl, combine 1½ cups of warm water (110-115°F), 1 package of Rapid Rise yeast, and 1½ tablespoons of sugar. Stir gently and let it sit for about 10 minutes until the mixture foams up. This means your yeast is partying—good sign!
- Mix in the flavor: Once the yeast is foamy, add 1¾ teaspoons of salt, 2 tablespoons of chopped fresh rosemary, 4¼ cups of all-purpose flour, and 6 tablespoons of soft unsalted butter into the bowl. Mix all these ingredients together until they form a shaggy dough. You can use a wooden spoon or your hands, whichever feels more satisfying!
- Knead the dough: Transfer your dough onto a floured surface and knead it for about 12 minutes. Yes, 12 whole minutes! This is where you get a workout and the dough gets stretchy and smooth. Don’t be shy; show it some love.
- Let it rise: Place the kneaded dough in a greased bowl, cover it with a clean towel, and let it rise until it’s doubled in size. This should take about 1 hour. Go ahead and maybe grab a snack while you wait; you deserve it.
- Prepare the filling: While your dough is rising, mix together 1 cup of shredded mozzarella and ¼ cup of grated parmesan in a small bowl. This cheesy mix is going to be the heart of your pretzels, so don’t skip this step.
- Shape the pretzels: After the dough has risen, punch it down (not literally—just gently deflate it) and divide it into 12 equal pieces. Roll each piece into a long rope and then flatten it slightly. Add a spoonful of your mozzarella and parmesan mix in the center, then fold the dough over and pinch it closed to seal the cheesy goodness inside. Now twist it into a pretzel shape!
- Boil the water: In a large pot, bring 10 cups of water to a boil and add ¾ cup of baking soda to it. Yup, you read that right. This is what gives pretzels their lovely, chewy texture. Carefully drop each pretzel into the boiling water one at a time for about 30 seconds, then remove them and place them on a lined baking sheet.
- Egg wash time: Combine 1 beaten egg with 1 tablespoon of water to make an egg wash. Brush this mixture over each pretzel. Not only does it give a nice color, but it also helps the toppings stick.
- Bake: Pop your pretzels in the oven preheated to 450°F and bake for about 12-15 minutes, or until they’re golden brown. You might want to keep an enthusiastic eye—nothing like the smell of baking pretzels to make you even hungrier.
- Final touches: If you’re feeling indulgent, brush the baked pretzels with 2 tablespoons of melted butter. Then sprinkle with the remaining rosemary (½ tablespoon), garlic powder (½ teaspoon), black pepper (½ teaspoon), and a pinch of salt.
Additionally, you can enhance your kitchen organization while preparing your culinary masterpieces with a Lazy Susan organizer. You’re finished! Serve these beauties warm and dig into the gooey, cheesy center. Just think—every bite is a warm hug, making your taste buds dance. Enjoy, and don’t forget to share… or not. No one would blame you if you kept them all to yourself.
Tips & Variations
Now that your kitchen is filled with the lovely aroma of freshly baked pretzels, let’s talk about how to make them even better.
First things first, always opt for fresh herbs. Trust me, they elevate the flavor from good to unforgettable.
Want to kick the cheese factor up a notch? Add a sprinkle of your favorite spices to the cheese filling for an unexpected twist.
Oh, and if you’ve got some leftover dough, try stuffing it with jalapeños or sun-dried tomatoes for a party in your mouth.
If you’re feeling adventurous, experiment with different cheeses – cheddar or gouda could rock this pretzel world.
Just keep those pretzels warm for the gooey, melty goodness we all crave.
How to Serve?
Whether you’re hosting a game night, having friends over, or just treating yourself, serving freshly baked rosemary parmesan mozzarella pretzels can make any occasion feel special.
I like to present them warm, straight out of the oven—there’s just something about that gooey cheese pulling apart, right?
I usually plate them on a big, colorful dish, sprinkling extra rosemary and a dash of garlic for flair.
For dipping, homemade marinara or a zesty mustard can amp up the flavor.
If I’m feeling fancy, I drizzle a bit of melted butter over the top.
And trust me, it’s okay if they don’t all look perfect; character is key, isn’t it?
Enjoy soaking up the compliments—you’ll deserve every one!
Storage & Reheating Guide
You might be wondering what to do with those delightful rosemary parmesan mozzarella pretzels after the last guest has left or you’ve indulged a little too much.
Don’t worry—storing them is easy. First, let those pretzels cool completely. Then, wrap them tightly in plastic wrap or pop them in an airtight container. They’ll keep well in the fridge for about 3 to 5 days.
If you want to save them longer, freeze them for up to 3 months. When you’re ready to devour them again, just reheat in a 350°F oven for about 10 minutes. Refrigerator organizer bins can be a great way to keep your fridge tidy while storing those pretzels.
They’ll come out warm and cheesy, just like the first time. Trust me, you’ll love every gooey bite all over again.
Final Thoughts
There’s something undeniably satisfying about pulling a tray of warm, golden rosemary parmesan mozzarella pretzels out of the oven. Just the smell alone—mouthwatering, right?
I love how the crispy outer layer gives way to a gooey, cheesy center. Honestly, it feels like a kitchen miracle every time. Did I mention they’re perfect for gatherings or cozy movie nights?
I mean, who wouldn’t want to munch on these delightful bites? And if you mess up a little, don’t sweat it. Even the not-so-pretty shapes taste amazing.
Trust me, I’ve had my share of “artistic” pretzel moments. So, roll up your sleeves, get cooking, and embrace the fun, delicious chaos of baking. You won’t regret it, I promise.


