I’ve gotta tell you, diving into the world of Fiery Nashville Hot Chicken has been a game-changer for my spicy cravings. Imagine succulent chicken drenched in a zesty buttermilk brine, followed by a crazy crunchy crust. It’s a totally mouthwatering combo, right? I mean, who doesn’t love that perfect kick of heat balanced by soft bread and tangy pickles? So, ready to explore how this dish comes together in all its fiery glory? Keep on reading.
Why You’ll Love This Recipe
If you’re looking for a recipe that packs a punch and leaves your taste buds dancing, Nashville hot chicken is just the ticket. Honestly, what’s not to love? You get that crispy, flavorful coating on tender chicken that makes your mouth water.
I still remember the first time I tried it—my friends and I were blown away by the heat, the crunch, and that sweet, spicy glaze that drenches every bite. It’s like a flavor rollercoaster.
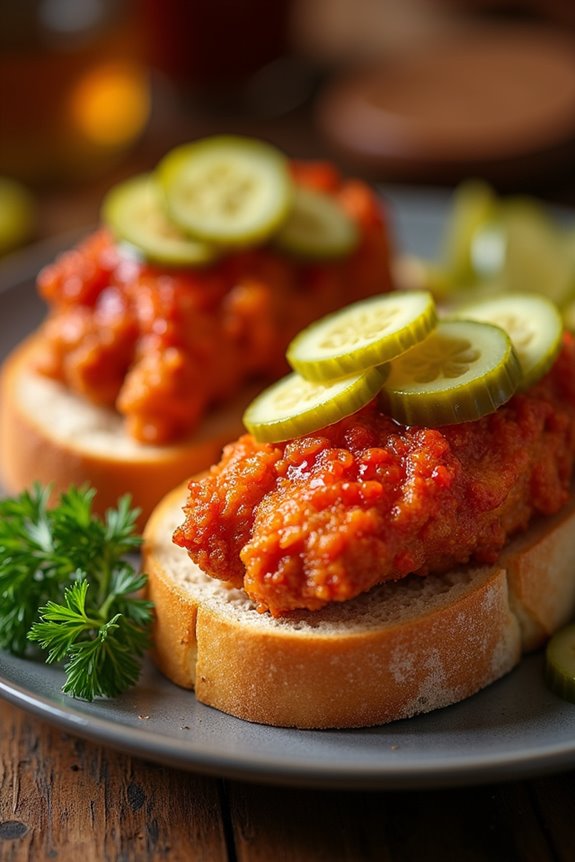
You’ll want to serve it on fluffy white bread, piled high with pickles, adding extra crunch to each mouthful. Plus, it’s perfect for impressing guests or just treating yourself.
Just make sure you’ve got water handy—things can get a bit fiery.
Equipment List
When whipping up Nashville hot chicken, having the right equipment makes all the difference.
First off, you’ll need a deep skillet or a heavy-duty pot for frying. Trust me, you don’t want splatters everywhere. A thermometer is essential too; nobody likes undercooked chicken.
Next, grab a couple of mixing bowls—one for the brine and another for the dry mix. Don’t forget tongs for flipping that spicy goodness without a mess.
A wire rack will help your chicken stay crispy as it cools, and parchment paper will help with clean-up—thank you, future me!
Finally, you might want an apron unless you enjoy looking like a walking spice bomb. Trust me, I’ve been there. Additionally, investing in professional kitchen appliances can enhance your cooking experience and ensure consistent results.
Our Ingredients
When it comes to whipping up Nashville Hot Chicken, the ingredients are key! This dish isn’t just about the heat; it’s a wonderful balance of flavors that come together to create something truly mouth-watering.
It’s spicy, crunchy, and oh-so-satisfying, making it perfect for serving at gatherings or enjoying on a cozy night in. So, let’s plunge into the essentials you’ll need to bring this soulful dish to life.
Here’s what you need to gather:
- 4 boneless, skinless chicken thighs
- 1 cup buttermilk
- ¼ cup pickle juice
- ¼ cup hot sauce (like Frank’s RedHot)
- 1 cup all-purpose flour
- ¼ cup cornstarch
- 1 tsp baking powder
- ½ tbsp salt
- Vegetable oil for frying
- ⅓ cup cayenne pepper
- 1½ tbsp brown sugar
- 1 tsp chili powder
- 1 tsp garlic powder
- Pickles and white bread for serving
Now, let’s chat about a couple of those ingredients. The buttermilk not only adds a tangy flavor but also tenderizes the chicken, which is why it’s a staple in many fried chicken recipes.
And don’t skimp on the cayenne pepper; it’s what gives the Nashville Hot Chicken its name—and its iconic heat. If you’re feeling brave and love the spice, feel free to amp up the cayenne a bit. Just remember, not everyone may have the same heat tolerance!
As for the pickles and white bread, they’re not just for looks; they help balance the heat and create that classic Southern experience. The bread soaks up some oil, while the pickles provide a rejuvenating crunch. Perfect combo, right?
Step-by-Step Instructions
Making Nashville Hot Chicken is a delightful adventure that’ll have your taste buds dancing! It may seem a bit involved, but trust me, once you start mixing and frying, you’ll see how easy (and fun) it can be. Let’s roll up our sleeves and explore these step-by-step instructions for that spicy, crispy goodness.
1. Brine the Chicken: Start by taking 4 boneless, skinless chicken thighs and placing them in a mixing bowl or a zip-lock bag. Pour in 1 cup of buttermilk, ¼ cup pickle juice, and ¼ cup hot sauce (like Frank’s RedHot). Make sure the chicken is well-coated.
Cover it up and let it hang out in the fridge for at least 1 hour. (This step is essential—the longer, the better it absorbs that tangy flavor).
2. Prepare the Dredge: While the chicken is having a spa day in the fridge, grab a mixing bowl and combine 1 cup of all-purpose flour, ¼ cup cornstarch, 1 teaspoon baking powder, and ½ tablespoon salt.
Mix it all together. This will create a crunchy coating that makes the chicken oh-so-delicious.
3. Dredge the Chicken: Pull out that juicy chicken from the fridge. Now, take each piece and dredge it in the flour mixture first; make sure it’s fully covered.
Then dip it back into the buttermilk (don’t be shy, get it nice and coated), and finally, give it another dunk in the flour mix.
Press down to coat well. (A little more flour doesn’t hurt—think of it like a warm hug for the chicken).
4. Fry the Chicken: Heat vegetable oil in a deep frying pan or Dutch oven to 350°F. Once it’s nice and hot, carefully drop the chicken in, making sure to not overcrowd the pan.
Fry them for about 3 minutes per side without moving them around. (This helps achieve that beautiful, crispy golden brown).
5. Make the Spicy Oil**: While your chicken is frying to perfection, stir together ⅓ cup cayenne pepper, 1½ tablespoons brown sugar**, 1 teaspoon chili powder, and 1 teaspoon garlic powder in a bowl.
Once the chicken is done, carefully add about ½ cup of the hot oil from the pan to the spice mixture. Stir until it’s all combined into a fiery glaze.
(Use a whisk, or channel your inner child and use a spoon—whichever floats your boat).
6. Brush on the Heat: After frying, place the chicken on a paper towel to drain some excess oil. Then, take that glorious spicy oil and brush it generously over the fried chicken.
(Go as light or as heavy as you like, but remember—this is called Nashville Hot Chicken for a reason).
7. Serve It Up: Now, it’s time to plate it up! Place those spicy beauties on slices of white bread and top with pickles.
You’ve just made Nashville Hot Chicken! (Feel free to step back and do a little kitchen victory dance—you’re entitled).
Enjoy this crunchy and spicy feast with your favorite sides or just as is.
Savor each spicy bite, and remember, it’s all about the balance between heat and flavor. The bread helps soak up the oil, while those invigorating pickles offer the perfect contrast. Happy cooking! Additionally, having the right seafood cooking equipment can elevate your cooking process for better results.
Tips & Variations
After you’ve conquered the steps to fry up some crispy Nashville Hot Chicken, let’s talk about how you can play around with the recipe and make it your own.
First off, experiment with different hot sauces. Frank’s is great, but try sriracha or your favorite fiery blend for a personal twist.
Ever thought about adding garlic or onion powder to your dredging mix? Trust me, it adds depth.
Also, let that coated chicken rest for 15-20 minutes before frying— it’ll really help with the crispiness.
Do you want a milder kick? Just reduce the cayenne, or you can even add honey to your spicy oil for a sweet-heat balance.
Cooking’s all about fun, right? So, get creative.
How to Serve?
Serving up Nashville Hot Chicken is almost as fun as making it. I always start with a generous slice of white bread – it’s the base and perfectly absorbs all that spicy goodness.
I layer my crispy chicken right on top, then pile on some cold pickles. Believe me, that crunch is a game-changer.
I usually make a bit of a mess, but hey, that’s part of the experience, right? You can serve it with some coleslaw or fries if you’re feeling fancy, but honestly, I love keeping it simple. It’s all about that fiery chicken!
And don’t forget the hot sauce on the side; it’s like adding a little “extra kick” for those brave enough to handle it.
Storage & Reheating Guide
While I’m all for devouring Nashville Hot Chicken fresh out of the fryer, sometimes life happens, and we’ve got to figure out what to do with leftovers.
First off, I usually pop my chicken in an airtight container in the fridge, where it’ll hold up for about 3 days. Airtight containers are essential for maximizing freshness and preventing moisture loss.
Now, when reheating, I can’t stress this enough—skip the microwave. That’s a guaranteed way to create sad, soggy chicken.
I prefer the oven at 375°F for about 15-20 minutes. Just enough time to catch up on an episode of my favorite show.
Or, if I’m feeling lazy, I’ll use an air fryer—just a few minutes at 350°F keeps things crispy.
No one wants to cry over cold chicken, right?
Final Thoughts
Although I could eat Nashville Hot Chicken every day without complaint, there’s something even more satisfying about making it yourself. The thrill of frying that crispy chicken, coating it in that fiery, spicy oil, it’s a joyful experience.
Sure, I might spill some flour or burn myself with hot oil—who hasn’t? But the moment you take that first crunchy bite, it’s pure bliss. You get to adjust the spice level to your liking—extra cayenne, anyone? And don’t skimp on the pickles; they really balance the heat.