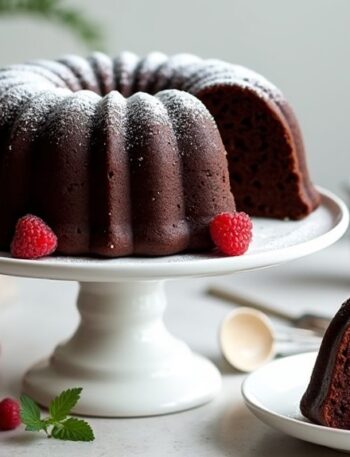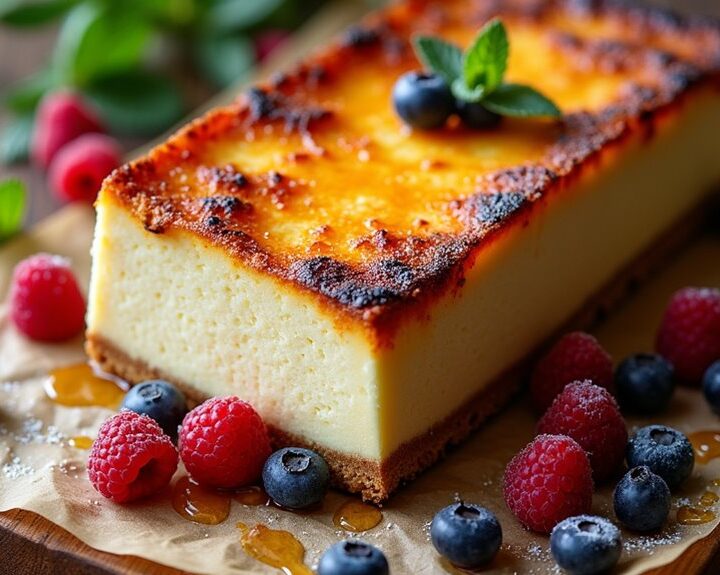
I can’t help but get a bit excited thinking about this indulgent Basque cheesecake in a loaf pan. Seriously, it’s so rich and creamy, and that caramelized top? Perfection. It’s super easy to make too, even if you’re like me and have the baking skills of a potato. Much to my surprise, this dessert has become my go-to for gatherings. Want to know how to whip this creamy delight up? Stick around, and I’ll spill all the secrets.
Why You’ll Love This Recipe
When it comes to desserts, I can definitely be a little picky—can you relate?
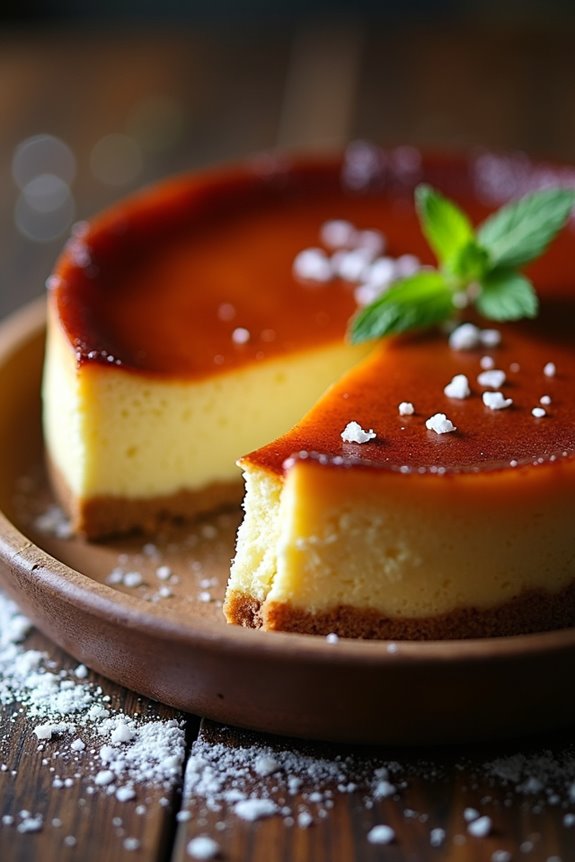
But this loaf pan Basque cheesecake is something I just can’t resist. Imagine that rich, creamy texture, topped with a slightly burnt crust that adds such depth of flavor. It’s basically the perfect combination of sweet and savory.
Plus, it’s so easy to make; you just throw everything together, and let the oven work its magic. I mean, who doesn’t love a dessert that requires minimal effort but tastes like a million bucks?
I once made this for friends, and let’s just say, they were fighting over the last slice. It’s a showstopper.
Give it a try, and watch your dessert dreams come true.
Equipment List
Let’s talk about the equipment you’ll need to whip up this delightfully rich Basque cheesecake. First off, grab a sturdy loaf pan—trust me, it’s essential for that perfect shape.
You’ll also need a mixing bowl, preferably large enough to handle the cream cheese like a champ. A hand mixer or stand mixer will make life easier, too.
Don’t forget a rubber spatula for scraping down those tasty bits stuck to the sides. Parchment paper is a must for lining the pan; it keeps the cheesecake from getting too cozy with the edges.
Oh, and a whisk might come in handy when you’re adding the eggs. Plus, if you’re a fan of versatility in your kitchen, consider adding ramekins to your collection; they’re perfect for individual servings of treats or appetizers. With just a few tools, you’ll be on your way to cheesecake heaven.
Our Ingredients
When it comes to making a Basque cheesecake, the ingredients you choose can really elevate the final result. You’ll find that this rich, creamy dessert primarily calls for just a few key elements, all of which come together to create a beautifully decadent treat.
As you gather your supplies, think about how each ingredient plays a role in harmony—like a well-rehearsed band.
Here’s what you’ll need for the best Basque cheesecake:
- 750g full-fat cream cheese (make sure it’s at room temperature for easy mixing)
- 225g caster sugar (the finer texture helps it dissolve nicely)
- 15g cornflour (this acts as a slight stabilizer)
- 3 whole eggs (also at room temperature; we want to keep things smooth here!)
- 225ml double cream (richness, please)
- 1/4 tsp fine sea salt (to heighten all the flavors)
- Parchment paper (you won’t want to skip this step)
Now, let’s talk about the cream cheese—the star of the show! It’s absolutely essential to use full-fat cream cheese here. I know, I know, it sounds a bit indulgent, but isn’t that the magic of cheesecake?
If you go for reduced fat or any substitutes, you’re going to miss out on that velvety texture and rich flavor that makes Basque cheesecake so irresistible.
And on the eggs, they should really be at room temperature as well. Cold eggs can shock the mixture, and we certainly don’t want to ruin our cheesecake’s smooth, creamy dream.
Trust me; you’ll thank yourself later when that cheesecake comes out of the oven all perfectly puffed up and gloriously golden brown.
Step-by-Step Instructions
Making a Basque cheesecake is a delightful adventure that results in a rich and creamy dessert. Mixing the batter is quick and simple—let’s plunge into the steps to bring this delicious treat to life. Get ready to whip up something scrumptious!
- Preheat that oven to 240°C (460°F). We want it nice and hot to achieve that beautiful, caramelized top that makes Basque cheesecake so special.
- In a mixing bowl, beat 750g of full-fat cream cheese and 225g of caster sugar together until smooth. Use an electric mixer if you have one—it’s a real time-saver. Just picture that velvety cream cheese transforming into a fluffy cloud of yum.
- Add the eggs (make sure they’re at room temperature—3 whole eggs, please) one at a time, mixing well after each addition. This step is essential. If you’re impatient like me, you might be tempted to throw them all in at once, but trust me: patience is key for a smooth batter.
- Stir in 225ml of double cream, 1/4 tsp of fine sea salt, and 15g of cornflour. Take your time with this—gently fold the mixture so everything combines beautifully. If you overmix, you might end up with a dense texture, not that dreamy lightness we’re aiming for.
- Line your loaf pan with parchment paper. I highly recommend this step for easy removal later on. Once lined, pour the batter into the pan. Give it a quick tap on the countertop to release any air bubbles. Imagine all those little bubbles saying goodbye—it’s very therapeutic, I promise.
- Bake uncovered in the preheated oven for about 40 minutes. You want the top to be slightly blackened. It may look a bit dramatic as it puffs and swells, but that’s all part of the Basque charm. Try not to peek inside the oven; every moment counts, and we don’t want to ruin that perfect rise!
- Cool completely once it’s out of the oven. Patience is a virtue here, as you’ll need to refrigerate the cheesecake overnight before slicing into it. I know waiting is tough; this cheesecake is practically begging to be devoured. But trust me, it’s worth it! Also, consider using premium kitchen gadgets to elevate your cooking experience and achieve perfect results.
And there you have it—a scrumptious Basque cheesecake, ready to impress. Just remember, the waiting is the hardest part, but I promise you’ll feel like a rock star the moment you slice into that creamy goodness.
Tips & Variations
Have you ever thought about how a little twist can turn a classic recipe into something uniquely yours?
Well, let me tell you, I’ve tried adding a splash of vanilla extract to the batter, and wow, does it elevate the flavor! If you’re feeling adventurous, go ahead and toss in some lemon zest for a fresh zing.
Oh, and instead of plain parchment, try using some fun baking papers for a pop of color. I’ve also made mini versions in ramekins—just watch the baking time.
And here’s a no-pressure tip: if you accidentally burn the top, just call it “caramelized.” I mean, who doesn’t love a good story to go with their dessert?
How to Serve?
Serving up a slice of Basque cheesecake is like giving your guests a warm hug. I love placing the cheesecake right on the table, so everyone can admire that beautifully caramelized top.
I usually cut generous slices—why skimp? As I serve, I often point out the creamy, almost custardy texture that’s hiding inside.
I sometimes add a dollop of whipped cream or a sprinkle of fresh berries for a pop of color. If I’m feeling fancy, I might drizzle a bit of honey or chocolate sauce on the plate.
It’s all about those little touches. Don’t forget to watch their faces light up as they take that first bite; it’s pure magic to see!
Storage & Reheating Guide
Even if you manage to resist eating the whole Basque cheesecake in one sitting, knowing how to store it properly is crucial for keeping that creamy goodness intact.
First, let it cool completely, then wrap it tightly in plastic wrap or foil. I usually pop it in the fridge for up to a week—if it lasts that long.
Got leftovers? You can also slice it and freeze those pieces. Just remember to wrap them individually.
When you’re ready to indulge again, let them thaw in the fridge overnight. If you want to reheat, a quick spin in the microwave for about 10 seconds does the trick.
That warm, melty cheesecake treasure… Pure bliss, right? Additionally, for optimal freshness, consider using airtight food storage solutions to ensure your cheesecake remains as delicious as possible.
Final Thoughts
Storing that delectable Basque cheesecake is just the beginning; savoring every bite is where the real joy lies.
I mean, who wouldn’t want a slice of that creamy goodness, right? Let’s be real—when you pull it out of the fridge, you might as well have your fork ready. Each slice is rich and slightly burnt on top, giving it that signature look.
You’ll find yourself just a little obsessed with its textures. Trust me, the first bite will make you forget about the kitchen mess you created.
And if any of your friends are lucky enough to get a taste, well, they might just crown you the cheesecake king or queen.