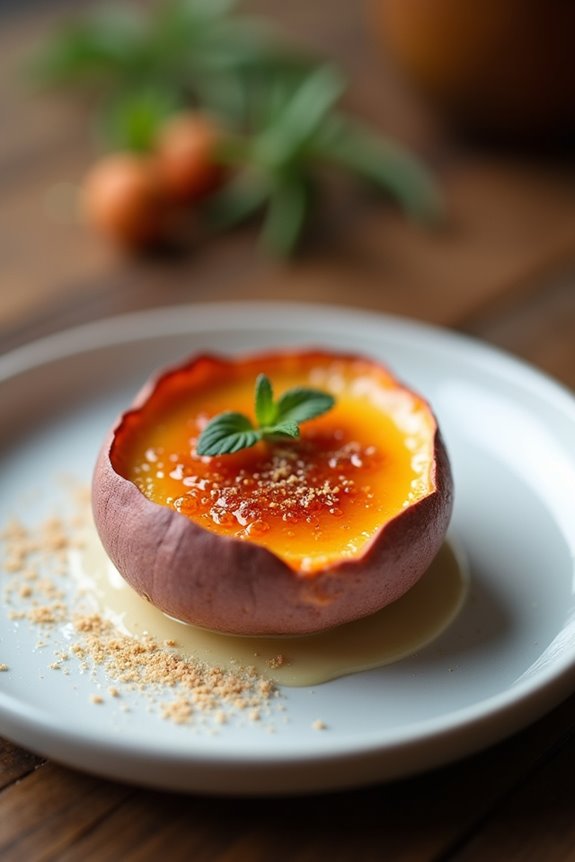
I’ve always loved crème brûlée; there’s something magical about that crispy sugar topping. But when I discovered the glorious Japanese sweet potato, I knew I had to combine the two. It’s creamy, it’s dreamy, and believe me, it’s impressive. Imagine wowing your friends with a dessert that tastes as good as it looks. Curious about how this all comes together? Let me walk you through the steps, so you can whip up your own batch of this unique treat.
Why You’ll Love This Recipe
You know, there’s something magical about dessert that makes even the toughest day seem a little brighter.
When it comes to comfort food, this Japanese sweet potato crème brûlée really hits the spot. Rich, creamy, and just sweet enough, it’s like a warm hug on your taste buds.
I remember the first time I made it; the kitchen smelled divine, and I thought, “Why haven’t I tried this before?”
The funny part? I almost burned my fingers trying to caramelize the sugar—definitely a lesson learned there.
But the smooth custard, with that perfect crack of the brûlée top, is pure bliss. Plus, who doesn’t love showing off a beautiful dessert?
Trust me; this one’s sure to impress.
Equipment List
Making Japanese sweet potato crème brûlée is a labor of love, and the right equipment can make all the difference in your success. First up, you’ll need a good oven for baking—the one that doesn’t have a personality crisis in the temperature department. A blender or food processor is essential for that smooth sweet potato puree; trust me, no one enjoys biting into lumps. Then, grab a whisk for mixing the egg yolks and sugar—who knew whisking could feel like a workout? Don’t forget ramekins or, better yet, your beloved sweet potato shells for serving. And, of course, you’ll want a kitchen torch for that charming caramelized top. Without this gear, it’s like making a cake without a pan—just a messy dream. Additionally, investing in commercial kitchen equipment will ensure you have the best tools for your culinary creations.
Our Ingredients
Are you ready to explore the delicious world of Japanese sweet potato crème brûlée? If you’ve ever had the pleasure of tasting this creamy, dreamy dessert, you know it’s a taste bud adventure. With its silky custard made from the naturally sweet and earthy Japanese sweet potatoes, it’s a treat worth every bit of effort.
But before we plunge into the sweet, toasty bliss, let’s gather our ingredients. After all, you can’t whip up magic in the kitchen without the right supplies.
Here’s what you’ll need to create this delightful dish:
- 2 medium Japanese sweet potatoes
- 3 egg yolks
- ⅛ cup sugar (plus extra for caramelizing)
- 1 cup heavy cream (or a mix of milk and cream)
- ½ tsp vanilla extract (or a vanilla bean if you’re feeling fancy)
- A pinch of salt
- ½ tsp cinnamon (optional, but why not?)
- 1 tsp cornstarch (optional, for thicker custard)
- 1 tbsp unsalted butter (optional, a little luxury never hurt)
Now, while we’re gathering these goodies, a couple of things to keep in mind. First, Japanese sweet potatoes bring a unique sweetness that really shines through, so try not to substitute with the regular kind or you might lose that special vibe.
And remember, if you’re not a fan of cinnamon, you can totally skip it. It’s optional, like wearing socks with sandals—some people love it, and some, well, not so much.
Finally, using a vanilla bean could elevate your crème brûlée from “delicious” to “I need this in my life every day.” Don’t be intimidated by the ingredients; together, they create a sweet harmony that’ll have your friends begging for the recipe.
Ready to get cooking? Let’s move on to the step-by-step instructions.
Step-by-Step Instructions
Making Japanese sweet potato crème brûlée is a fun and surprisingly straightforward adventure—the kind that makes you feel like a culinary wizard in your own kitchen. Follow these easy steps, and you’ll create a dreamy dessert that has all the comforting flavors of sweet potato wrapped in an indulgent, creamy custard. Ready? Let’s dig in!
1. Preheat Your Oven****: To kick things off, preheat your oven to 375°F (190°C). It’s the perfect temperature for baking those sweet potatoes until they’re tender—like a hug, but for your taste buds.
2. Bake the Sweet Potatoes: Pierce 2 medium Japanese sweet potatoes a few times with a fork to let steam escape (we wouldn’t want them exploding in your oven!).
Bake them on a baking sheet for about 45–55 minutes, or until they’re soft and a knife slides in easily. Once they’re done, cool them slightly.
3. Prepare the Sweet Potato Shells: Now comes the artistry. Cut off the tops of the sweet potatoes, and gently scoop out the flesh, leaving about a ½ inch border for your little edible bowls.
Set aside ½ cup of the sweet potato flesh, and don’t forget—this dish prefers not to have holes, so don’t over-scoop!
4. Make the Sweet Potato Purée****: In a food processor or blender, puree the reserved sweet potato flesh until creamy and smooth.
If you have a spoonful of it stuck to your fingers, don’t worry—it’s like nature’s candy.
5. Whisk the Egg Mixture: In a medium mixing bowl, whisk together 3 egg yolks, ⅛ cup sugar, a pinch of salt, and ½ tsp vanilla extract (or the fanciest part—a vanilla bean if you’re feeling extra special).
Whisk until it’s well blended and maybe even a little frothy—that’s the magic of eggs at work.
6. Warm the Cream: In a small saucepan, gently warm 1 cup of heavy cream (or a mix of milk and cream if you’re trying to be a bit lighter) over low heat.
If you’re using 1 tbsp of unsalted butter, toss it in now to melt. This warming will help your cream incorporate easily into the egg mixture—no scrambling allowed!
7. Combine Ingredients: Gradually mix the warm cream into the egg mixture while whisking continuously.
Then, fold in the sweet potato purée. If you want to take the custard up a notch in thickness, stir in 1 tsp of cornstarch during this step. Yes, please.
8. Pour and Bake: Carefully pour the custard mixture into those adorable sweet potato shells.
Place them in a baking dish and fill the dish with hot water until it’s halfway up the sides of the sweet potato shells. This water bath helps create a gentle cooking environment, ensuring a smooth texture.
Bake at 340°F (170°C) for about 20–25 minutes, or until the custards are set but still a little wobbly in the center—think of it like a delightful jiggle.
9. Cool and Chill: After baking, remove the sweet potatoes from the water bath, and let them cool at room temperature.
Then, pop them into the fridge for at least 2–4 hours to allow the flavors to meld together. Patience is a virtue, and this chilling is key to achieving that perfect creamy texture.
10. Caramelize the Tops: Just before serving, sprinkle a thin, even layer of sugar over the tops of your cooled crème brûlée.
Now for the fun part—using a kitchen torch, caramelize the sugar until it turns golden brown and bubbly. If you don’t have a torch, broil them for a few minutes, but keep a close eye—nobody wants burnt sugar.
And there you have it—a rich and creamy Japanese sweet potato crème brûlée that’s totally worth all that effort. Is it fancy? Yes. Is it delicious? Absolutely.
Now, go ahead and impress your friends while startling them with your culinary prowess—and don’t forget to enjoy a bit yourself. Bon appétit! Cooking with premium cookware sets can elevate your dessert-making game, ensuring perfectly baked treats every time.
Tips & Variations
When it comes to making Japanese sweet potato crème brûlée, there are a few fantastic tips and variations that can really elevate your dish. First, always use genuine Japanese sweet potatoes; their natural sweetness is a game-changer.
Don’t go crazy scooping out the flesh—leave some shell to keep it sturdy. I’ve learned the hard way; nobody wants a flat crème brûlée disaster.
Another fun idea? Play around with flavors—cinnamon adds warmth, and a touch of ginger can be revitalizing. If you’re feeling adventurous, try adding a sprinkle of matcha on top before caramelizing.
Oh, and chill those custards long enough; trust me, it’s essential for that ideal brûlée crust. You’ll be grateful for these little tweaks.
How to Serve?
After making those scrumptious Japanese sweet potato crème brûlées, it’s time to think about how to serve them up. Trust me, presentation matters! I usually place them right on a cute dessert plate, fancying things up a bit.
Just before serving, I grab my kitchen torch and caramelize the sugar on top. The crackling sound is music to my ears, isn’t it?
If I’m feeling extra generous, I’ll whip up some lightly sweetened whipped cream or maybe garnish with a sprinkle of cinnamon. It adds a nice touch.
And, if you have guests, make sure to pause for that “ooh” moment when they crack into that crispy layer. It’s all about the experience, right? Enjoy!
Storage & Reheating Guide
Storing those delightful Japanese sweet potato crème brûlées the right way is essential if you want to enjoy them later—trust me, nobody wants a sad dessert.
After they cool, cover them with plastic wrap, making sure it doesn’t touch the custard to prevent condensation.
Pop them in the fridge, where they’ll stay fresh for about three days.
When it comes to reheating, just take off the wrap and let them sit at room temperature for about 30 minutes.
Then, if you want that crisp, caramelized top, sprinkle some sugar on and torch it like a pro. It’s important to have essential kitchen appliances on hand for the perfect cooking experience.
Don’t worry if it doesn’t look perfect; I’ve charred mine more than once. Just remember, crème brûlée is all about indulgence.
Final Thoughts
As you immerse yourself in making these delightful Japanese sweet potato crème brûlées, you might find yourself swept up in their creamy, dreamy goodness. Honestly, I never expected such a simple dish could deliver so much joy.
When you crack that caramelized sugar topping, it’s like magic. The sweet potato adds a unique twist that’ll have your friends asking for more.
And let’s face it—using the sweet potato shells as mini bowls? Genius. Trust me, they’ll be impressed.
Remember, take your time with the sugar caramelization—it’s worth it. If I can whip these up without setting the kitchen on fire, so can you.