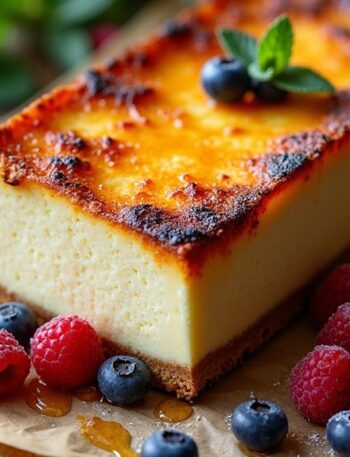
I’ve been on a quest for the perfect dessert, and let me tell you, this Light and Fluffy Japanese Mini Cotton Cheesecake might just be it. It’s so airy, it practically floats off the plate. You mix cream cheese and whipped egg whites, and it feels like you’re making magic. Ever tried a cheesecake that melts in your mouth? Trust me, this is one of those. Stick around, and I’ll share how you can whip this wonder up in your own kitchen.
Why You’ll Love This Recipe
You’re gonna love this mini cotton cheesecake for a bunch of reasons.
First off, it’s super light and fluffy, like a cloud on your plate. I mean, who doesn’t want dessert to feel like a sweet embrace?
The Japanese mini cotton cheesecake is incredibly easy to make, too. Seriously, you don’t need to be a pastry chef. It’s all about mixing and folding—simple, right?
Plus, the flavor? Soft cream cheese meets a hint of lemon, creating that perfect balance of sweet and tangy.
And let’s not forget its impressive look! You’ll feel like a kitchen rockstar when you serve it.
I swear, folks will think you spent hours in the kitchen. What’s not to love?
Equipment List
When it comes to whipping up your Japanese mini cotton cheesecake, having the right equipment really makes a difference.
First up, you’ll need a reliable springform pan. Trust me, it’s the best way to get that fluffy beauty out without losing half of it to the pan.
A hand mixer or stand mixer is a must for whipping those egg whites into light, fluffy meringue—no one wants sad, flat cake. You’ll also want a mixing bowl that can handle your enthusiasm.
And don’t forget some parchment paper for easy cleanup; it saves so much time.
Finally, a water bath setup, so you don’t end up with a dry cheesecake.
I’ve learned the hard way that moisture is key to cheesecakes. Additionally, having kitchen shears on hand can be helpful for trimming parchment paper and any other necessary tasks in the kitchen.
Our Ingredients
Alright, let’s talk about the ingredients you’ll need to whip up some delicious Japanese mini cotton cheesecake! This delightful treat is soft, fluffy, and has just the right amount of sweetness—perfect for sharing or keeping all to yourself!
Before you dive headfirst into baking bliss, it’s crucial to gather everything so you’re not running around the kitchen like a headless chicken halfway through. So, let’s get organized, shall we?
Ingredients:
- 5 large eggs (be sure to separate those yolks from the whites)
- 8 oz cream cheese (make sure it’s at room temperature for easy mixing)
- 1/2 cup milk (you can use low-fat or whole, whatever floats your boat)
- 1/4 cup unsalted butter (also at room temperature)
- 1/4 cup all-purpose flour
- 2 tbsp corn starch (the magical ingredient for that light texture)
- 1/2 cup sugar (divided into two parts: 1/4 cup for the meringue and the rest for the batter)
- 1/4 tsp cream of tartar (it helps stabilize those egg whites)
- 1 tbsp lemon juice (a little zing never hurt anyone)
Now, before you start gathering these goodies, just a quick note: using room temperature ingredients, like butter and cream cheese, really makes a difference.
It smooths everything out and helps create that dreamily fluffy texture. And don’t skip the cream of tartar; it’s the unsung hero in keeping your meringue nice and stable.
Oh, and if you’re feeling particularly adventurous, you might consider substituting some of the ingredients to experiment with flavors. Maybe a splash of vanilla extract or a hint of orange zest? Just a thought!
Happy baking!
Step-by-Step Instructions
Making Japanese mini cotton cheesecake is a delightful journey into fluffiness and sweetness. Mixing the batter is quick and simple—just follow these easy steps to turn those ingredients into a heavenly cake that will leave everyone asking for seconds (or thirds).
1. Preheat and Prepare: Preheat your oven to 315°F (157°C). While that’s heating up, grab your trusty springform pan and line it with parchment paper. Don’t forget to wrap it in foil if you’re using a water bath—this is essential to keeping your cheesecake moist and preventing any nasty cracks.
2. Whip the Egg Whites: In a large bowl, take those 5 separated large egg whites and beat them with 1/4 teaspoon of cream of tartar. Beat until foamy, then slowly sprinkle in 1/4 cup of sugar. Keep on whisking until you see soft peaks forming—this could take a few minutes, so hang in there! (Fun fact: your arm might feel like it just did a mini workout.)
3. Make the Cream Cheese Mixture**: In another bowl, beat 8 oz of room-temperature cream cheese and 1/2 cup of milk together until smooth. You want a beautiful, creamy texture—no lumps allowed. Then, add in 1/4 cup of unsalted butter** (also at room temperature, please) and keep mixing.
Toss in the remaining sugar (1/4 cup), 1 tablespoon of lemon juice, 1/4 cup of all-purpose flour, and 2 tablespoons of corn starch. Mix again until everything is well combined and nice and smooth. (Make sure you strain this mixture—any lumps will rain on your fluffy parade.)
4. Incorporate the Egg Yolks: Now, grab those 5 egg yolks and mix them into your cream cheese batter, whisking just until they’re blended in. It’s like bringing together old friends for a party—just a gentle reunion, nothing wild.
5. Fold in the Meringue: This next step is vital for that airy texture. Gently fold the meringue you whipped earlier into the cream cheese batter. You’ll want to do this carefully—too much mixing will knock the air out and nobody wants a flat cheesecake.
Think of it like folding in a beloved fluffy pet that you don’t want to accidentally squish, okay?
6. Pour into Pan: Pour your lovely batter into the prepared springform pan. You’ll notice it’s a bit thick compared to your average cake batter, and that’s just how it should be.
7. Bake in a Water Bath: Now comes the moment of truth. Place your pan into the larger pan filled with water (this is why you wrapped it in foil!). Bake in the oven for about 1 hour. You want the cake to be set but still jiggly—think of it like a well-loved soft toy, not a frozen brick.
8. Cool Gradually: Once your cheesecake is done, turn off the oven and crack the door open, allowing it to cool in there for a bit. This helps to prevent any sudden temperature changes, which can lead to unsightly cracks on your masterpiece.
After about 30 minutes, you can take it out to finish cooling on the counter.
Now, take a moment to appreciate your creation. This cheesecake is a magical blend of light and creamy, and when it’s cooled and ready, it’s time for the best part—serving and enjoying each fluffy bite! If you’ve followed the steps, your cake should look gorgeous, and whether you share it or savor it solo, the effort will definitely pay off. Plus, with the right artisan cheese making kit, you can explore even more cheesemaking adventures at home.
Tips & Variations
There are a few tips and variations that can really elevate your Japanese mini cotton cheesecake experience.
First, make sure all your ingredients are at room temperature; trust me, it makes a smoother batter and a happier cake.
I learned the hard way that overmixing the meringue can lead to a less fluffy texture, so fold it gently.
If you’re feeling adventurous, try adding a splash of vanilla extract or a sprinkle of matcha powder for a flavor twist.
Want bite-sized goodness? Divide the batter into small molds and bake them for about 30 minutes.
Oh, and don’t rush the cooling—let it cool gradually to avoid cracking.
Your patience will definitely pay off.
How to Serve?
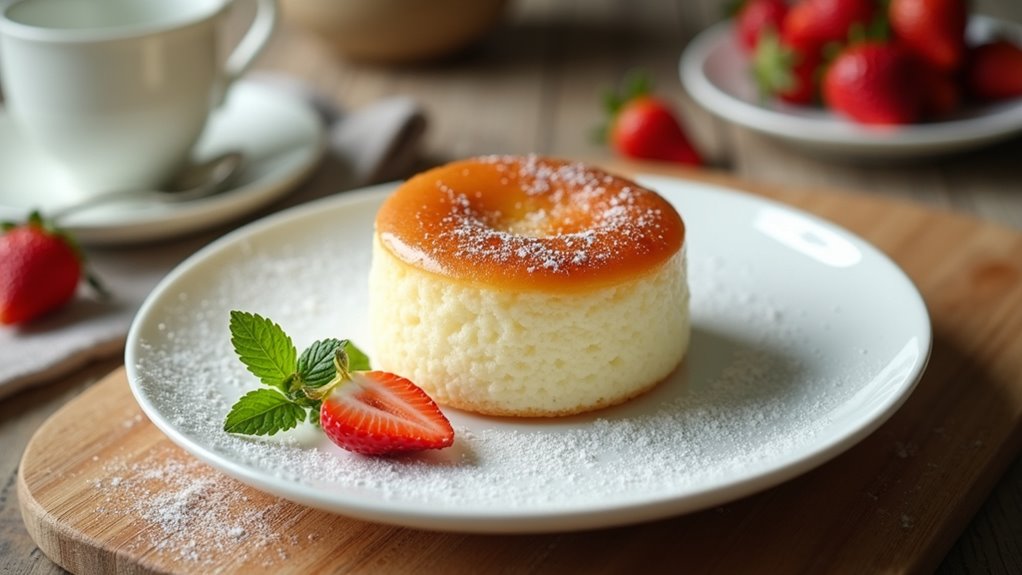
How should you serve this delightful Japanese mini cotton cheesecake? First, I recommend letting it cool completely before slicing. Trust me, warm cheesecake can be tricky and fall apart.
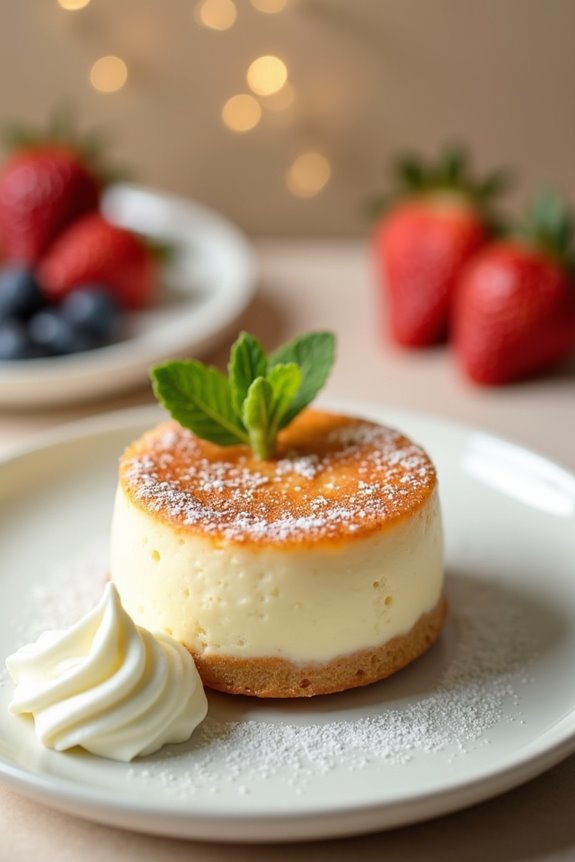
When it’s cool, cut it into small, cute pieces—I love serving it on pretty plates or even just simple napkins. A dusting of powdered sugar adds a nice touch, don’t you think?
You could also serve it with fresh berries or a drizzle of chocolate sauce for that extra flair. Sometimes, I even pair it with a cup of green tea for a cozy experience.
And let’s be honest, who doesn’t love that sweet, light, and fluffy texture melting in their mouth? Enjoy every bite, and don’t worry about sharing too much.
Storage & Reheating Guide
Once this delightful Japanese mini cotton cheesecake has made its way to your kitchen, you’ll want to know how to store it properly.
First, let it cool completely, and then wrap it tightly in plastic wrap to keep away the dreaded dryness. If you’re not devouring it all at once (which, trust me, is a challenge), store it in the fridge for up to three days.
For longer storage, freeze those little beauties—just cut them into slices, wrap each slice, and toss them in an airtight container. Utilizing vacuum seal bags can further extend the freshness and prevent freezer burn.
When you’re ready for a bite, simply thaw it in the fridge for a few hours. Reheating? A quick 10 seconds in the microwave should do. You’re welcome.
Final Thoughts
Storing that fluffy Japanese mini cotton cheesecake properly guarantees you can enjoy its light and creamy goodness for days to come. Personally, I love the satisfaction of slicing into a piece that still retains its softness.
You know, it’s like a little piece of cloud on a plate. If you’re feeling adventurous, try adding a twist with fruit toppings or a drizzle of chocolate sauce. Trust me, your taste buds will thank you.
And hey, if it doesn’t turn out perfect, don’t sweat it; I burnt my first batch, too. Just remember, practice makes… well, slightly better.