When I first tried making classic Japanese melon pan, I didn’t expect it to become my go-to comfort food. The blend of soft bread and that sugary cookie crust? Pure magic. Have you ever bitten into something that just wraps you in a warm hug? Trust me, this treat does that. So, if you’re curious about whipping up your own delightful batch, stick around. I’ll share all the details, including a few of my own missteps along the way.
Why You’ll Love This Recipe
You might wonder why Huli Huli chicken is the go-to dish for gatherings and weeknight dinners alike. Honestly, it’s a flavor explosion that’s hard to resist.
The combination of tender, juicy chicken marinated in a sweet and tangy glaze? It’s pure magic. I can’t help but sneak bites before serving – and I think you’ll end up doing the same.
The aromatic marinade creates an irresistible aroma that fills the kitchen. Plus, it’s super easy to make. I love that I can throw it on the grill, and in no time, I’ve got a crowd-pleaser that everyone devours.
Whether it’s a special occasion or Tuesday night, huli huli chicken never disappoints. Trust me; you’ll want this recipe in your collection.
Equipment List
When you plunge into making Huli Huli chicken, having the right equipment can make all the difference, trust me.
You’ll need a good grill or grill pan for that mouthwatering char. A mixing bowl’s essential for combining your marinate—and trust me, you want it mixed well.
Don’t forget a whisk; you can pretend you’re a culinary maestro while you blend everything. A sharp knife makes cutting the chicken a breeze, and I can’t stress enough how important a meat thermometer is to avoid any unfortunate chicken incidents.
Finally, gather some tongs for flipping your chicken like a pro. Additionally, investing in luxury seafood cooking tools can elevate your culinary experience even further. So, gear up and let’s make some delicious Huli Huli chicken together.
Who’s ready for a tasty adventure?
Our Ingredients
Alright, so let’s get into this adventure of making some scrumptious Huli Huli chicken, which if you’ve never tried is both sweet and savory, with a hint of tropical vibes thanks to pineapple juice.
Trust me, your taste buds are going to enjoy themselves. Before we embark on the nitty-gritty, let’s talk about what you’ll need to get this party started.
Here’s the ingredient list you’ll be taking to the kitchen:
- 8-10 chicken thighs
- 2 cups soy sauce
- 3 (6 oz) cans pineapple juice
- 1/2 cup brown sugar
- 1/2 cup ketchup
- 1/4 cup rice vinegar
- 8 cloves garlic, minced
- 2 tbsp grated ginger
- 1/2 tsp chili-garlic sauce
Now that you have your ingredient lineup, let’s chat a bit about them, shall we?
Feel free to get a little creative – if you’re not a fan of certain flavors, you can always adjust. For example, you may want a little more ginger for a kick or less sugar if you’re watching your sweet tooth.
And those chicken thighs? They’re the perfect choice because they stay juicy and tender during grilling, unlike their dry chicken breast cousins.
Plus, if you’re feeling fancy, you could also toss in some fresh herbs like green onions or cilantro at the end as a fun garnish.
Cooking is all about personal preference, so don’t be afraid to make these flavors work for you. Get ready to make your grill the happy place tonight!
Step-by-Step Instructions
Making Huli Huli chicken is a delightful journey into the world of grilling that will transport your taste buds straight to a tropical paradise. The steps are straightforward, and you’ll be just a few simple moves away from a plateful of sweet, savory goodness.
Step-by-Step Instructions
1. Brine the Chicken: Start by preparing a brine using 2 quarts of water and 2 cups of soy sauce. Add in the minced garlic and grated ginger.
Submerge 8-10 chicken thighs in this mixture and let them soak for anywhere between 1 to 8 hours. This step is essential—it infuses flavor and moisture into the chicken so that every bite is succulent.
2. Preheat the Grill: Fire up your grill to a medium high heat. You want that grill ready to work its magic on your marinated chicken.
3. Pat the Chicken Dry: After brining, remove the chicken from the solution and pat it dry with paper towels.
This helps achieve that glorious grill mark and prevents steaming.
4. Grill the Chicken: Place the chicken thighs skin-side up on the grill. Close the lid and let them grill for about 25-30 minutes, or until they reach an internal temperature of 120°F.
During this time, the skin will get crispy and beautifully charred.
5. Flip to Finish: Carefully flip the chicken over to skin-side down. Grill for another 20-25 minutes until the thighs hit 175°F.
This is when the magic happens—the chicken will be juicy, and the skin will be irresistibly crispy.
6. Baste with Glaze: In the last few minutes of grilling, baste the chicken with your reserved glaze.
This will create an extra layer of flavor and a shiny finish that screams “dinner party ready.”
7. Rest the Chicken: Once done, remove the chicken from the grill and let it rest for about 10 minutes.
This allows the juices to settle and the flavors to deepen.
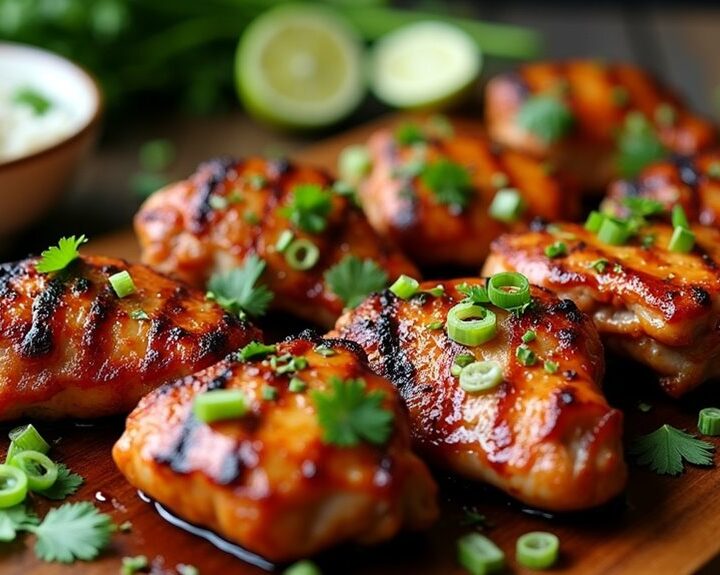
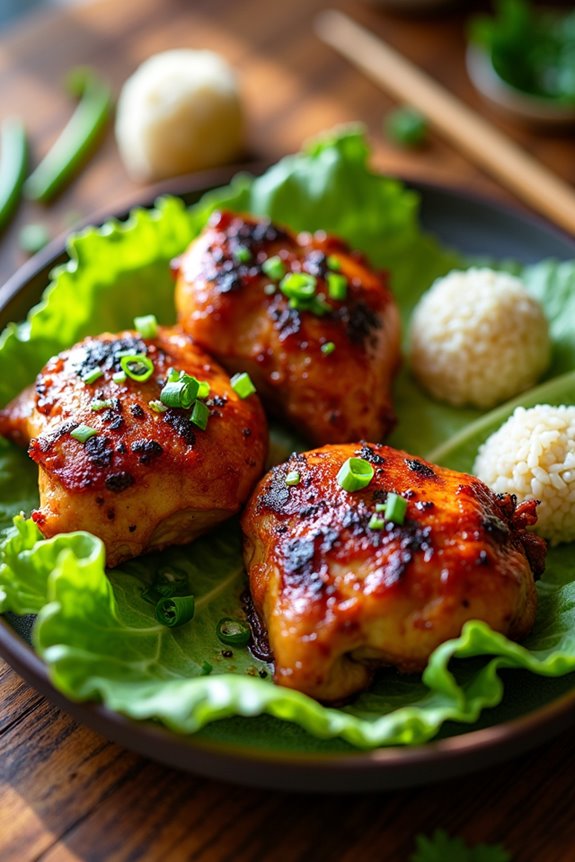
8. Serve and Enjoy: Slice into those juicy thighs, maybe sprinkle on some fresh herbs like cilantro or green onions for that pop of color, and serve them up warm.
Pair with rice or a fresh salad, and voilà—you’ve made a dish that will impress both friends and family! Don’t forget that using the right seafood cooking equipment can enhance your grilling experience and ensure perfect results every time.
Tips & Variations
As you plunge into cooking Huli Huli chicken, you’ll find there are plenty of ways to jazz it up or tailor it to your preferences.
Want to spice things up? Add more chili-garlic sauce for a nice kick. If you’re from the “sweet is my jam” camp, consider a splash of honey or maple syrup.
Not a fan of chicken thighs? Swap ‘em with juicy chicken breasts or even tofu if you’re feeling adventurous.
And let’s not forget about marinating—if you can leave it overnight, do it. Your taste buds will thank you later.
Oh, and don’t forget to rest your chicken for a few minutes after grilling; it makes a difference, trust me.
Happy cooking!
How to Serve?
Serving Huli Huli chicken is pretty much where the magic happens, and trust me, it’s as deliciously simple as it sounds.
Once your chicken is perfectly grilled, lay it out on a large platter, the sizzling skin glistening invitingly. Don’t forget to drizzle any leftover marinade over the top—yum.
I like to garnish with fresh cilantro or green onions for a pop of color.
Pair it with fluffy white rice or a fresh salad to balance the richness, and maybe some grilled veggies on the side for good measure.
Honestly, the aroma alone will have everyone gathering around the table, waiting enthusiastically. Just try to keep your cool as you slice and serve; it can be hard to wait for seconds.
Storage & Reheating Guide
Once you’ve grilled that delicious Huli Huli chicken and it’s all gone, you might be wondering, what do I do with the leftovers?
Well, first things first, let ’em cool down completely. I usually store them in an airtight container in the fridge. They’ll last about three to four days, but honestly, they rarely last that long in my house.
If you’re ready to enjoy them again, reheating’s simple. I pop mine in the oven at 350°F for about 15-20 minutes, maybe with a little splash of water to keep things juicy.
Or, if I’m feeling lazy, I just microwave them for a minute or two—easy does it. Just don’t let them become rubbery. Trust me, nobody wants that. Using reusable glass milk bottles for storage can help keep your leftovers fresh for longer.
Final Thoughts
Cooking is, without a doubt, a delightful adventure full of flavors and creativity.
As I wrap up this journey into the world of Japanese melon pan, I can’t help but smile at all the amazing memories created in the kitchen.
There’s something magical about the sweet aroma filling your home while the bread bakes, almost like a warm hug.
If my clumsy hands can make these soft, buttery treats, so can yours.
Just remember, whether you’re an expert or a newbie, it’s all about having fun.
Have questions or mishaps? Share them! I’d love to hear your stories.
So, why not jump in and whip up a batch of melon pan?
Trust me; it’s a comforting experience you won’t regret.