Have you ever had that moment when you’re craving something warm and buttery, yet simple? That’s where garlic knots come in. They’re these little bundles of joy, soaked in garlic butter, that just scream comfort food. Trust me, the first bite will make you forget every bread roll you’ve ever known. Now, let’s get into how you can create this masterpiece in your own kitchen, because you won’t want to miss out on these flavors.
Why You’ll Love This Recipe
If you’ve ever had a hard day and needed a little comfort food, garlic knots are the ultimate solution. Trust me, there’s something magical about those fluffy, buttery bites. They soothe the soul like a warm hug.
When I make garlic knots, the smell of garlic and melting butter fills my kitchen, and I can’t help but feel a little happier. They’re perfect for dipping in marinara sauce, too. Plus, making them is easier than you might think. Sure, I’ve messed up dough a few times—who hasn’t?
But when those knots come out golden brown, I can’t help but feel like a culinary genius. Honestly, garlic knots bring joy to any meal, and they’re always a crowd-pleaser, no matter the occasion.
Equipment List
When it comes to making those delicious garlic knots, having the right equipment can really make a difference. First off, you’ll need a mixing bowl—something big enough for all that dough action. Honestly, my last batch nearly exploded out of a too-small bowl.
A rolling pin‘s essential for shaping your dough into those adorable ropes. Don’t forget parchment paper for lining your baking sheet; trust me, you’ll want to avoid the dreaded stick.
A pastry brush is key for slathering on that buttery garlic goodness, and a sharp knife or pizza cutter makes for easy knot-tying.
Finally, grab an oven mitt. If you’re like me, you might burn your fingers trying to sneak a knot out too soon. Also, having a good cutting board set can help you prep your ingredients efficiently and keep your workspace tidy.
Our Ingredients
To make those irresistible garlic knots, you’ll need a handful of simple ingredients that come together to create that fluffy, garlicky goodness we all crave. Don’t worry; you won’t have to hunt high and low for anything on this list. Most of these staples probably already live in your kitchen.
The magic happens when these ingredients transform, making your house smell like an Italian pizzeria. Seriously, who can resist that?
Here’s what you’ll need:
- 1 tsp dry active yeast
- ¾ tsp sugar
- ½ cup warm water
- 1½ cups flour
- ½ tsp salt
- ½ Tbsp olive oil
- ¼ cup butter, melted
- 4 tsp minced garlic (or 1 tsp garlic powder)
- ½ tsp Italian seasoning
- 2 Tbsp grated Parmesan cheese
Now, let’s chat a bit more about these ingredients. First off, the yeast is the little superhero of the whole operation, helping your dough rise to fluffy perfection.
Make sure your water isn’t too hot; otherwise, you’ll scare that yeast away (and we don’t want any sad yeast). It’s basically a party for your dough—sugar is like the party invitation, telling the yeast to come on in and get to work.
Good quality olive oil not only adds a nice flavor but also helps keep your knots soft. As for the garlic, whether you’re a fresh garlic fan or love the convenience of garlic powder, either choice will give you that fantastic flavor.
And don’t skip the Parmesan! It’s the cherry on top, adding a cheesy goodness that elevates your knots from good to unforgettable. Trust me, once you’ve tasted these knots, you’ll be hooked.
They’re perfect for a party, movie night, or just because you deserve a tasty treat.
Step-by-Step Instructions
Making garlic knots is a fun and rewarding process that fills your kitchen with irresistible aromas. Mixing the dough is quick and simple—just follow these easy steps to achieve warm, fluffy knots that’ll have everyone asking for more.
1. Proof the Yeast: Start by taking 1 tsp of dry active yeast and ¾ tsp of sugar, and combine them in a small bowl with ½ cup of warm water. Let that sit for about 5-10 minutes, or until it gets all foamy and bubbly. That foam is your yeast getting excited—just like you should be!
2. Make the Dough: In a large bowl, combine 1½ cups of flour, ½ tsp of salt, and ½ Tbsp of olive oil. Once the yeast has proofed, add that bubbly mixture to your dry ingredients. Mix it all together until it starts to form a soft, slightly tacky dough.
At this point, if you’re like me, you might think, “Wow, this is messy!”—but that’s okay! Just knead it on a floured surface until it’s nice and smooth, about 5-7 minutes.
3. Let It Rise: Once kneaded, place your dough in a greased bowl, cover it with a clean towel, and Let It Rise in a warm spot until it doubles in size—this usually takes about 30 to 60 minutes. You can use this time to contemplate all the delicious garlic knots that are about to grace your plate.
4. Shape the Knots: After the dough has risen, punch it down (yes, literally!) to release the air. Now, divide it into 6 equal pieces. Roll each piece into a rope about 8 inches long, then tie it into a knot. If the shape isn’t perfect, don’t sweat it; rustic is charming, right?
5. Second Rise: Place the knots on a lined baking sheet, cover them up again, and let them rise until they double in size, about another 30 minutes. This is critical—the knots need that extra time to puff up and become airy.
6. Prepare the Garlic Butter: While you wait, melt ¼ cup of butter in a small bowl, and mix in 4 tsp of minced garlic (or 1 tsp of garlic powder if you’re in a pinch) and ½ tsp of Italian seasoning. This savory mixture is what’ll make your knots sing!
7. Bake the Knots: Preheat your oven to 400°F (that’s about 200°C for our metric friends). Brush the risen knots with half of your delicious garlic butter mixture, then pop them in the oven for about 15 minutes or until they’re golden brown.
Can you already smell that heavenly aroma wafting through your house?
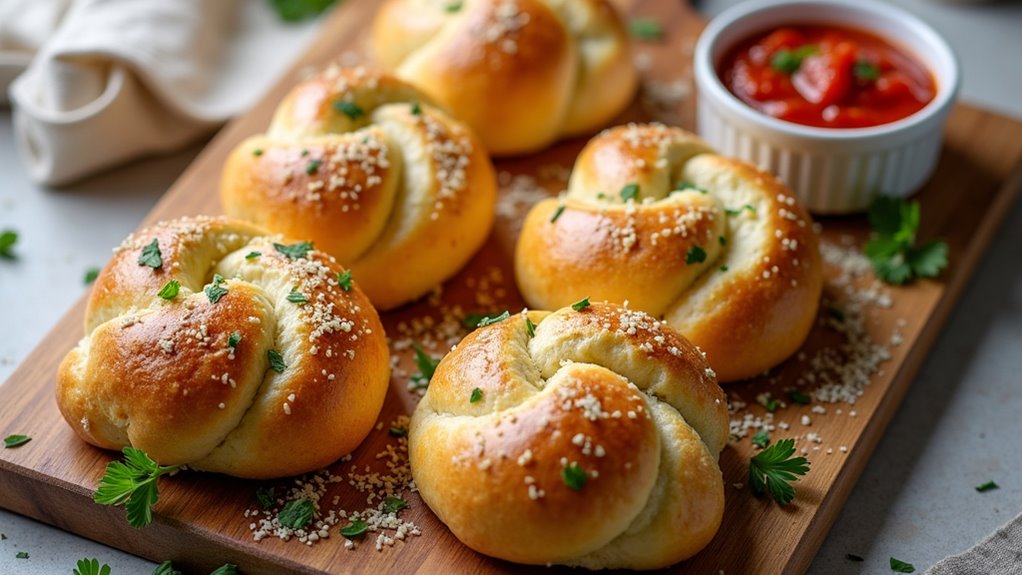
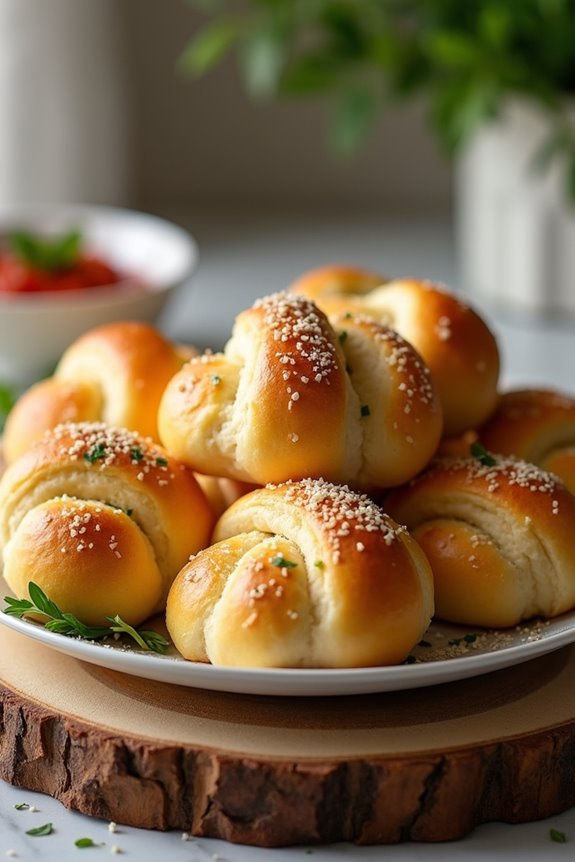
8. Finishing Touches: When they come out of the oven, brush those babies with the rest of the garlic butter and sprinkle 2 Tbsp of grated Parmesan cheese over the top. The cheese melts just enough to add that final touch of flavor.
And there you have it! Your garlic knots are ready to be devoured. Serve them warm, and if you’re feeling extra fancy, consider pairing them with marinara sauce for dipping.
Trust me, these delightful little knots will have everyone drooling and begging for the recipe. Enjoy, and don’t worry if a few vanish before reaching the table—my family calls it “quality control.” Plus, using gourmet kitchen gear can elevate your baking experience, making these knots even more enjoyable to create!
Tips & Variations
After shaping those delightful knots and watching them plump up, you might be wondering if there’s more you can do to elevate this recipe.
Here’s where I like to experiment a bit. Try tossing in some chopped herbs, like parsley or basil, into the garlic butter; trust me, the aroma’s worth it.
For a kick, why not sprinkle in some crushed red pepper flakes? I’ve done it, and it’s a flavor explosion.
If you’re feeling adventurous, swap out half the butter for olive oil for a lighter twist.
And let’s be real, who doesn’t love a cheesy twist? A little mozzarella stuffed inside those knots? Heaven.
Just be careful not to burn your fingers digging in. You’ll definitely want to share… or not.
How to Serve?
When it comes to serving garlic knots, I can’t help but think about those moments when friends gather around the table, ready to plunge into something delicious.
I usually pull them straight from the oven while they’re still warm and fragrant. Just imagine the sight—golden, buttery knots glistening like jewels.
I like to set out a small bowl of marinara sauce for dipping. It’s like the perfect little surprise!
Sometimes, I go all out and sprinkle extra Parmesan on top, because why not?
As everyone digs in, you can see the smiles. You know, those moments where laughter fills the air, while bits of garlic and dough vanish within minutes.
It’s comfort food magic, really.
Storage & Reheating Guide
You’ve pulled those gorgeous, golden garlic knots from the oven, and they’ve vanished faster than a pizza at a party.
But what if you’ve got leftovers? First, let them cool completely, then stash them in an airtight container. They’ll be good for about 2-3 days at room temperature.
If you want to keep them even longer, throw them in the freezer. Just make sure to wrap them tightly; nobody wants freezer-burned knots.
When it’s time to enjoy them again, reheating is key. I usually pop them in the oven at 350°F for about 10 minutes. You could also microwave them for about 20 seconds, but let’s be real, it’s not the same.
For those who value sustainability, consider using a reusable glass water bottle to stay hydrated while snacking on these garlicy hugs!
Enjoy those garlicy hugs!
Final Thoughts
Although I could rave about garlic knots all day, let’s wrap this up with some final thoughts.
These little bites of heaven aren’t just delicious; they’re a labor of love. There’s something special about homemade garlic knots—especially when you can smell that garlic aroma wafting through your kitchen.
And let’s be real, mess-ups happen. I’ve tangled dough more times than I can count.
But hey, even not-so-pretty knots taste amazing. Serve them warm, and they’ll vanish in a flash. Dip ’em in marinara if you’re feeling fancy.