I can’t tell you how many times I’ve come home to a long day, only to be saved by the deliciousness of garlic butter chicken. It’s one of those recipes where simplicity meets flavor, perfect for those busy weeknights or when you want to wow guests without too much fuss. Honestly, I’m convinced the smell of garlic bubbling in butter is nature’s way of saying, “Dinner’s about to be amazing.” Ready to make your kitchen feel a little bit like an Italian bistro? Let’s get started.
Why You’ll Love This Recipe
You’ll love this recipe for Garlic Butter Chicken, and let me tell you why. First off, it’s super simple to make—even I can whip it up without losing my mind. Imagine tender, juicy chicken drenched in a rich garlic butter sauce, with the aroma wafting through your kitchen. Trust me, your family will be begging for seconds. Plus, you only need a handful of ingredients, so you won’t feel like you’re stocking a grocery store. And let’s face it, who doesn’t love melted cheese on top? It’s the cherry on this delicious sundae. I promise you’ll feel like a culinary genius, even if you occasionally burn toast. So let’s plunge into this garlic butter chicken like we mean it.
Equipment List
Cooking something as delightful as garlic butter chicken requires a few handy tools, and I’ve got your equipment list right here.
First, you’ll need a sturdy baking dish—trust me, it’s vital for that mouthwatering bake. A large skillet is also essential for melting that buttery goodness. A trusty meat thermometer? Absolutely. You don’t want to play guessing games with your chicken’s doneness.
I also grab a good knife for mincing garlic and chopping herbs. Oh, and don’t forget measuring cups for the butter; you’ll want precision here!
In addition to these tools, having a reliable cutting board set is indispensable for preparing your ingredients efficiently.
Finally, a spatula is a lifesaver for pouring that garlic butter over the chicken. With these tools, you’re set for a kitchen adventure that’s just begging to begin.
Our Ingredients
Alright, let’s roll up our sleeves and talk about the delicious ingredients you’ll need for our garlic butter chicken.
Trust me, once you get these in your kitchen, you’ll be halfway to whipping up a meal that not only tastes great but also makes your home smell like a cozy Italian bistro. What’s more comforting than that?
So, grab your notepad and let’s get into it.
Ingredients:
- 4 boneless, skinless chicken breasts
- Salt and black pepper, to taste
- ½ cup unsalted butter
- 6 cloves garlic, minced
- 1 tablespoon fresh rosemary leaves
- ½ cup shredded Italian cheese blend
Step-by-Step Instructions
Making Garlic Butter Chicken is a breeze, and you’ll love how easy it’s to prepare a delicious, comforting meal.
Just follow these straightforward steps, and soon your kitchen will be filled with mouthwatering aromas that will have everyone at the table excited for dinner.
Step-by-Step Instructions:
1. Preheat Your Oven: Start by preheating your oven to 375ºF (190ºC). Grease a baking dish to guarantee your chicken doesn’t stick. A little oil or butter will do the trick, and trust me, you don’t want a stuck chicken situation on your hands.
2. Season the Chicken: Take your 4 boneless, skinless chicken breasts and season both sides generously with salt and black pepper. This is where those juicy flavors begin, so don’t skimp on the seasoning!
3. Melt the Butter: In a skillet over medium heat, melt ½ cup of unsalted butter. The butter will start to foam and melt, which is totally normal!
4. Sauté the Garlic: Add in 6 cloves of minced garlic to the melted butter, stirring gently. Cook it for about 4 minutes, just until the garlic is fragrant and lightly golden—keep an eye on it because burnt garlic tastes like…well, burnt garlic, and nobody wants that.
5. Add Rosemary: Toss in 1 tablespoon of fresh rosemary leaves into the skillet with the garlic butter. The aroma will be incredible!
Give it a quick stir and then take the skillet off the heat.
6. Combine Chicken and Garlic Butter: Pour that luscious garlic butter mixture over the seasoned chicken breasts in the baking dish. Make sure they’re well coated; you want every bite to be infused with that garlicky goodness.
7. Bake the Chicken: Place the dish in your preheated oven and bake for 30–32 minutes. The chicken is done when it reaches an internal temperature of 165ºF (you might want to use a meat thermometer for this).
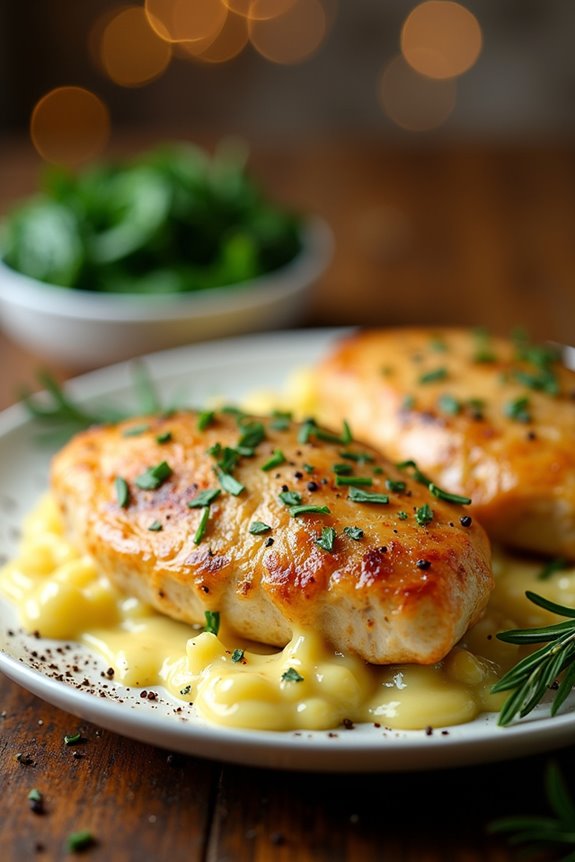
8. Add the Cheese: Once done, pull the chicken out and sprinkle ½ cup of shredded Italian cheese blend over the top.
Pop it back in the oven for just 3 more minutes to let that cheese melt into gooey perfection.
9. Let it Rest: After all that anticipation, give your chicken a solid 5 minutes to rest.
This is key for juicy chicken—don’t rush it; a little patience pays off big time.
10. Serve it Up: Finally, spoon that rich garlic butter sauce over the chicken when serving.
It’s like adding the cherry on top, just without the sweetness. Enjoy!
And there you have it—a simple yet delightful Garlic Butter Chicken that radiates comfort with every bite. Remember to use quality kitchen tools, like a silicone spatula set, for an easier cooking experience.
Your family will think you’re a kitchen wizard, and they’ll never need to know how easy it was.
Tips & Variations
While you’re savoring the deliciousness of garlic butter chicken, don’t forget that there are plenty of ways to switch things up and make it your own.
Maybe try adding some lemon juice for a zesty kick, or toss in a handful of veggies like spinach or broccoli for a pop of color and nutrition. If you’re feeling adventurous, swap the rosemary for thyme or basil—fresh herbs can totally change the vibe.
I once burned garlic trying to multitask, and it was a culinary heartbreak. Trust me, keep an eye on it.
Another time, I forgot the cheese. Let’s just say it was a sad chicken day.
How to Serve?
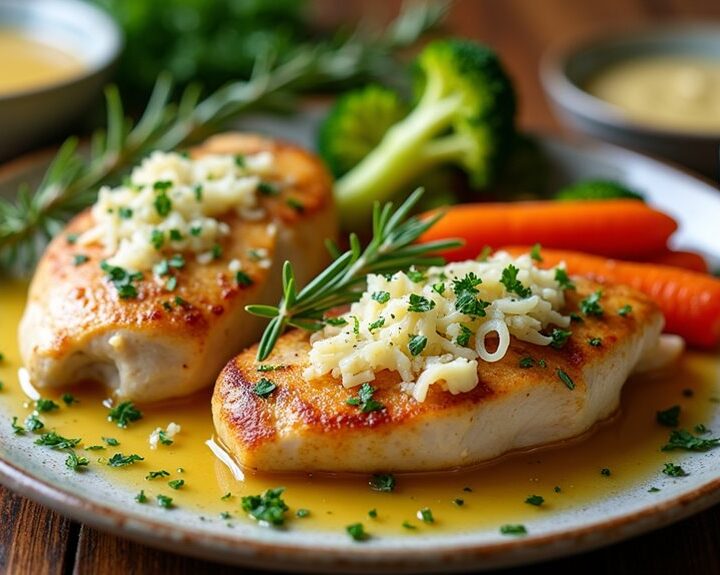
When it comes to serving garlic butter chicken, you want to make sure it’s as delightful on the plate as it’s in flavor. I usually plate the chicken with a generous drizzle of that irresistible garlic butter sauce—it’s like the cherry on top, right?
I often pair it with a side of roasted veggies or creamy mashed potatoes, so the flavors can mingle beautifully. And, don’t forget some crusty bread for soaking up that garlic goodness—seriously, it’s a must.
If you want to impress, sprinkle fresh herbs or extra cheese on top for a pop of color and taste. Trust me, when your guests see this, they’ll be hooked and asking for seconds. You might even need to hide a piece for yourself.
Storage & Reheating Guide
Storing leftover garlic butter chicken the right way can really keep that mouthwatering flavor intact—after all, who wants sad, dry chicken?
I usually pop my leftovers into an airtight container after they’ve cooled down. Make sure to eat them within three to four days, or you might’ve to get creative with a not-so-tasty science experiment. Utilizing airtight food storage ensures your chicken maintains its delicious texture and flavor for longer.
When it’s time to reheat, I like to use the oven to keep that juicy goodness alive. Just preheat it to 350°F, cover the chicken loosely with foil, and warm for about 15-20 minutes.
If you’re in a hurry, the microwave works too, but I sometimes end up with little chicken hockey pucks. Nobody wants that, right? So, take it slow, folks.
Final Thoughts
I often find myself marveling at how a simple dish like garlic butter chicken can turn an ordinary dinner into a delightful experience. Every time I bake it, I get that warm, comforting aroma wafting through my kitchen, and I can’t help but feel a little fancy—like a chef in my own restaurant.
Plus, the combination of garlic and butter? It’s basically magic. It’s amazing how something so simple can impress family and friends. And hey, if I can pull this off without burning the garlic, anyone can.