I’ve got to tell you, crispy fried pickles have become my go-to snack for any occasion—movie night, game day, or even just a Tuesday when I’m feeling snacky. They’re tangy, crunchy, and oh-so-addictive. I never thought dredging pickles could be this satisfying, but here we are. So, are you ready to learn how to make this crunchy delight from scratch? Let’s jump into the step-by-step process that’ll have your friends begging for more.
Why You’ll Love This Recipe
Fried pickles are like the ultimate snack you didn’t know you needed in your life. Let’s face it, they’ve got that perfect crunch, a zingy taste, and a fun twist on classic flavors. Honestly, it’s hard not to love them.
I remember the first time I tried fried pickles—I was skeptical! But after one bite, I was hooked. The golden coating is so satisfying, it makes your taste buds dance. Plus, they’re super easy to whip up, which means you can impress friends or just snack solo while binge-watching your favorite shows.
And if you throw in a zesty dipping sauce, like ranch, you’re in for a treat. Seriously, these fried pickles are bound to become your new favorite go-to snack.
Equipment List
When you’re gearing up to make crispy fried pickles, having the right equipment is key to achieving that delightful crunch. You’ll need a deep fryer or a heavy pot, which works wonders when heating oil to get that perfect fry.
A slotted spoon or spider helps fish those pickles out without splattering oil everywhere—trust me, you don’t want a hot oil situation. You’ll also need a couple of mixing bowls for your egg and flour mixtures.
And let’s not forget the paper towels for draining—talk about keeping things neat. Did I mention a whisk? It’s great for beating those eggs.
In addition, consider incorporating a spiralizer to add a fun twist to your fried pickle presentation.
You’re gonna want to keep everything organized, or you might start losing your marbles… or pickles!
Our Ingredients
When it comes to making crispy fried pickles, the ingredients you choose can make all the difference between the average snack and a mouthwatering delight. You’ll want to gather a handful of key items that come together to create that perfect crunch and tang. Trust me, once you’ve bitten into a perfectly fried pickle, you’ll wonder why you ever settled for the soggy store-bought ones. So, let’s get into it!
Here’s what you’ll need:
- Dill pickle chips or slices, drained and dried
- 3/4 cup all-purpose flour
- 1/4 cup yellow cornmeal or crushed saltines
- 2 eggs
- 1 cup milk or buttermilk
- 1/2 tsp salt
- 1 tsp black pepper
- Seasonings: dill, cayenne, paprika (if you’re feeling spicy)
- Vegetable, canola, or peanut oil for frying
Now, while these ingredients are pretty straightforward, here are a few things to reflect on: The type of pickles you choose can really change the flavor profile. Dill pickles are classic, but if you like a bit of sweetness, give bread and butter pickles a shot—just adjust your seasoning accordingly.
And about that frying oil: peanut oil is fantastic for frying because it has a high smoke point, which means it gets hot and stays hot without burning. Plus, it adds a nice flavor. But if allergies are a concern, vegetable or canola oils work just fine.
Step-by-Step Instructions

Making crispy fried pickles is both fun and rewarding—just think about that warm, crunchy goodness paired with your favorite dipping sauce. Mixing the batter is quick and simple—just follow these easy steps to get that perfect crunch while keeping the tangy flavor of the pickles. Let’s get frying!
- Heat Your Oil: Start by heating about 2 inches of vegetable, canola, or peanut oil in a deep fryer or a heavy pot. You want the oil to reach a temperature between 350 to 375°F. (This is the sweet spot for frying—too low, and your pickles will soak up the oil; too high, and they’ll burn before they’re cooked through.)
- Prepare the Egg Mixture: In a bowl, beat together 2 eggs and 1 cup of milk or buttermilk. This creamy mixture will help the flour stick to the pickles for that oh-so-important crunch. (If you have a whisk, now is the time to show it off—make those eggs frothy and inviting.)
- Mix the Dry Ingredients: In another bowl, combine 3/4 cup of all-purpose flour with 1/4 cup of yellow cornmeal or crushed saltines. Add in 1/2 tsp of salt and 1 tsp of black pepper. If you’re feeling a bit adventurous, toss in some dill, cayenne, or paprika to spice things up. (Trust me, the right seasoning can elevate your fried pickles from tasty to absolutely irresistible).
- Dredge the Pickles: Take your drained and dried dill pickle chips or slices and dip them into the egg mixture first, letting any excess drip back into the bowl. Then, toss them into the flour mixture, coating them evenly. (Feel free to have any stray pickles join in, but don’t overcrowd the bowl—each pickle deserves its moment in the spotlight.)
- Fry in Batches: Once the oil is hot, gently lower a few coated pickles into the oil. Careful now, no one likes a splash! Fry them for about 1 to 2 minutes, or until they turn a beautiful golden brown. (Keep an eye on them—you want them crispy, not burnt.)
- Drain and Repeat: Use tongs or a slotted spoon to remove the fried pickles from the hot oil and place them on paper towels to drain any excess oil. Repeat the frying process with the rest of your pickles. (This is the part where you can sneak a crispy piece or two while no one is looking. Just saying.)
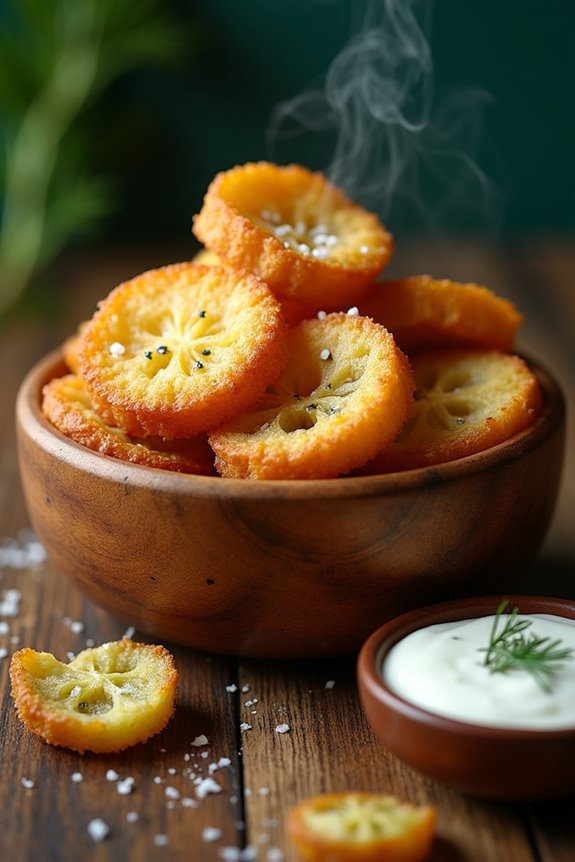
When you’re done frying, arrange the crispy fried pickles on a plate and serve them warm with a dipping sauce like ranch or spicy mayo. Trust me, these will disappear faster than you can say “crunch.” Adding luxury kitchen appliances can enhance your cooking experience and help ensure perfect results every time.
Enjoy every crispy bite—you’ve earned it!
Tips & Variations
Even if you think you’ve got the perfect crispy fried pickles down, there’s always room for a little experimentation in the kitchen.
Try swapping out regular flour for something like chickpea flour—it’s surprisingly good! You can also play around with spices.
I once tossed in some hot sauce into the egg mixture by accident, and wow, it added a kick I didn’t expect. If you’re feeling adventurous, consider giving sweet pickles a try for a tangy twist.
And let’s be real—who doesn’t love a little bacon dust? Just crumble some bacon over the fried pickles for a gourmet touch.
You’ll impress your friends and probably end up craving these all the time. Seriously, who wouldn’t want that?
How to Serve?
Serving crispy fried pickles is almost as important as making them, because let’s be real, the presentation matters.
I like to arrange them on a fun platter, looking all golden and crunchy, and add little bowls of dipping sauce—ranch is my go-to, but spicy mayo has its moments too.
You can even sprinkle some fresh herbs on top for that gourmet touch.
If you’re feeling fancy, why not add a side of fresh veggies for crunch? Trust me, your guests will love the contrast.
And don’t forget to serve them warm; that’s key!
Everyone loves that crispy bite right outta the fryer.
What’s more inviting than a shared platter of delicious pickles? I dare you not to dive right in.
Storage & Reheating Guide
After whipping up a batch of crispy fried pickles, you might find yourself wondering what to do with the leftovers—if there are any!
First, let them cool completely, then pop ’em in an airtight container; they’ll stay fresh for about 2-3 days in the fridge, though I wish they’d last longer. Remember that using airtight food storage solutions can significantly extend the freshness of your snacks.
When hunger strikes, I typically reheat them in the oven for that crispy texture—just 10-15 minutes at 375°F works wonders.
Microwaving? Well, it’s an option, but they can get soggy, and we definitely don’t want that.
If you’re anything like me, those little guys might disappear before you even get a chance to reheat them, so guard those leftovers closely!
Final Thoughts
While I’m not one to over-exaggerate, there’s something simply magical about crispy fried pickles. Seriously, they’re addictive.
Imagine this: a crunchy bite that gives way to a tangy, zesty pickle, all wrapped in a crispy coating—it’s a party for your taste buds.
I’ve made these so many times that I’ve lost count, and guess what? They always disappear faster than I can fry them. If you’ve never tried them, what’re you waiting for?
And if you’re anything like me, you’ll definitely want to dip them in ranch or spicy mayo—don’t skimp.
Remember, learning to perfect the frying technique is half the fun.


