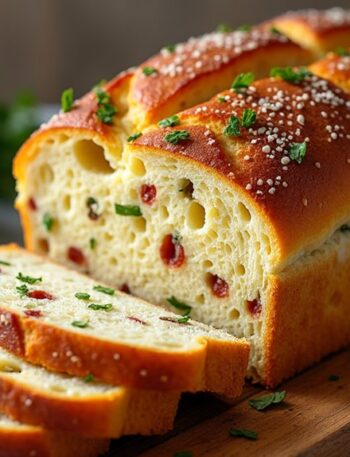
Let me tell you, there’s something about curry bread that feels like a warm hug on a chilly day. It’s got that crispy outside and a cozy, savory filling that just makes you feel right at home, doesn’t it? I remember the first time I tried making it—let’s just say flour was flying everywhere. If you’re ready to tackle this delight with me, you’ll soon discover how incredibly satisfying it is to create your own!
Why You’ll Love This Recipe
You might think that making curry bread is complicated, but trust me, it’s easier than you’d expect.
I remember my first attempt; I was scared but excited. The smell of the savory filling wafting through my kitchen was like a warm hug.
Just imagine biting into a golden, crispy bun filled with delicious curry—pure bliss, right?
This recipe’s got the perfect balance of flavors and textures, from the fluffy dough to the crunchy panko coating. Plus, you can use whatever filling you love or have on hand—talk about flexibility.
Seriously, you’ll impress your friends and family without breaking a sweat.
Equipment List
While the thought of gathering all the equipment for making curry bread might seem intimidating, rest assured it’s simpler than it sounds.
First, you’ll need mixing bowls—trust me, I’ve spilled too many ingredients to keep them all in one. A rolling pin is a must for flattening the dough; I’ve used a wine bottle before, but let’s not talk about that.
You’ll want parchment paper to keep things neat, and don’t forget a frying pan for that glorious deep-frying action. A spatula will rescue your golden-brown creations, and tongs? Essential for not burning your fingers.
Finally, grab a thermometer to verify your oil’s just right. Choosing the right fryer can ensure perfect results every time. Who knew making curry bread could feel so professional? Can’t wait to plunge in!
Our Ingredients
Making curry bread is a delicious adventure that combines rich flavors with a crispy exterior. Whether you’re a seasoned cook or just dipping your toes into the world of frying, gathering your ingredients is the fun part!
Plus, there’s just something so satisfying about having everything ready to go, like preparing for a small culinary mission. Let’s take a look at what you’ll need for this tasty treat.
Ingredients:
- For the Dough:
- 2 cups bread flour
- 1 tablespoon sugar
- 1 teaspoon salt
- 2 tablespoons vegetable oil
- 3/4 cup lukewarm whole milk
- 1 tablespoon instant yeast
- For the Filling:
- 1 cup ground beef or minced chicken
- 1 onion, chopped
- 2 garlic cloves, minced
- 1 carrot, diced
- 1 potato, diced
- 2-3 curry roux blocks (adjust for spice preference)
- 1 cup water
- Salt to taste
- For Breading:
- 1 cup panko breadcrumbs
- 1 egg, beaten
- Vegetable oil for frying
When it comes to ingredients, there are a few things to take into account.
First, the type of curry roux you choose can really elevate the flavors. Spicy, mild, or a blend—pick one that tickles your taste buds.
Also, using fresh vegetables makes a noticeable difference. Who knew that cutting up a real potato instead of reaching for those frozen ones could bring so much joy?
Remember to keep your oil at the right temperature; too hot and you’ll get a burnt shell and raw filling. Too cool and, well… let’s just say no one wants soggy curry bread, right?
Trust me, I’ve learned the hard way a time or two. So gather your goodies and get ready for a delightful cooking experience!
Step-by-Step Instructions

Making curry bread isn’t just cooking; it’s an experience! With its crispy outer shell and warm, curry-filled center, you’ll be delighted by the magical transformation that happens in your kitchen. So, let’s roll up our sleeves and embark on these step-by-step instructions. Stick with me, and we’ll navigate this culinary adventure together.
Step-by-Step Instructions:
1. Make the Dough:
Start by mixing 2 cups of bread flour**, 1 tablespoon of **sugar**, 1 teaspoon of salt, and 1 tablespoon of instant yeast** in a large bowl.
Here’s a little secret: make sure your flour is nice and airy, so your dough rises beautifully. Once mixed, stir in 2 tablespoons of vegetable oil** and 3/4 cup of lukewarm whole milk** until it forms a sticky dough. Don’t worry if it feels a bit tacky—that’s a good thing!
2. Knead the Dough:
Transfer the dough to a lightly floured surface and knead it for about 5–7 minutes. You want the dough to become smooth and elastic—think about how satisfying it feels when you poke it, leaving a little indentation.
Once it looks like a lovely little ball, place it in a greased bowl and cover it with a clean cloth. Let it rise in a warm spot until it doubles in size, which should take around 1 hour.
3. Prepare the Curry Filling:
While the dough is rising, let’s get to the good stuff—the filling! In a skillet over medium heat, sauté 1 cup of ground beef or minced chicken**, 1 chopped onion, and 2 minced garlic cloves until the meat is cooked through and the onion turns translucent, about 4–5 minutes**.
Then, add 1 diced carrot**** and 1 diced potato** to the mix. After they’ve softened a bit (around 5 minutes), stir in 2–3 **curry roux blocks** and 1 cup of water. Season with salt to taste. Let that simmer until thickened, about 10 minutes**. It should smell amazing!
4. Shape the Curry Bread:
Once your dough has risen, punch it down like it owes you money, then divide it into 8 equal pieces. Flatten each piece into a circle (about 4 inches wide) on a floured surface.
Spoon a generous amount of the cooled curry filling onto the center of each circle, then fold the edges together, pinching them tightly to seal. No one wants a leak during frying, right?
5. Prepare for Frying:
Grab 1 beaten egg in one bowl and 1 cup of panko breadcrumbs**** in another. Dip each filled bun into the egg, allowing the excess to drip off, then coat thoroughly with the panko. This creates that golden, crunchy exterior.
6. Fry the Curry Buns:
Heat up vegetable oil in a deep fryer or heavy pan to 320°F (160°C). Carefully add a few buns to the oil, frying them for about 2 minutes per side or until they’re golden brown.
Trust your eyes—golden is good here. Once fried, use a slotted spoon to remove them and drain on paper towels.
7. Serve Warm:
Allow the buns to cool slightly, then serve with your favorite dipping sauce or just on their own.
And there you have it! Your homemade curry bread is ready to enjoy, filling your home with an irresistible aroma. Take a moment to relish your accomplishment.
After all, you’re now the proud creator of this crispy, flavorful delight—better than any takeout you could order! Plus, having the right seafood cooking equipment can elevate your culinary adventures even further! And who knows, this might just become your new favorite dish to make at home.
Tips & Variations
If you’re looking to jazz up your curry bread experience, I’ve got some tips and variations that might just tickle your taste buds.
First off, consider mixing different meats or even going vegetarian by adding lentils and veggies. And trust me, if you want crispy perfection, stick with a firm, thick curry filling; soggy buns aren’t my favorite.
Oh, and don’t skimp on sealing those edges tightly—no one wants a messy explosion while frying.
You can even experiment with spices—maybe throw in some heat with chili powder or mix in some herbs for a fresh twist.
Finally, if you’re feeling adventurous, try a sweet potato filling. Who knew curry bread could be this versatile?
How to Serve?
While enjoying a delicious warm curry bread, you might find yourself wondering just how to present these little delights. Honestly, I like to keep it simple. A big, inviting platter makes everything feel special.
Lay out a few curry breads, maybe pair them with some dipping sauces for a little extra flair—think a mild ketchup or a zesty yogurt dip. If I’m feeling fancy, I sprinkle some fresh herbs on top.
But you know what? At the end of the day, it’s all about comfort. I sometimes serve them right in the basket I fried them in, adding a touch of rustic charm.
And trust me, your friends will appreciate that no-fuss vibe while they dig in.
Storage & Reheating Guide
Even though you might find yourself devouring every last bit of curry bread in one sitting, knowing how to store some leftovers can come in handy.
If you’ve got any, let them cool completely first. Then, wrap each piece tightly in plastic wrap or pop ‘em in an airtight container. They’ll keep in the fridge for about three days, or if you’re feeling adventurous, freeze them for up to a month. Using airtight food storage solutions can further enhance the longevity of your leftovers.
Reheating is simple, too—just pop them in the oven at 350°F (175°C) for about 10-15 minutes to regain that lovely crunch.
Microwave? Sure, but you might sacrifice some crunchiness. Honestly, who wants soggy curry bread? I know I don’t. So, choose wisely and enjoy every bite.
Final Thoughts
Making curry bread can be one of those cooking adventures that fills your kitchen with warm, savory smells, reminding you of comforting home-cooked meals.
Honestly, there’s something so satisfying about biting into a crispy, golden bun packed with flavorful curry. You might find that the process is a bit messy—my kitchen often looks like a war zone—but it’s all worth it when you serve these up. Just imagine your friends and family diving in.
Who wouldn’t love that? And hey, if you don’t master it on your first try, don’t sweat it. That’s how we learn, right?

