I’ve got this ultimate cheesy Texas toast recipe that’s just calling your name, especially if you’re a comfort food fanatic like me. Imagine this: thick slices of bread, gooey cheeses melting together, and that garlic aroma wafting through your kitchen. It’s a game changer. I often whip this up when I’m craving something warm and satisfying, and trust me, it never disappoints. Want to find out how you can make it too? Let’s explore the details.
Why You’ll Love This Recipe
If you’ve ever found yourself craving something delicious and cheesy, then let me tell you, this Cheesy Texas Toast recipe is totally going to hit the spot. Seriously, it’s an instant classic. You’ve got that thick, golden bread serving as a cozy base, smothered in a dreamy mix of creamy cheeses and zesty garlic. What’s not to love? You can whip it up for a snack, side dish, or even a midnight munchie—believe me, I’ve done it. Plus, it’s quick and easy, no culinary degree required. Just mix, spread, and bake. I’ve even accidentally burned a few bites, but hey, that’s part of the fun, right? You’re gonna want to keep this recipe in your back pocket for sure.
Equipment List
When you’re diving into the Ultimate Cheesy Texas Toast recipe, there’s really only a handful of key tools you need to bring this melty masterpiece to life.
First up is a baking sheet. Trust me, you won’t want to deal with a gooey mess on your oven floor. Line it with parchment paper for easy cleanup.
Then, grab a mixing bowl—just a regular one will do. You’ll need it for that luscious cheese spread.
Next, a basting brush makes slathering on that garlic butter a breeze.
And don’t forget your trusty spatula; it helps flip those slices if you’re feeling fancy.
Oh, and an oven, because, well, that’s kind of essential.
Got it all? Perfect! Let’s toast!
Our Ingredients
When it comes to making the Ultimate Cheesy Texas Toast, the magic truly happens with the ingredients. Now, don’t be intimidated by that list; this is all about combining some delicious staples that will elevate your toast game to a whole new level.
Think gooey cheese, buttery goodness, and a bit of garlic magic. Who wouldn’t want to plunge into a crispy slice of this cheesy delight? So, let’s get to the good stuff: what do we need to get started?
Ingredients:
- 8 slices of Texas Toast
- 3/4 cup real mayonnaise
- 4 cups shredded Cheddar Jack cheese
- 1/2 cup grated Parmesan cheese
- 1/4 cup parsley (freshly chopped is best!)
- 1 teaspoon seasoned salt
- 1/2 teaspoon freshly ground black pepper
- 1/2 cup salted butter
- 1 tablespoon garlic paste
Now, you might be wondering about some of these ingredients. First off, let’s talk cheese. A blend of Cheddar Jack gives a nice, melty texture and rich flavor, while the Parmesan adds a delightful sharpness that’s just irresistible.
And if you can’t find Texas Toast, don’t fret—thick-cut bread will work too, but we all know Texas Toast is the MVP here. Oh, and if you love garlic, feel free to toss in a bit more garlic paste. I mean, why not? Just imagine the aroma wafting through your home.
You’ll have everyone’s mouths watering, even if your kitchen looks like a cheesy disaster zone afterwards. Just embrace the chaos—it’ll be worth it when you sink your teeth into that comforting slice of cheesy goodness.
Step-by-Step Instructions
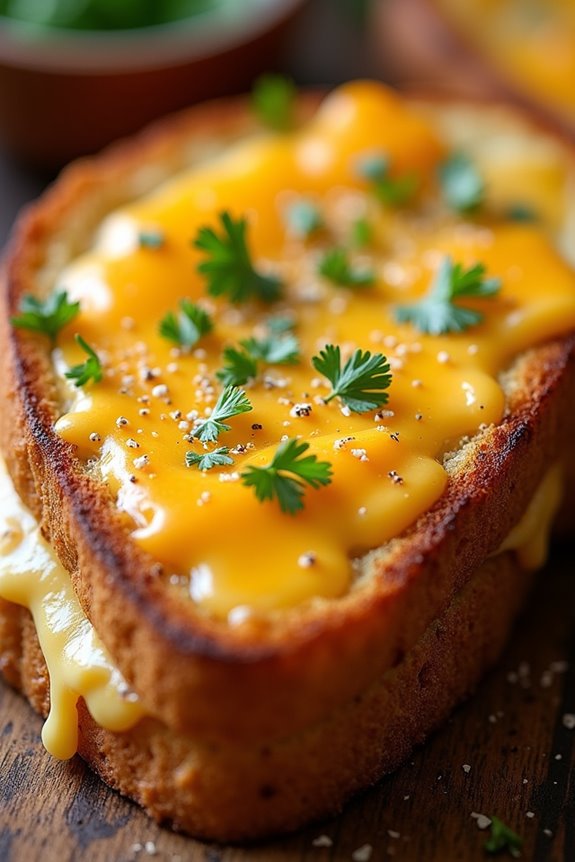
Making the Ultimate Cheesy Texas Toast is a simple and satisfying experience. You’ll be amazed at how easily these ingredients come together to create a gooey, cheesy masterpiece that will have everyone in the room flocking to the kitchen. So, let’s roll up our sleeves and plunge into the steps that will get you to cheesy toast nirvana.
Step-by-Step Instructions
1. Preheat the oven to 350°F. This is an important step because you want the oven all nice and hot when your cheesy delight goes in. While it’s heating up, line a baking sheet with parchment paper so your toast doesn’t stick.
(Trust me; nobody wants a cheese catastrophe stuck to the pan.)
2. Mix up the cheesy goodness: In a large mixing bowl, combine 3/4 cup real mayonnaise**, 4 cups **shredded Cheddar Jack cheese**, 1/2 cup **grated Parmesan cheese**, 1/4 cup freshly chopped parsley, 1 teaspoon seasoned salt, and 1/2 teaspoon freshly ground black pepper**.
Stir until everything is well mixed. (You’re aiming for a creamy, cheesy blend that will spread like a dream.)
3. Melt the butter: In a small saucepan, melt 1/2 cup salted butter over low heat and add in 1 tablespoon of garlic paste****.
Allow the butter and garlic to mingle for a minute so the flavors infuse. Brush this buttery goodness on both sides of each slice of Texas Toast—don’t be shy, use it all.
(The more butter, the better, right?)
4. Spread on the cheese mixture**: Take your lovely, buttered Texas Toast slices** and spread an even layer of the cheesy mixture on one side of each slice.
Make sure you cover every inch, as this is where the magic lies. (Just think about that ooey-gooey cheese melting in your mouth—divine.)
5. Bake to golden perfection: Place the toast on your prepared baking sheet and pop it into the preheated oven.
Bake for about 10 to 12 minutes, until the edges are toasted, and you can see that cheese bubbling and melting. If you’re feeling fancy, throw it under the broiler for an additional minute or two for that extra crisp.
(But, keep an eye out! Nobody wants burnt toast. That’s like showing up at the party with a sad, blackened disc.)
And there you go! In just a handful of simple steps, you’ve created a fantastically cheesy treat that’s sure to impress.
Just imagine the aroma filling your space and the satisfied smiles when everyone takes their first bite.
You’ve earned your culinary stripes today, my friend. Premium cookware sets are a great addition for creating delicious meals, which enhances your cooking experience. Enjoy your cheesy toast journey!
Tips & Variations
While I’ve just laid out the ultimate cheesy base for your Texas Toast, there’s always room to get a little adventurous.
Want to kick it up a notch? Try adding cooked bacon bits or jalapeños for a bit of heat. Ever thought about using different cheeses? Swap out the Cheddar Jack for pepper jack or even gouda if you’re feeling fancy.
You might even slather some pesto on the bread before adding the cheese mixture; it’s a game changer.
And hey, if you’d rather skip the oven, a toaster oven works like a charm. Just keep an eye on it, so it doesn’t pull a disappearing act.
How to Serve?
After whipping up that delicious cheesy Texas Toast, it’s time to think about how to serve it. First off, I love to cut each slice diagonally, which makes it feel fancy, even if it’s just toast.
Next, I plate it alongside a hearty bowl of soup or a crisp salad—those flavors just dance together. Ever tried it with marinara for dipping? Trust me, it’s a game-changer.
I usually garnish with a sprinkle of extra parsley for that pop of color, plus it makes me look like I know what I’m doing. And hey, if you’re feeling adventurous, try adding jalapeños for a spicy twist. Perfect for impressing friends or just indulging myself after a long day.
Storage & Reheating Guide
If you want to keep your cheesy Texas Toast tasting fresh long after it’s baked, you’ve got to nail the storage game. First, let it cool completely—trust me, soggy toast is a sad toast.
Once cool, stack the slices in an airtight container, separating layers with parchment paper, and pop it in the fridge. It’ll last about 3–4 days, but let’s be honest, who can resist it that long?
When you’re ready to enjoy it again, preheat your oven to 350°F. Arrange the slices on a baking sheet and reheat for around 8-10 minutes until it’s toasty and delightful once more.
I mean, it’s not like I haven’t eaten it straight from the fridge… but don’t judge me. Plus, a premium salad spinner can help you ensure other ingredients for your toast are fresh and dry before assembling.
Final Thoughts
Cheesy Texas Toast is one of those magical dishes that just brings everyone together, doesn’t it? I mean, who doesn’t love sinking their teeth into a crispy, cheesy slice?
Every bite feels like a warm hug, perfect for gatherings or cozy nights in. When I whip up a batch, the aroma fills the house, instantly making it feel like home. Plus, it’s so simple—just slather on the cheesy goodness and let the oven work its magic.
Honestly, I could eat this with anything, or even on its own. So, the next time you want to impress your friends or family, remember this recipe. You won’t regret it.
And hey, if you burn a slice or two, I won’t tell anyone.


