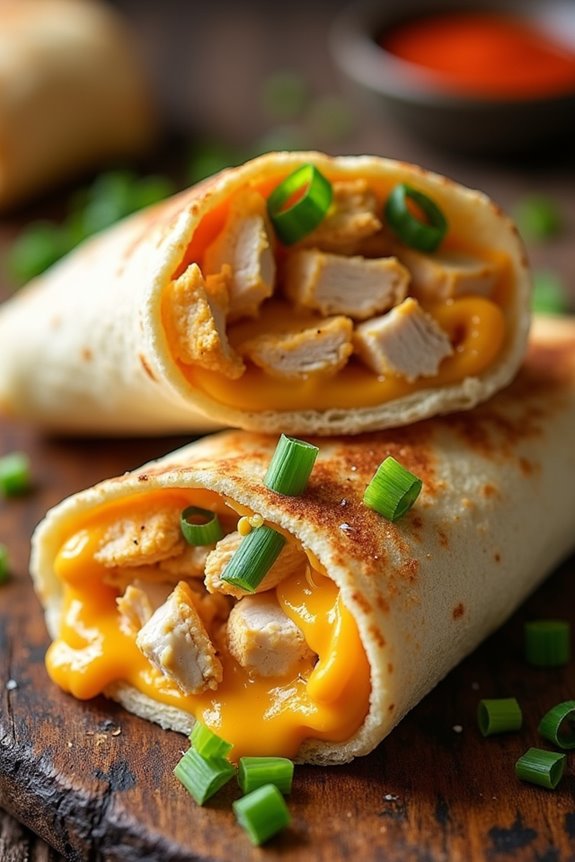
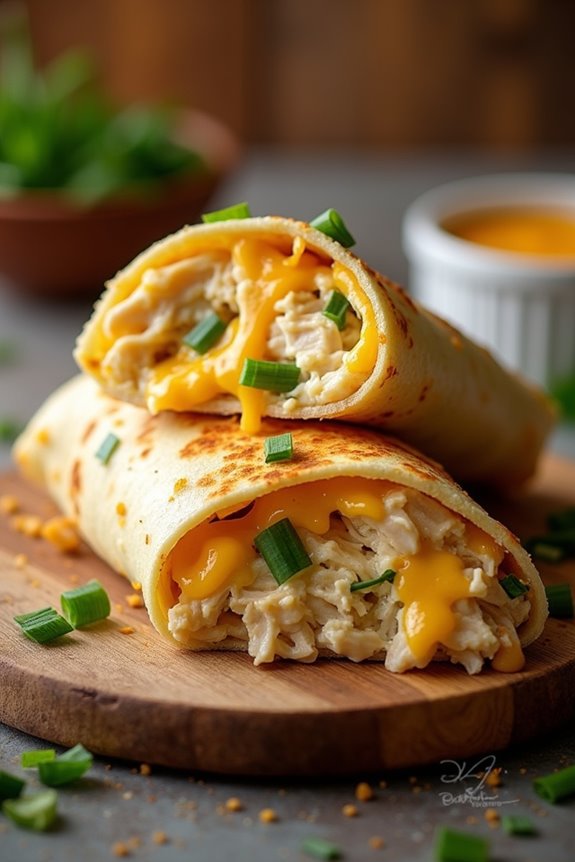
I’ve gotta say, there’s something magical about cheesy garlic chicken wraps that just hits the spot. Imagine this: tender chicken, melty cheese, and a burst of garlic flavor, all snugly wrapped in a warm tortilla. It’s like a hug for your taste buds. My family can’t get enough of these, and trust me, they’re super simple to whip up, even for someone who occasionally burns toast. Want to know the best part? Let’s dig into what you’ll need to get started.
Why You’ll Love This Recipe
If you’re looking for a meal that’s as comforting as a warm hug, then let me tell you about these cheesy garlic chicken wraps.
They’re the perfect combination of gooey cheese and tender chicken, all wrapped up in a soft tortilla. Seriously, who doesn’t love that cheesy goodness?
The best part? They’re super easy to make, so you won’t spend your entire evening in the kitchen. I often whip these up after a long day, and trust me, they disappear fast.
Plus, the flavor from the garlic and hot sauce? It’s just magic.
Whether you’re feeding a crowd or treating yourself, these cheesy garlic chicken wraps always hit the spot.
Get ready for a cozy food experience that’ll make you smile.
Equipment List
Before diving into this delicious cheesy garlic chicken wrap adventure, let’s guarantee we’ve got all the right tools at our disposal. You’re gonna need a skillet, preferably non-stick—I still remember the time I tried using a regular pan, and it ended up a cheesy disaster. A spatula’s essential too, to flip those wraps without losing half of their goodness. Oh, and don’t forget a mixing bowl for that savory chicken blend. You’ll also want a sharp knife for slicing your wraps, plus some cutting boards because, let’s face it, garlic and chicken can get messy. Finally, grab your trusty measuring spoons; guessing isn’t my strong suit, and I suspect it mightn’t be yours either. Did you know that a Dutch oven can also be a fantastic tool for cooking chicken dishes? Ready to roll?
Our Ingredients
Alright, let’s get down to the delicious details of making those Cheesy Garlic Chicken Wraps. We’re talking about a super simple recipe that’s just packed with flavor! These wraps are perfect for a quick lunch or a cozy dinner when you want something tasty but not too complicated. Trust me, with just the right ingredients, you’ll be on your way to creating something scrumptious and satisfying.
Ingredients:
- 2 large tortillas
- 7 oz cooked chopped chicken
- 2 garlic cloves, minced
- 2 tbsp light mayonnaise
- 1 tbsp light Greek yogurt
- 2 tsp hot sauce
- ¼ tsp salt
- 3 oz grated cheese (cheddar blend)
- 1 green onion, chopped
- Olive oil spray
Now, here are a couple of thoughts on our ingredients: First off, if you’re in a pinch for time, rotisserie chicken can be your best friend. It’s already cooked, saves you loads of time, and let’s face it, we all have those days when the thought of cooking feels a bit intimidating. Also, feel free to play around with the cheese; if you have a special blend you adore, go ahead and throw it in. The same goes for the hot sauce—add more or less, depending on your spice tolerance; after all, it’s your wrap. Just imagine all that gooey cheese melding with the chicken and those zesty garlic notes; it’s gonna be great!
Step-by-Step Instructions
Making Cheesy Garlic Chicken Wraps is a breeze—it’s basically a happy combination of mixing, spreading, and toasting! In just a few steps, you’ll turn your kitchen into a cozy eatery, serving up scrumptious wraps that are sure to impress. Let’s plunge into how to whip them up in no time.
Step-by-Step Instructions:
- Mix the Chicken Mixture: In a medium bowl, combine 7 oz of cooked chopped chicken, 2 minced garlic cloves, 2 tbsp of light mayonnaise, 1 tbsp of light Greek yogurt, 2 tsp of hot sauce, and ¼ tsp of salt. Stir until everything is well blended and creamy. This is the heart of your wrap—feel free to taste it and adjust the spices if you need more zing!
- Prepare Your Tortillas: Grab 2 large tortillas and lay one flat on a clean surface. Sprinkle 2 tbsp of grated cheese (I recommend a cheddar blend for that melty goodness) across the lower third of the tortilla. You want it to be a comforting layer that will hold everything together.
- Add the Chicken Filling: Now, take about ⅔ cup of your chicken mixture and spread it evenly over the cheese you just laid down. Don’t be shy here; you want a generous helping. Next, sprinkle 1 tbsp of cheese on top for that extra cheesy pull, and add some chopped green onion for a fresh crunch.
- Roll it Up: Here comes the fun part! Fold the sides of the tortilla in towards the center, then roll it up tightly from the bottom. Imagine you’re tucking everything in for a cozy nap. Make sure it’s snug but not overstuffed—no one likes a burst wrap, right?
- Cook Your Wraps: Heat up a pan over medium heat and spray it lightly with olive oil. Place the wraps seam-side down in the pan and cook for about 3-4 minutes per side, covered. This helps the cheese melt while giving the wrap a nice golden brown color. Flip with care; you don’t want to spill out all that delicious filling in the process.
- Slice and Serve: Once your wraps are golden and crispy, remove them from the pan and let them sit for a minute (if you can resist the temptation). Slice them in half and serve warm. Picture yourself enjoying that first, melty bite—pure bliss.
These wraps are so simple yet so satisfying, they’re bound to become a staple in your recipe collection. And remember, don’t take it too seriously—cooking should be enjoyable, and if you accidentally overstuff your wrap and it explodes, just embrace the chaos. After all, it still tastes delicious! Additionally, using premium kitchen cookware can enhance your cooking experience and help achieve the perfect texture for your wraps.
Tips & Variations
Cooking these wraps is just the beginning; there’s a whole world of tips and variations waiting to spice things up.
For a quick dinner, rotisserie chicken is your best friend—it shaves off cooking time like a pro. Want to kick it up a notch? Swap in your favorite cheese or toss in a handful of spinach for some greens.
I’ve tried adding bacon, and let me tell you, it’s a game-changer. If you’re feeling adventurous, drizzle some ranch dressing or barbecue sauce inside before rolling.
And, here’s a little secret: keeping the wraps covered in the pan helps them heat evenly. Trust me, nobody likes a cold center.
These wraps are versatile, so don’t be afraid to get creative.
How to Serve?
When it comes to serving these cheesy garlic chicken wraps, presentation really makes a difference. I like to slice them in half on a diagonal—those beautiful, melty cheese layers pop right out, making each bite irresistible.
Serving them on a colorful platter adds a nice touch. You might consider garnishing with a sprinkle of chopped green onions or fresh parsley for that extra fancy flair.
Don’t forget about dipping sauces; I usually whip up some extra hot sauce or a creamy ranch to kick things up a notch.
Trust me, folks are gonna start asking for seconds before they even finish their first. And, let’s be honest, who can blame them? These wraps are a total crowd-pleaser.
Storage & Reheating Guide
So, you’ve whipped up a batch of cheesy garlic chicken wraps that are now the star of your kitchen.
Now, let’s talk storage. If you’ve got leftovers—lucky you—wrap them in foil or pop them in an airtight container. They’ll chill in the fridge for about 3 days.
Freezing? Sure, they can handle it! Just make sure to wrap each one tightly in plastic wrap before tossing them in a freezer bag. For the best results, consider using soup freezer containers to keep your wraps fresh and easy to organize.
When you’re ready to enjoy, thaw ’em in the fridge overnight. For reheating, I recommend the skillet method. It adds that delightful crispiness back. Just heat over medium for a few minutes, flipping until golden—and voilà! You’re ready to dig back in without missing a beat.
Final Thoughts
Even though these cheesy garlic chicken wraps are a breeze to make, the satisfaction they bring is anything but simple.
Seriously, you’ll wonder how something so easy can taste so good. I mean, who doesn’t love gooey cheese melting with the punch of garlic, right?
And let’s talk about convenience—using rotisserie chicken saves time and effort. Plus, if you’re like me, you might even be tempted to eat the filling before wrapping them up. Guilty as charged!
These wraps are perfect for a quick dinner or a casual lunch, plus they’re super customizable.