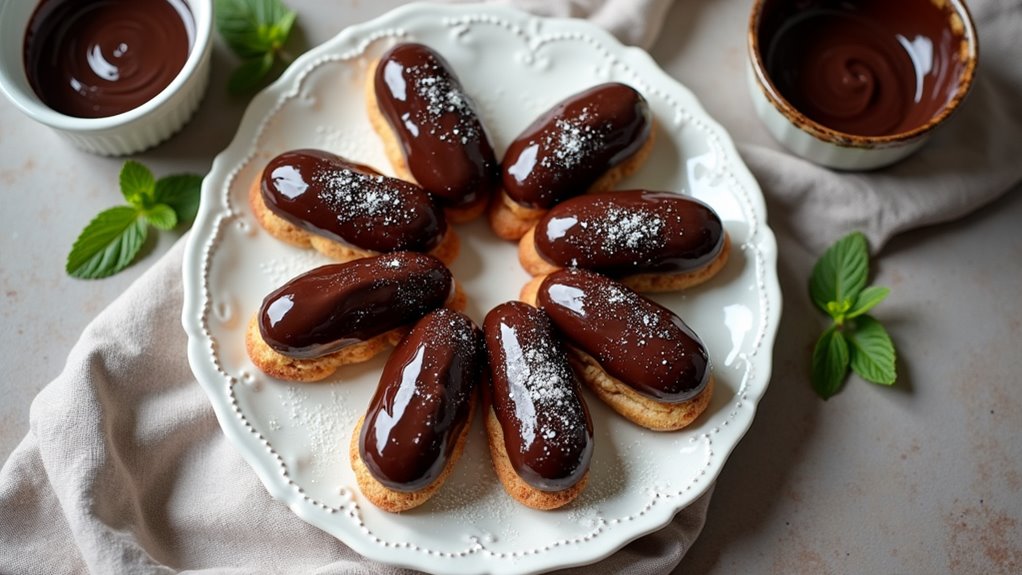
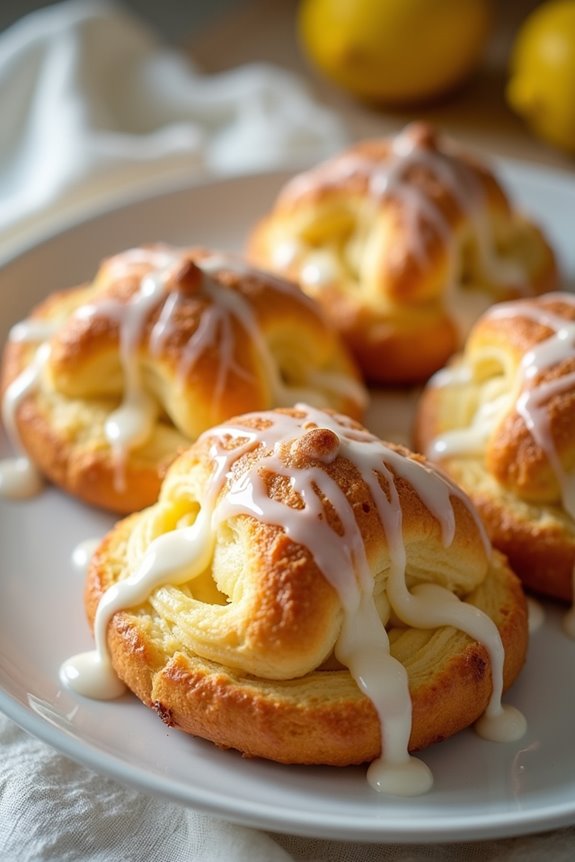
Have you ever faced a situation where you needed a quick yet impressive treat? I know I have, and that’s when these delightful cheese danishes come to the rescue. They’re flaky, creamy, and all-around delicious. Plus, they’re surprisingly simple to make, even for someone like me who once mistook baking powder for flour. If you’re curious about how to whip these up and wow your guests, stick around—I’ve got some tasty tips just for you.
Why You’ll Love This Recipe
When it comes to pastry, I can’t help but think that a good cheese Danish is a little slice of heaven.
Seriously, have you ever tasted one fresh out of the oven? The crispy, flaky layers of puff pastry encase a creamy, sweet cheese filling that just melts in your mouth. It’s like they were made for each other.
Plus, whipping up these cheese Danishes is surprisingly easy. I mean, if I can do it without burning my kitchen down, trust me, you can too.
Just imagine serving these at brunch or as a cozy treat on a rainy day. Who wouldn’t love a warm cheese Danish? They vanish so quickly in my house; I barely get to enjoy one myself.
Equipment List
Making cheese Danishes is a delightful experience, but let’s be real: you can’t just waltz into the kitchen and whip them up without a few basic tools.
First off, you’ll need a good old baking sheet—trust me, nothing fancy. Parchment paper‘s a lifesaver, too; it keeps things mess-free.
I can’t forget a mixing bowl for that creamy filling—you don’t want to create a cheese catastrophe. Oh, and you’ll need a sharp knife or a pizza cutter to slice that puff pastry. A whisk? Absolutely, for that egg wash magic.
Finally, have a cooling rack on hand, so your lovely danishes can chill out. Imagine them puffing up perfectly—it’s a sight to behold, really. To elevate your cheese-making experience, consider using a gourmet cheese making kit, which can introduce you to new flavors and techniques.
Our Ingredients
When it comes to whipping up a batch of cheese Danishes, the star of the show is certainly the ingredients. You may think that it’s just cream cheese and puff pastry, but darling, there’s a bit more nuance involved.
Imagine the wonderful combination of sweet, tangy, and creamy flavors that come together to create that delicious filling. And the aroma wafting through your kitchen as they bake? It’s enough to make your mouth water. For those who might be a bit intimidated in the kitchen, fear not! The ingredient list is pretty straightforward. Let’s jump in, shall we?
Here’s what you’ll need to gather to make those glorious cheese Danishes:
- 1 sheet of puff pastry (thawed)
- 8 oz of softened cream cheese
- ½ cup granulated sugar
- 1 tsp lemon juice
- ¾ tsp vanilla extract
- 1 egg (for egg wash)
- 2 tsp water (for egg wash)
- Powdered sugar and milk (for glaze)
Now that we’ve got our essential players in the mix, let’s chat about a couple of considerations.
You want to guarantee that your cream cheese is really softened—this makes it much easier to blend with the sugar and other flavors. If it’s still a bit too firm, you might end up with lumpy filling, and nobody wants that.
Also, it’s surprising how a dash of lemon juice can bring something special to the table, adding a revitalizing brightness that harmonizes perfectly with the creamy texture.
Finally, a good quality puff pastry makes a difference; trust me, you’ll notice those flaky layers when they come out of the oven, golden and perfect. So grab your ingredients and let’s get to baking!
Step-by-Step Instructions
Let’s get baking those delightful cheese Danishes! It’s a simple process that leads to a treat that’s perfect for breakfast or an afternoon snack. You’ll be amazed at how these ingredients come together to create something so festive and delicious. Follow these easy steps to create your scrumptious Danishes!
1. Preheat Your Oven****: First things first, before you even think about mixing, set that oven to a toasty 375°F (190°C). Preheating is essential; trust me, no one likes a pastry that’s raw in the middle.
2. Prepare the Puff Pastry**: Grab your 1 sheet of thawed puff pastry and lay it out on a clean surface. Use a sharp knife or pizza cutter to cut it into four squares, each measuring about 12×12 inches. Aim for neat squares—it’s just more visually appealing when they bake** up!
3. Make the Cream Cheese Filling**: In a medium bowl, combine 8 oz of softened cream cheese, ½ cup of granulated sugar, 1 tsp lemon juice, and ¾ tsp vanilla extract**. Mix everything together until it’s beautifully smooth and creamy. (Don’t rush this part—nobody wants lumps in their filling.)
4. Assemble the Danishes: Now it’s time to fill those squares. Place 2 tablespoons of your creamy filling in the center of each pastry square. Here’s where the magic happens!
Fold the corners of the squares toward the center, leaving a little peak in the middle. It’s totally okay if some of the filling peeks out; it’s just going to look even tastier when it bakes.
5. Egg Wash Time: Grab your 1 egg and 2 tsp of water for an egg wash. Whisk them together in a small bowl until combined. Use a pastry brush or the back of a spoon to brush this glossy mixture over the folded pastry. This will give your Danishes that lovely golden glow while they bake.
6. Bake the Danishes: Carefully place your assembled pastries on a baking sheet lined with parchment paper (no one wants to scrub burnt pastry off the sheet, right?).
Pop them into the oven and bake for about 20 to 25 minutes, or until they’re golden and puffy. The smell wafting through your kitchen will make you want to dive right in.
7. Glaze It Up: Once your Danishes are out and slightly cooled, it’s time for a little extra flair. In a bowl, mix together powdered sugar with a splash of milk until smooth to create your glaze.
Drizzle this over your still-warm pastries—just a tip: wait a bit before glazing so that the glaze doesn’t melt away into oblivion.
And there you have it, your cheese Danishes are ready to enjoy! Just think about it: flaky puff pastry, creamy filling, and that lovely drizzle of glaze. Does it get any better? Quality baking equipment can make all the difference in your baking outcomes. Share with friends or keep them all to yourself (no judgment here). Happy baking!
Tips & Variations
While cheese Danishes are delicious just as they are, there’s always room for creativity in the kitchen.
For a fun twist, try mixing in some chocolate chips or fresh fruit. I once tossed in blueberries, and I swear they practically sung!
If you’re feeling adventurous, swap out the cream cheese for ricotta. You’ll get a nice, light texture that’s oh-so-tasty.
Don’t forget, letting your Danishes cool before glazing is a game-changer. I learned that the hard way, as my early attempts ended up looking like a sweet puddle of regret.
Always sprinkle a little extra powdered sugar on top—who doesn’t love a tiny bit of magic?
Go ahead, release your inner pastry chef. You got this!
How to Serve?
Serving up your cheese Danishes is where the magic truly happens.
Envision this: a warm, flaky pastry topped with a drizzle of sweet glaze, waiting to impress your guests or maybe just yourself. I like to arrange them on a pretty platter, garnished with a sprinkle of powdered sugar.
If you’re feeling fancy, fresh berries make a vibrant addition! Just imagine the smiles when they catch a whiff of that dreamy aroma.
Whether it’s for brunch or a cozy evening snack, don’t forget a plate and napkins for a tidy grab-and-go experience.
And trust me, if you have leftovers, they’ll disappear faster than my attempts at yoga.
Seriously, these Danishes are effortless showstoppers!
Storage & Reheating Guide
Once those mouthwatering cheese Danishes have made their grand entrance, it’s only natural to wonder how to keep them fresh and tasty for as long as possible.
First, let them cool completely before storage—nobody wants a soggy Danish. Pop them in an airtight container, and they’ll hang around for about two days at room temperature. If you’re feeling super organized, refrigerate them for up to a week.
For reheating, the oven is your best friend. Just 5-10 minutes at 350°F will do the trick and restore that crispy goodness. Remember, reusable glass water bottles can help you stay hydrated while you enjoy your freshly heated treats.
Microwaving might work, but they’ll lose their charm. I’ve learned that the hard way, sadly. So, treat your Danishes right, and they’ll make you happy all over again.
Final Thoughts
As you take a moment to reflect on your cheese Danishes, you might wonder how something so simple can bring such joy.
Seriously, who’d have thought that cream cheese and puff pastry could create such bliss? I mean, I might’ve burned a few danishes in my early attempts, but hey, I learned. It’s all about practice.
You’ll want to savor each bite, perhaps with a cup of coffee or tea.
And let’s be real, they’re perfect for brunch, gatherings, or just a pick-me-up on a Wednesday afternoon.
So don’t hesitate—give this recipe a go. You’ll impress your friends and, more importantly, treat yourself to a little happiness.
Who knew baking could be so rewarding?