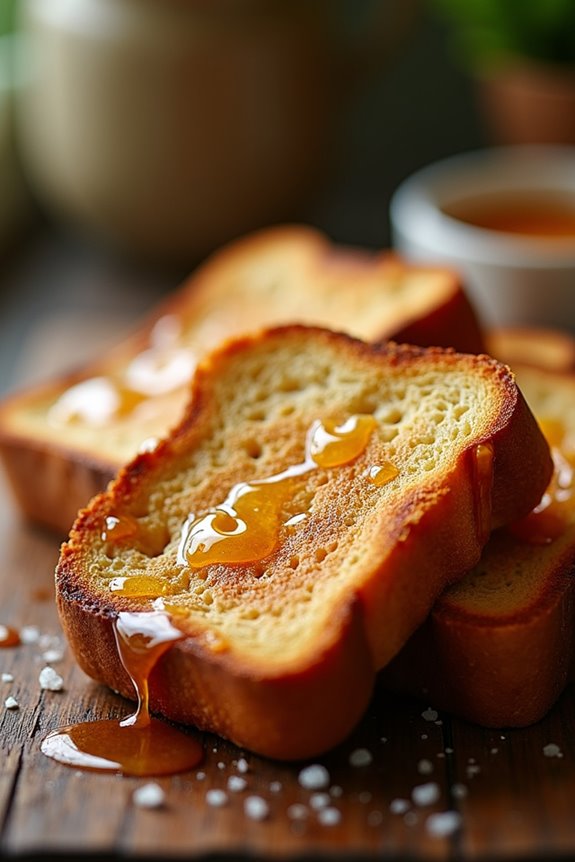
I’ve always had a soft spot for toast, but this Indulgent Caramelized Honey Butter Toast takes it to a whole new level. Just picture it—the buttery, sweet aroma wafting through the house as the bread transforms into something truly magical. It’s an easy treat that feels gourmet without the fuss. Ever wondered what makes a simple slice of bread feel so nostalgic? Stick around, and I’ll spill all the buttery secrets.
Why You’ll Love This Recipe
When you take a bite of this Caramelized Honey Butter Toast, you’re not just tasting a treat; you’re diving into a blissful indulgence that feels like a warm hug on a plate.
Seriously, it’s like the universe conspired to create the perfect breakfast or snack. The way the butter melts in your mouth, followed by the sweet, caramelized crust—it’s pure magic.
And let’s be real—who doesn’t love something that’s easy to make yet feels fancy? You can whip it up on a lazy Saturday morning or impress guests at brunch.
Plus, the aroma wafting through your kitchen? It’ll have everyone wandering in, wondering what masterpiece you’re creating.
Trust me, this caramelized honey butter toast will become your new favorite.
Equipment List
Before diving into this delicious recipe, let’s make sure you’ve got the right tools on hand because, believe me, you don’t want to be scrambling around the kitchen at the last minute.
First things first, you’ll need a baking sheet and some parchment paper—trust me, they’re lifesavers for clean-up. A mixing bowl’s essential for whipping up that heavenly butter mixture.
Don’t forget a spatula or a butter knife to spread it on your bread slices. Also, grab tongs for safely flipping those beauties without creating a butter splatter zone.
Finally, a cooling rack is key for letting them rest. Seriously, if I can manage this setup, anyone can! Using a digital kitchen scale can ensure that your ingredients are measured accurately for the perfect flavor.
Now, let’s get to toast-making magic.
Our Ingredients
When it comes to creating something utterly scrumptious like Caramelized Honey Butter Toast, the right mix of ingredients can turn an ordinary snack into a heavenly treat. I mean, who doesn’t love the smell of baking bread mingling with rich, sweet honey and buttery goodness? It’s a combination that just feels cozy and inviting.
So, let’s gather up the tasty bits you’ll need to whip up this delightful dish. Grab your apron, and let’s take a look at what you’ll need to bring this buttery masterpiece to life.
Here’s your ingredient list:
- Thick slices of bread (shokupan, brioche, or milk bread), crusts removed
- 40g softened butter
- 40g light brown sugar
- 20g honey
- Pinch of salt
Now, let’s chat a bit about those ingredients. Using a thick, hearty bread like shokupan or brioche is where the magic really starts. You want those slices to hold up against that luscious butter mixing and toasting.
Plus, the crusts – yes, we want them gone; we want this toast to be soft and melt-in-your-mouth during every bite. As for the butter, sweet brown sugar, and honey mixture, that’s what’s going to create that beautiful caramelized exterior.
And trust me, a pinch of salt doesn’t just sit in the background; it enhances all the sweet flavors, creating a symphony of taste that will leave you craving more. Just don’t forget to hold onto the tongs; flipping those slices can get messy if you’re not careful!
Now that we’re prepped and ready, let’s get to the step-by-step instructions in the next section!
Step-by-Step Instructions
Making Caramelized Honey Butter Toast is a delightful adventure that fills your kitchen with enchanting aromas and promises a sweet treat. The process is quick and easy—just follow these simple steps to bring this buttery masterpiece to life.
- Preheat your oven to 180°C (350°F). This is crucial because you want your toast to bake evenly and develop that beautiful caramelization.
- Prepare the butter mixture by combining 40g of softened butter, 40g of light brown sugar, 20g of honey, and a pinch of salt in a mixing bowl. Stir everything together until it’s smooth and creamy. A whisk or a fork works just fine, so don’t stress about fancy tools.
- Spread the mixture generously on all sides of your thick slices of bread (around 1.5–2 inches thick is ideal). Make sure every nook and cranny is coated; you want that buttery goodness everywhere. The more coverage, the better the caramelization.
- Arrange the bread slices on a parchment-lined baking tray, leaving space between each slice. This allows hot air to circulate, helping them to toast evenly. Just don’t cram them together like a crowded elevator.
- Bake in the preheated oven for about 10-12 minutes, or until the undersides turn golden brown. This is where the magic happens, as those sugars and butters start to transform into a caramelized delight.
- Carefully flip each slice to expose the other side, being cautious not to lose any of that delicious topping. Bake for another 10-12 minutes until everything is beautifully caramelized and you can practically hear them calling your name.
- Let the toast cool on a wire rack for about 10 minutes before diving in. This cooling phase is essential; it allows the caramel to set, preventing you from burning your tongue on melting sweetness. Trust me, you’ll want to wait.
And there you have it! A warm, buttery batch of Caramelized Honey Butter Toast that’s just waiting to be enjoyed. Baking this delicious toast can be even more rewarding with the right tools, especially if you invest in high end baking equipment.
Don’t forget to invite some friends over, or you might eat it all yourself—which I definitely wouldn’t judge you for; it’s that good.
Enjoy the simple pleasure of this indulgent treat, and feel free to get creative with toppings or variations once you’ve mastered the basics. Happy toasting!
Tips & Variations
While I’m all about sticking to the classic recipe for Caramelized Honey Butter Toast, there’s a whole world of tips and variations just waiting to be explored.
Want a little spice? Sprinkle in some ground cinnamon for a cozy twist.
Or try using sourdough or whole grain bread for an earthy flavor.
If you’re feeling adventurous, why not add a pinch of sea salt on top right before serving? Trust me, it makes a difference.
I may have burned a slice or two in my experimenting, but hey, that’s how the best recipes are born, right?
And let’s be real, serving it with ice cream is a game-changer. It feels indulgent, and who doesn’t want that?
How to Serve?
Serving up Caramelized Honey Butter Toast is where the magic really happens. When you pull those golden slices from the oven, you’ll want to let them cool just a bit. Trust me, nobody enjoys a molten caramel surprise on their tongue, right?
Once they’re cool enough to handle, pile them on a cute plate. You can sprinkle a bit of cinnamon on top for flair.
But here’s a fun idea: serve them with a scoop of vanilla ice cream for that indulgent touch.
Imagine this—drizzling extra honey or even some fresh fruit on the side. You’ve got a toast that even your brunch friends will remember.
Seriously though, who can resist this sweet goodness? It’s simply irresistible.
Storage & Reheating Guide
Even though we all wish we could devour every slice of Caramelized Honey Butter Toast right out of the oven, life happens, and sometimes we need to save some for later.
I mean, how do we not scarf down a whole loaf? To store your toast, just let it cool completely, then place it in an airtight container.
I like to keep mine in the fridge for up to 3 days. When you’re ready to enjoy it again, pop it in a toaster or a preheated oven at 180°C (350°F) for about 5-7 minutes.
This brings back that delightful crispiness. Trust me, it’s almost as good as fresh—almost. Just don’t forget to keep a close eye; nobody likes burnt toast. Remember, using airtight food storage solutions helps maintain the quality and freshness of your toast when stored properly.
Final Thoughts
As we wrap up this recipe journey, I can’t help but think about how these Caramelized Honey Butter Toast slices can turn an ordinary day into something special.
Seriously, who knew that butter and sugar could create such magic? Imagine this: You’re cozy on the couch, and you bite into that warm, gooey toast. It’s like a hug from your grandma but way sweeter.
Trust me, even if you burn the edges—uh, not that I’d ever do that—it’s still delicious.
And hey, feel free to get creative with toppings. Ice cream, anyone?
So whether it’s breakfast or dessert, treat yourself; you deserve it.
Don’t overthink it, just enjoy each indulgent bite. Your taste buds will thank you.