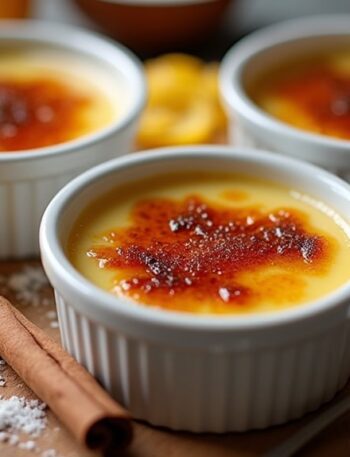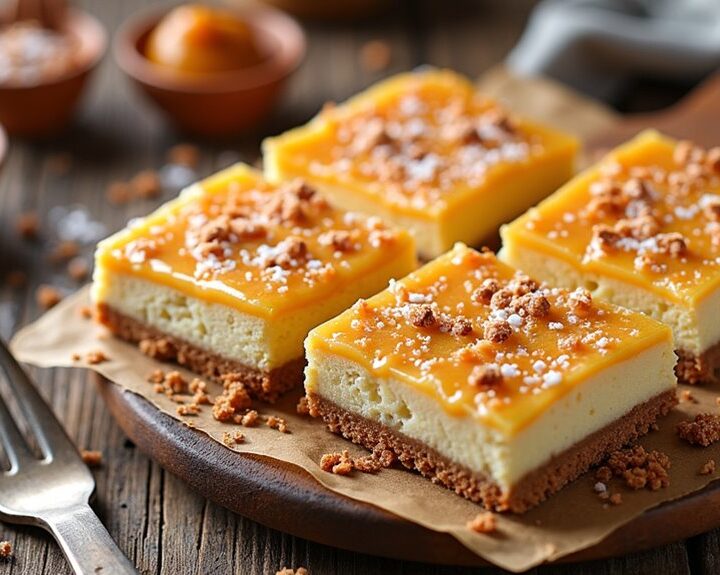
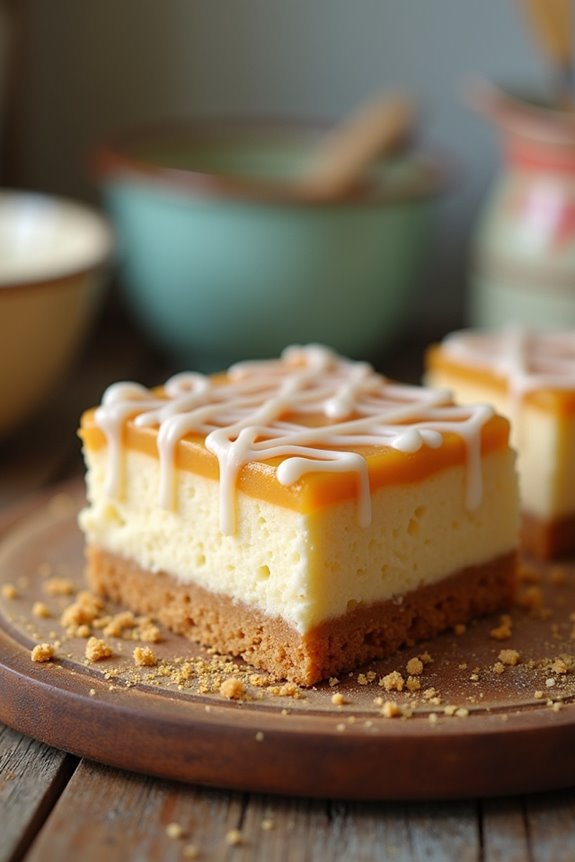
I’ve got a treat that’ll make you rethink dessert – indulgent dulce de leche cheesecake bars. Seriously, who can resist that creamy goodness and caramel sweetness, right? They’re super easy to whip up, and trust me, that golden graham cracker crust? It’s a game changer. Plus, adding fresh blueberries makes it look fancy and taste divine. Curious about how to get that perfect drizzle of dulce de leche on top? Let’s explore the recipe and make your taste buds dance.
Why You’ll Love This Recipe
Why is this Blueberry Cream Cheese Pastry Braid going to become your new favorite dessert? Well, let me tell you, this sweet masterpiece combines the tartness of blueberries and the creamy richness of cream cheese, all wrapped up in golden, flaky pastry.
Imagine pulling a slice apart, the vanilla icing drizzling down like a sweet hug. Seriously, who can resist that? It’s dumb-proof—I mean, even I could do it, and I’ve burned toast more times than I can count.
Plus, it’s perfect for brunch, desserts, or, let’s be real, a midnight snack. You’ll feel like a pro with this blueberry cream cheese pastry braid with vanilla icing on your table. Trust me, your taste buds will thank you.
Equipment List
Gathering the right equipment is key to making your Blueberry Cream Cheese Pastry Braid a success. First off, you’ll need a mixing bowl—something sturdy, because we’re doing some serious blending.
A whisk or hand mixer will help whip that cream cheese into creamy perfection. Don’t forget your baking sheet, lined with parchment paper; trust me, it saves you from a sticky mess. A sharp knife is essential for those diagonal cuts, and a spatula? It’s like having a trusty sidekick in the kitchen.
If you’ve got measuring cups and spoons handy, you’re golden. Oh, and an oven thermometer? Just to make sure that baby is baking at the right temperature. Simple tools can make or break this recipe, so let’s get cooking! Remember, having the right Wooden Spoon Set can also make a difference in achieving that perfect batter consistency.
Our Ingredients
When it comes to making the ultimate treat that balances sweet and creamy, the ingredients for these Dulce De Leche Cheesecake Bars are where the magic begins. Think of layering rich flavors in each bite, where every component plays an essential role. So, grab your apron, and let’s plunge into what you’ll need to whip these up. Are you ready to impress your friends, or at least your family? Either way, these bars will definitely earn you some major brownie points—or, should I say, cheesecake points.
Here’s what you’ll need:
- Cream Cheese: 8 oz, softened (because we want that creaminess to shine through)
- Sugar: 1/3-1/2 cup (to add that sweet touch)
- Vanilla Extract: 1 tsp (for that warm flavor kick)
- Egg Yolk: 1 (optional, but it adds richness)
- Dulce De Leche: About 1 cup (the star of the show)
- Flour: 3 Tbsp (helps hold everything together)
- Crust: You can use about 1 1/2 cups of crushed graham crackers mixed with a bit of sugar and melted butter (because what’s cheesecake without a great crust?)
- Icing: For drizzle, you’ll want powdered sugar, a splash of vanilla, and cream or milk for texture.
Now, keep in mind that fresh ingredients make a huge difference. If you can, avoid the generic grocery store brands, especially for the cream cheese and dulce de leche, as those can truly elevate your cheesecake bars.
And don’t be afraid to get a little creative—maybe add a touch of salt to your dulce de leche for that sweet and salty twist, or use a flavored extract. The kitchen is like your canvas; let your taste buds guide you.
Ready to get started on these delicious bars? Let’s get into the step-by-step instructions!
Step-by-Step Instructions
Making Dulce De Leche Cheesecake Bars is an enjoyable journey that leads to a rich, creamy dessert that your friends and family will rave about. Mixing the batter is quick and simple—just follow these easy steps, and you’ll be on your way to creating a dessert that’s sure to impress.
Step-by-Step Instructions
1. Preheat the oven: Start by preheating your oven to 350°F. While it’s getting cozy, line an 8×8-inch baking dish with parchment paper for easy removal later—because nobody wants their delicious bars to stick.
2. Prepare the crust: In a mixing bowl, combine about 1 ½ cups of crushed graham crackers, some sugar (around 2 tablespoons), and ½ cup of melted butter. Mix it all together until it resembles wet sand. Press this mixture firmly into the bottom of the prepared baking dish.
(Pro tip: use the back of a measuring cup to get an even layer.)
3. Bake the crust: Pop your crust into the preheated oven and bake it for about 10 minutes, or until it’s golden and slightly crispy. Let it cool for a few minutes while you whip up the creamy filling.
4. Mix the filling: Grab a mixing bowl and add 8 oz of softened cream cheese. Beat it until it’s nice and creamy—this part is essential for that luxurious texture. Then, gradually mix in about 1/3 to 1/2 cup of sugar and 1 tsp of vanilla extract until fully incorporated.
Don’t rush this part; feel that delight in seeing the mixture come together.
5. Incorporate the dulce de leche: Now, it’s time for the star of the show. Add about 1 cup of dulce de leche to the creamy mixture and blend it until smooth. You might find yourself licking the spoon—totally understandable.
6. Add the egg yolk****: If you’re feeling adventurous and want that extra richness, crack an egg and separate the yolk from the white. Beat the yolk lightly, then mix it into your filling until combined.
(And yes, you can totally save the egg white for breakfast or an omelet later. No waste here!)
7. Mix in the flour: Add about 3 tablespoons of flour into the filling, which will help in giving that perfect firm texture. Mix just until it’s blended.
(Remember, overmixing is a no-go!)
8. Spread the filling: Pour the heavenly filling over your cooled crust and spread it evenly with a spatula. Just looking at it will make your heart sing.
9. Bake the bars: Bake your cheesecake bars in the oven for about 25–30 minutes, or until the edges are set and the center has a slight jiggle—like a dance party waiting to happen.
10. Cool and chill: Once baked, let the bars cool at room temperature for about 30 minutes. Then, cover and refrigerate them for at least 2 hours or until they’re firm enough to slice.
Patience is key, my friend.
11. Prepare the icing: Finally, while you’re waiting, you can whip up a simple icing. Mix powdered sugar with a splash of vanilla and cream or milk until you reach your desired drizzling consistency.
12. Slice and serve: Once fully chilled, remove the bars from the baking dish using the parchment paper. Use a sharp knife to slice into squares, drizzle with your icing, and serve.
Try not to eat them all in one sitting (but no judgment if you do).
And there you have it—delicious Dulce De Leche Cheesecake Bars that are creamy, dreamy, and oh-so-satisfying. Enjoy the accolades, and maybe share a few… if you must. Don’t forget that using premium baking equipment can elevate your baking experience even further!
Tips & Variations
Cooking doesn’t have to be rigidly formulaic; in fact, experimenting with your Dulce De Leche Cheesecake Bars can lead to delightful surprises.
I love playing around with flavors—maybe toss in some crushed cookies for a crunchy base or swirl in some chocolate ganache on top. If you’re feeling a bit adventurous, try a sprinkle of sea salt to enhance that sweet richness.
And hey, don’t forget to match the cheesecake batter to your mood; sometimes a dash of cinnamon or nutmeg can brighten things up.
Oh, and if I’m being honest, I sometimes overfill the pan like it’s my last chance to bake. Just remember, even with a little mess, deliciousness still reigns supreme.
How to Serve?
Dulce de leche cheesecake bars deserve a grand presentation. I like to cut them into neat squares and plate them on a colorful serving platter.
A sprinkle of crushed graham crackers on top adds a nice, rustic touch. Feeling a little fancy? Drizzle some extra dulce de leche over the bars for that wow factor.
If you’re feeling generous, pair them with fresh berries on the side—berries and dulce de leche? A match made in heaven.
When serving, I love to make sure each guest has a small fork and napkin handy; trust me, it’s a messy delight.
And if you’re brave enough, a scoop of vanilla ice cream alongside really brings things to the next level. Enjoy every bite!
Storage & Reheating Guide
After indulging in those delightful dulce de leche cheesecake bars, you might be wondering how to keep this sweet treat fresh for the next round.
I’ve got you covered. First, let ’em cool completely, then stack those delicious bars in an airtight container. They’ll stay fresh in the fridge for about 5 days—if they last that long.
If you’re like me, you’ll be sneaking bites every chance you get. For longer storage, try freezing them. Just wrap each bar tightly in plastic wrap and pop them in a freezer bag. These sweet treats can be stored in soup freezer containers for added convenience.
When you’re ready to enjoy, let them thaw in the fridge overnight. No shame in heating one up for a warm, gooey moment, either. They’re absolutely worth it.
Final Thoughts
Although I might be a little biased, I can’t help but think these dulce de leche cheesecake bars are a true showstopper.
Seriously, if you want to impress your friends or family, make these. They’re creamy, dreamy, and drizzled in that sweet, gooey dulce de leche that’ll have everyone coming back for seconds.
Plus, who doesn’t love a dessert that looks fancy but is super easy to whip up? I remember the first time I served these; I barely managed to take a picture before they disappeared.
They sat on the table like a tempting siren calling my name. It’s pretty hard to resist.
So, gather those ingredients and indulge yourself—you won’t regret it.
Happy baking, friend!