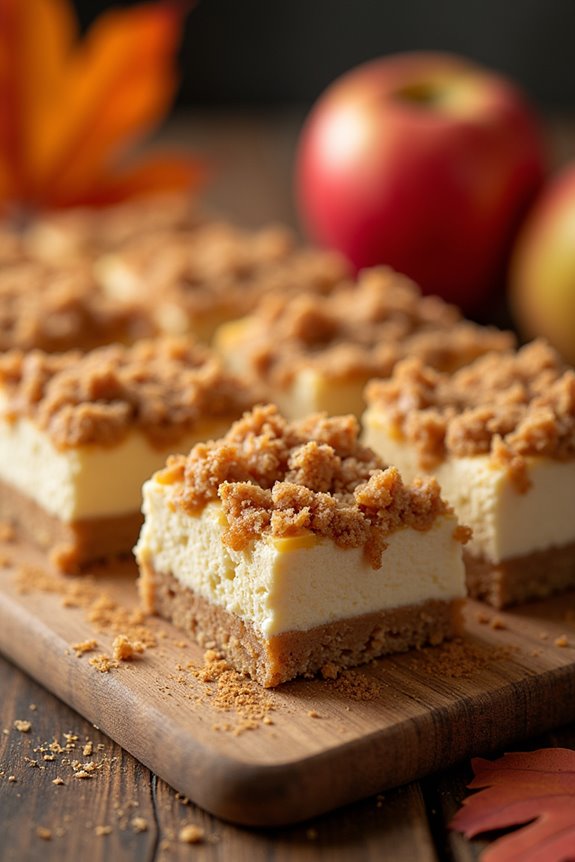
I’ve gotta say, there’s something about fall that just makes me want to bake. Maybe it’s the crisp air or the cozy sweaters, but I can’t resist the pull of baking these Apple Cheesecake Bars. Combining creamy cheesecake with spiced apples and a buttery streusel? It’s pure bliss. And let’s be honest, who doesn’t love a dessert that looks fancy but is actually pretty easy to whip up? Trust me, you’ll want to stick around for this delightful recipe.
Why You’ll Love This Recipe
You’ll love this recipe for Apple Cheesecake Bars, especially when you realize how easy it’s to whip up an incredible dessert that feels fancy but is actually straightforward.
Seriously, who doesn’t want a treat that looks amazing without a fuss? The creamy cheesecake layer, topped with spiced apples and a buttery crunch, is like a hug for your taste buds.
You can serve these bars at gatherings, but I’ll be honest, I’ve devoured a whole batch myself—no judgment here.
The aroma of apples and cinnamon fills the house, making it feel like fall. And trust me, nothing beats a cold slice after chilling in the fridge.
Give these apple cheesecake bars a try; they’re a tasty game-changer.
Equipment List
When it comes to making Apple Cheesecake Bars, getting the right equipment makes all the difference. First, I grab a trusty 9×9-inch baking pan. It’s perfect for these gooey delights.
You’ll also need a mixing bowl—preferably one that isn’t too ancient and cracked. A hand mixer? Yes, please. My old one’s a bit noisy, but hey, it gets the job done.
Don’t forget a cutting board and a knife for those luscious apples. Spatula? A must to spread that cream cheese mixture. Having a reliable cutting board set can really elevate your preparation process.
Oh, and parchment paper? Game changer for easy lift-out. Can you believe I’ve baked without it before? Total disaster.
Now, let’s get cozy in the kitchen and whip up something delicious!
Our Ingredients
When it comes to whipping up some delightful Apple Cheesecake Bars, gathering your ingredients is like preparing for a mini adventure in the kitchen. I mean, who doesn’t love the sweet and tangy combination of apples and creamy cheesecake? Just imagining that delicious bite gets me excited to start mixing!
So, let’s dive right into what you’ll need to make these little squares of joy.
Here’s the list of ingredients you’ll need:
- 1 cup flour
- 1/3 cup brown sugar
- 1/4 cup butter, cold
- 16 oz cream cheese, room temperature
- 1/3 cup sugar
- 1 egg
- 1 tsp vanilla extract
- 2 cups chopped apples (the tastier, the better!)
- 1 tbsp sugar (for those apples)
- 1/2 tsp cinnamon (oh, the aroma)
- 1/8 tsp nutmeg (just a hint goes a long way)
- 1/2 cup oats (for some added texture)
- 1/4 cup brown sugar (because we can never have enough, right?)
- 1/4 cup flour (for the streusel topping)
- 2 tbsp butter, melted (butter makes everything better)
Now, about those ingredients—freshness matters! For the apples, pick ones that are crisp and slightly tart, like Granny Smiths, to balance the creamy cheesecake.
And don’t even get me started on the cream cheese; make sure it’s at room temperature. Trying to mix cold cream cheese is like wrestling with a stubborn toddler—it’s just not going to end well.
Also, measuring your ingredients accurately is key, especially if you want to impress someone with your baking skills. So grab those measuring cups, and let’s get ready to bake some magic!
Step-by-Step Instructions
Mixing the batter is quick and simple—just follow these easy steps. You’ll be on your way to creating some delectable Apple Cheesecake Bars in no time. Let’s get started, shall we?
- Preheat your oven to 350°F (175°C). This step is key—no one wants to bake when the oven isn’t ready and waiting for deliciousness.
- Prepare the crust by mixing together 1 cup of flour and 1/3 cup of brown sugar in a mixing bowl. Next, grab 1/4 cup of cold butter and cut it into the dry mixture until it resembles coarse crumbs. This is where you can channel your inner pastry chef—just don’t overdo it; we want crumbs, not butter soup.
- Press the crust mixture into the bottom of a greased baking pan (an 8×8 inch works great). It should be evenly spread out, so it bakes nicely. Bake that for about 12-14 minutes, or until it looks a lovely golden brown. You want a nice base for all that creamy goodness.
- While that bakes, let’s whip up the cheesecake filling. In a large bowl, beat together 16 oz of cream cheese (make sure it’s at room temperature) and 1/3 cup of sugar until it’s smooth and creamy. Resist the urge to lick the spoon—at least save some for a taste later.
- Add in the egg and 1 tsp of vanilla extract, mixing just until combined. Don’t overmix here; that could lead to cracks in your cheesecake bars. We want smooth, not cracked!
- Pour the cheesecake mixture over your pre-baked crust, spreading it out evenly.
- Now for the apples—in another bowl, toss together 2 cups of chopped apples, 1 tbsp of sugar, 1/2 tsp of cinnamon, and 1/8 tsp of nutmeg. The aroma alone should elicit some “oohs” and “ahhs.” Spread this apple mixture evenly over the cheesecake layer.
- To create the streusel topping, combine 1/2 cup of oats, 1/4 cup brown sugar, 1/4 cup flour, and 2 tbsp of melted butter in a small bowl. Mix it until crumbly, just like how you want your life to be sometimes—nice and crumbly but with some structure. Sprinkle that all over the apple layer.
- Bake the entire concoction in your preheated oven for 35-40 minutes. You’ll know it’s done when it’s set and the edges may slightly pull away from the pan. If only other life events had such clear indicators…
- Let it cool to room temperature before refrigerating it for a couple of hours until it’s chilled. Patience pays off here! Once it’s cooled down, slice them into bars.
Serve cold, and if you can keep them in the fridge for up to 5 days without devouring them all at once—kudos to you.
Enjoy every bite of your creation, and remember, if things don’t come out perfect, there’s always another chance to bake again (and eat those mistakes). Happy baking!
Additionally, having the right premium baking equipment can make your baking experience even more enjoyable!
Tips & Variations
Ever wondered how to take your Apple Cheesecake Bars to the next level? I’ve got a few tricks up my sleeve. First, try adding a splash of lemon juice to your apples before spreading them on. It brightens the flavor beautifully.
If you’re feeling adventurous, swap out half of the apples for pears. A little twist never hurt, right?
Now, about that streusel topping—can you ever really have too much? I think not. Toss in some chopped nuts for extra crunch.
And if you’re like me and love caramel, drizzle some on top before serving. Trust me, it’s a game-changer.
Just remember, it’s all about having fun in the kitchen. So don’t stress, experiment, and enjoy every delicious bite!
How to Serve?
Serving your Apple Cheesecake Bars can be just as delightful as making them. I usually take the bars out of the fridge a bit before serving them, letting them soften slightly for that creamy texture.
Slice ‘em into squares, and don’t be shy about presenting them on a colorful plate—it adds a nice touch. I’ve found that a drizzle of caramel sauce or a dusting of powdered sugar really elevates the experience.
Don’t forget to pair these bars with a cup of warm chai or apple cider; it’s like a cozy hug in autumn!
And if you’re feeling fancy, I sometimes add a dollop of whipped cream on top. Trust me, it’s a crowd-pleaser every time. You might even want to double the recipe.
Storage & Reheating Guide
When it comes to storing your delicious Apple Cheesecake Bars, I’ve found that a little bit of care goes a long way in keeping them fresh and tasty.
First, make sure you’ve cooled them completely before storage. I usually cut them into squares and pop them in an airtight container. They’ll happily chill in your fridge for up to five days—though, let’s be real, they never last that long in my house.
If you want to enjoy them later, reheating is super simple. Just warm a slice in the microwave for about 10-15 seconds. Perfectly gooey, right?
Or, you can let them sit out for a bit to soften. This is my secret for keeping the vibe just right. Investing in premium cookware sets can enhance your baking experience, ensuring even cooking and better results.
Final Thoughts
Although I think I might be a little biased considering how much I love these Apple Cheesecake Bars, I can honestly say they’re worth every bit of effort.
The blend of creamy cheesecake, sweet apples, and that crunchy topping is something you just can’t resist. Maybe you’ve got a sweet tooth like mine, and if so, you know what I’m talking about.
Picture a cozy fall evening, these bars chilling in the fridge, waiting to be devoured. Seriously, what’s better?
And hey, if you drop a few crumbs on the floor, just blame it on the cat. It’s like a warm hug, especially when you share them with family or friends.