I’ve got a snack that’s perfect for any occasion: Garlic Parmesan Twists. Seriously, these bites are a game-changer. With just a few ingredients and a little twisting action, you can whip up something that impresses without the hassle of deep frying. I still can’t believe how simple they are to make, and you won’t need a culinary degree to pull them off. Curious about the magic behind it? Let’s explore the details.
Why You’ll Love This Recipe
When it comes to appetizers or snacks, garlic Parmesan twists are simply irresistible. Seriously, have you ever sunk your teeth into one of these crispy delights? I can’t help but smile every time I whip up air fryer garlic Parmesan twists.
They’re not just tasty; they’re a breeze to make. With just a few pantry staples, I’m transforming a simple puff pastry into a crowd-pleaser. And the garlic…oh man, it fills the kitchen with a heavenly aroma that draws everyone in.
Plus, using the air fryer means they come out perfectly golden and flaky, not greasy. Honestly, who wouldn’t want to serve these at their next gathering? Trust me, they’ll vanish faster than you can bake them.
Equipment List
Gathering the right equipment makes all the difference in whipping up these delicious garlic Parmesan twists. First, you’ll need an air fryer, of course—it’s where the magic happens.
A rolling pin is essential, too, because we want our pastry nice and thin. Grab a sharp knife for cutting those strips, and don’t forget a mixing bowl to combine all those buttery, garlicky goodness.
A pastry brush comes in handy for slathering on the reserved butter, making everything taste even better. Finally, a parchment paper-lined baking sheet is great for chilling those twists before cooking. Additionally, having a reliable garlic press can enhance the flavor by easily mincing garlic to infuse into your twists.
Our Ingredients
When it comes to whipping up Garlic Parmesan Twists, the ingredients you choose can make or break your dish. Luckily, the list is pretty straightforward and consists of tasty staples that you might already have sitting in your kitchen.
I mean, who can resist the aroma of garlic mingling with the nuttiness of Parmesan? There’s just something magical about that combination—maybe it’s the way it can transform a simple puff pastry into something that feels gourmet.
And the best part? You don’t need to be a five-star chef to pull this off. Let’s dig into what you’ll need to create these scrumptious twists.
Here’s your ingredient list:
- 1 puff pastry sheet
- ¼ cup melted butter
- 2 tbsp grated Parmesan cheese
- 2 cloves garlic, minced
- 1 tsp chili flakes (optional, but hey, if you like a kick…)
- 1 tbsp chopped parsley
- Salt and black pepper to taste
Now, while these ingredients are pretty standard, there are a few things worth noting. First, make sure you get good quality Parmesan cheese! You don’t want the shavings that look like they’ve been sitting in the back of your fridge for months. Freshly grated cheese will add a depth of flavor that pre-grated just can’t compete with.
Also, if you’re feeling especially adventurous, you might swap out the chili flakes for fresh herbs or even some lemon zest for a zesty twist—pun intended.
And remember, the beauty of cooking is that it’s all about adjusting things to your taste! So, if you love garlic (who doesn’t, right?), feel free to add an extra clove or two. Go on, make it your own!
Step-by-Step Instructions
Making Garlic Parmesan Twists is a fun and satisfying cooking adventure that anyone can tackle. Soon, you’ll be crafting these delectable bites, perfect for snacks or appetizers, with just a few straightforward steps. Let’s break it down!
Step-by-Step Instructions
1. Begin with the Mixture: In a medium bowl, mix together ¼ cup melted butter**, 2 tbsp **grated Parmesan cheese**, 2 cloves garlic (minced), 1 tsp chili flakes (if you’re feeling spicy), 1 tbsp chopped parsley, and a pinch of salt and black pepper**.
Stir until everything is well combined—this will be your flavorful filling, so don’t skimp on mixing!
2. Prep the Puff Pastry: Unfold your 1 puff pastry sheet**** on a floured surface. This can be a little tricky if the pastry is too cold, so let it sit out for a few minutes.
Now, cut the sheet in half lengthwise. Don’t stress if the pieces aren’t perfect, it’s about the taste!
3. Apply the Filling: Spread your buttery mixture generously on one half of the puff pastry.
Carefully lay the other half on top, making a pastry sandwich. Gently press down to seal the edges—think of it like giving it a little hug.
4. Roll it Out: Roll the puff pastry sandwich to about 1/8 inch thickness.
This is the time to show off your rolling pin skills. If it starts to stick, just add a bit more flour to your surface.
5. Cut and Twist: Using a sharp knife or a pizza cutter, cut the rolled pastry into 1-inch strips.
Grab a strip and twist it to create a lovely spiral shape. This step is super fun—give each strip your best twirl!
6. Chill Your Twists: Place the twists on a parchment-lined baking sheet and chill them in the refrigerator for 30 minutes.
This is essential—chilling helps them puff up perfectly in the air fryer.
7. Preheat the Air Fryer: While the twists are chilling, preheat your air fryer to 375°F.
Give it a few minutes to reach that temperature; it makes a big difference in cooking.
8. Brush and Air Fry: Once chilled, lightly brush your twists with some reserved melted butter for that extra golden charm.
Then, carefully place them in the air fryer basket in a single layer (you may need to do this in batches). Air fry for 8-10 minutes, or until they’re golden brown and crispy.
You’ll know they’re ready when your kitchen starts smelling like a delightful garlic haven.
9. Finish and Serve: If you’d like to add an extra touch, brush more butter on the warm twists and sprinkle them with a bit more parsley for color.
And voila—your Garlic Parmesan Twists are ready to impress your friends and family.
And there you have it, a simple and delicious way to make Garlic Parmesan Twists!
They’re perfect for a snack or to share at a gathering. It’s always beneficial to use quality cooking equipment gourmet kitchen gear for crafting such culinary delights; you’ll be amazed at how something so simple can taste so good.
Just remember, even if they look a bit wonky, they’ll still taste fantastic—because, really, who could resist garlic and cheese?
Tips & Variations
While you might think these Garlic Parmesan Twists are perfect as is, there’s a world of possibilities to explore when it comes to tips and variations.
If you want to amp up the flavor, try adding some herbs like oregano or basil to the butter mixture. Want a kick? Toss in more chili flakes. I’ve even tried some cheddar cheese mixed in, and wow, it was a game changer.
Don’t overlook the chilling step, either. It really helps them puff up nicely.
Also, if you’re like me and can’t fit them all in your air fryer at once, just cook in batches. You won’t regret it—trust me.
Experiment, have fun, and make these twists your own!
How to Serve?
How do you make those Garlic Parmesan Twists not just delicious, but truly unforgettable at your next gathering?
First off, serve ‘em warm. I swear, the aroma will have everyone flocking to the table.
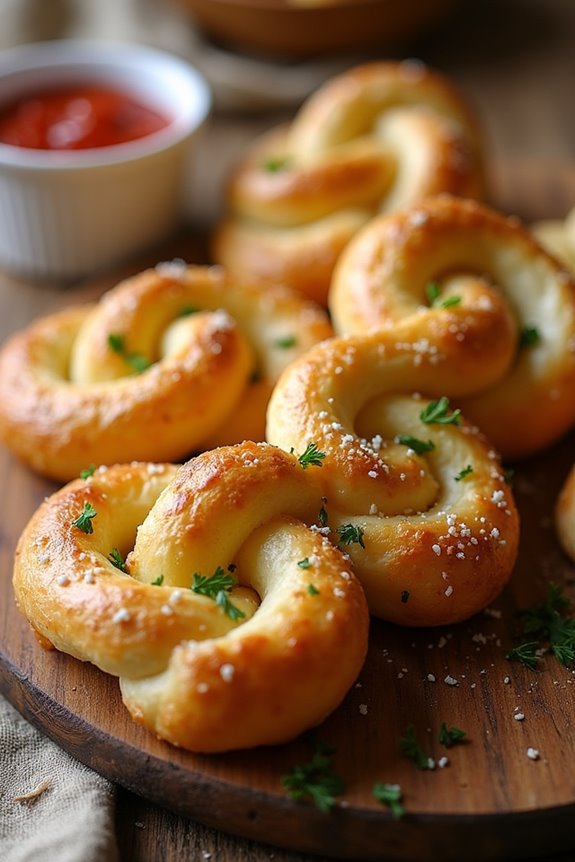
You can create a fun dipping station with marinara sauce, garlic butter, or even a zesty ranch dressing. Trust me, watching my friends devour these is a joy.
Sprinkle a little extra parsley on top for that pop of color—everyone eats with their eyes first, right?
If you’ve got guests who love a kick, don’t forget to mention the chili flakes.
And when they ask for the recipe, just smile and say it’s my secret—totally not, but who cares?
Enjoy the moment!
Storage & Reheating Guide
After serving up those delicious Garlic Parmesan Twists and watching your guests rave, you might find yourself with some leftovers. So, what do you do?
First, let them cool completely, because warm twists can turn soggy in storage. I usually pop them into an airtight container, and they’ll last up to three days in the fridge.
If you’re feeling ambitious, freeze them for up to a month. Just remember to separate the layers with parchment paper, ’cause nobody likes a stuck-together mess. Using a vacuum sealer machine can make freezing even more effective, preserving freshness for longer.
When you’re ready to enjoy them again, just reheat in the air fryer at 350°F for about 3-5 minutes. They’ll crispen up beautifully, saving you from that sad, leftover fate.
Trust me, you won’t regret it.
Final Thoughts
As you wrap up your culinary adventure and savor those Garlic Parmesan Twists, you might find yourself reflecting on the joy they brought to your table.
Seriously, who doesn’t love a snack that’s flaky, buttery, and packed with garlicky goodness?
I mean, they practically disappeared at my last gathering. If you’ve got little ones or picky eaters around, they’ll go crazy for these. You might even become their favorite chef (hey, I won’t judge).
Plus, making them in the air fryer means less fuss and more flavor, not to mention healthier cooking.