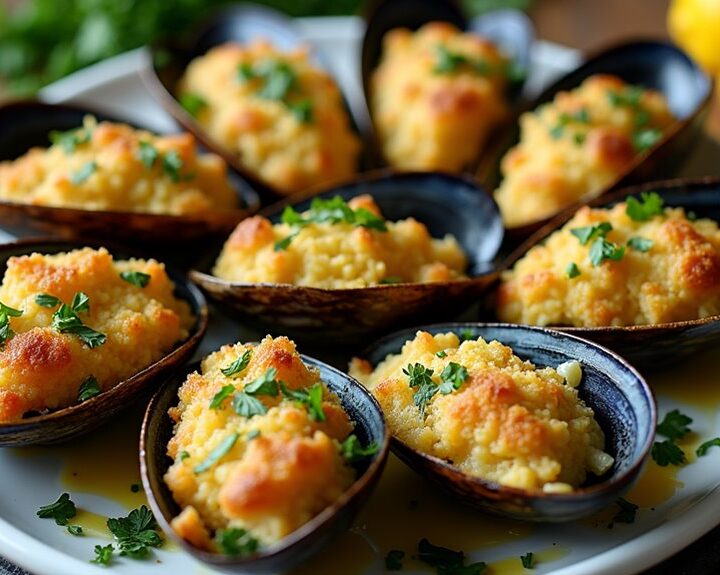
I can’t wait to share this stuffed baked mussels recipe with you. It’s a charming dish that’s surprisingly easy to whip up, but it’ll make you feel like a gourmet chef. Have you ever tried mussels? They’ve got this wonderful briny flavor that pairs perfectly with the crunchy, savory stuffing. Trust me, you’ll want to impress your friends with this one. Let’s plunge into the details and get those mussels baking, shall we?
Why You’ll Love This Recipe
When you plunge into this classic French onion soup, you might find yourself wondering why you haven’t made it sooner.
Seriously, the deeply caramelized onions blend perfectly with savory beef stock, creating a comforting hug in a bowl. Just picture yourself, spooning up that rich broth while the melted Gruyère cheese stretches like a dream.
I mean, who doesn’t love cheese? And those crispy toasted baguette slices— they’re like the cherry on top. Honestly, every slurp is a little celebration.
Plus, it’s surprisingly easy to whip up once you get the hang of caramelizing those onions. You’ll feel like a culinary genius, and let’s be honest, who doesn’t want that?
French onion soup is pure bliss, and it should definitely be in your recipe rotation.
Equipment List
Gathering the right tools can make all the difference, especially when you’re about to commence on a culinary adventure like making stuffed baked mussels.
First off, you’ll need a good baking dish; something that’ll hold all those delightful mussels snugly. A mixing bowl is essential for all your stuffing goodness, while a sharp knife will help slice and dice with precision.
Don’t forget a spoon for stirring, and if you can, grab a pair of kitchen tweezers to pull out those pesky shell bits.
Oh, and an oven mitt—trust me, you’ll need it when you retrieve that sizzling dish. Lastly, consider using a professional kitchen torch to add a beautiful finish to your mussels, enhancing both flavor and presentation.
It’s all about making the process easier so you can focus on enjoying the delicious outcome. Happy cooking!
Our Ingredients
Making stuffed baked mussels brings a whole new level of flavor to your dinner table. It’s a fun way to transform sweet, tender mussels into an inviting dish that’s perfect for sharing—or devouring all by yourself if you’re feeling a little greedy, but who could blame you?
With some fresh ingredients, a dash of creativity, and a splash of love, you’ll have a mouthwatering masterpiece. So, let’s plunge into what you’ll need for this delightful recipe.
Ingredients:
- Fresh mussels (about 1-2 pounds)
- ½ cup breadcrumbs
- ¼ cup grated Parmesan cheese
- 2 tbsp parsley, chopped
- 2 garlic cloves, minced
- ¼ cup olive oil
- Salt and pepper to taste
- Optional: red pepper flakes for a kick
When gathering your ingredients, make sure to pick the freshest mussels you can find. They should smell briny but not overly fishy. You might even find yourself chatting with the fishmonger about the best catch of the day.
And while you’re at it, think of playing around with the breadcrumbs: you can use plain, but seasoned or even panko can really amp up the texture. If you’re feeling adventurous, toss in some finely chopped veggies in the stuffing for extra flavor and nutrients.
Step-by-Step Instructions
Making stuffed baked mussels is a delightful culinary adventure that’s both satisfying and impressive. With just a few steps, you’ll transform fresh mussels into a deliciously cheesy, crispy dish that almost feels like a hug for your taste buds—perfect for those cozy dinner nights. Investing in high end kitchen appliances can elevate the quality and efficiency of your cooking process.
Just follow these easy directions to whip up a batch that will have everyone asking for seconds!
Step-by-Step Instructions:
1. Preheat the oven to 375°F (190°C). This is essential for getting that lovely crispy topping we all adore—trust me, no one enjoys sad, soggy mussels.
2. Clean the mussels (about 1-2 pounds) under cold running water. Scrub them well to remove any grit and barnacles. Discard any mussels that are open and won’t close when tapped. They’re just not meant to be a part of your culinary masterpiece.
3. Prepare the stuffing by combining ½ cup breadcrumbs, ¼ cup grated Parmesan cheese, 2 tbsp chopped parsley, and 2 minced garlic cloves in a mixing bowl. Drizzle in ¼ cup of olive oil, and season with salt and pepper to taste.
Mix everything together until it’s well combined (it should resemble a chunky paste—a bit like sandcastles at the beach, but tastier).
4. Stuff each mussel with a generous spoonful of your breadcrumb mixture. Make sure to pack it in there nicely, or you’ll be left with sad shells. Don’t worry if it overflows a bit; that’s just more delicious goodness that will get crispy in the oven.
5. Place the stuffed mussels on a baking sheet. Arrange them in a single layer, making sure they’re not crowded—you want heat to circulate. You could be fancy and line the sheet with parchment paper if you’re feeling posh, but it’s not essential.
6. Bake for about 15-20 minutes until the tops are golden brown and the mussels are cooked through. You’ll know they’re ready when they’re bubbling slightly and looking oh-so-inviting. Keep an eye on them, as ovens can be sneaky and vary a bit.
7. Serve immediately. Enjoy them straight from the oven, maybe with a squeeze of lemon over the top for a zestful finish. Grab a fork, a friend, and plunge into… or just keep them all to yourself. No judgment here!
And there you go! Your stuffed baked mussels are ready to impress and indulge. A few simple steps, a bit of love, and some attention to detail will leave you with a dish that truly shines.
Happy cooking, or perhaps even happier eating!
Tips & Variations
Everyone loves a good cooking tip, don’t they? I sure do.
For my stuffed baked mussels, I like to get a little creative. Swap out the breadcrumbs for crushed crackers or even breadcrumbs made from stale bread—just don’t toss that old loaf yet.
If you’re feeling adventurous, add diced jalapeños or sautéed mushrooms into the stuffing for some extra flair. Remember, the stuffing needs to be packed but not overcrowded.
Trust me, overstuffed mussels will look great but might just make a mess. And if you’re having a dinner party, feel free to garnish with fresh parsley.
It’ll impress your friends even if—confession alert—you nearly burnt the first batch. Cooking’s all about having fun!
How to Serve?
Now that you’ve whipped up those delightful stuffed baked mussels, let’s talk about how to serve them.
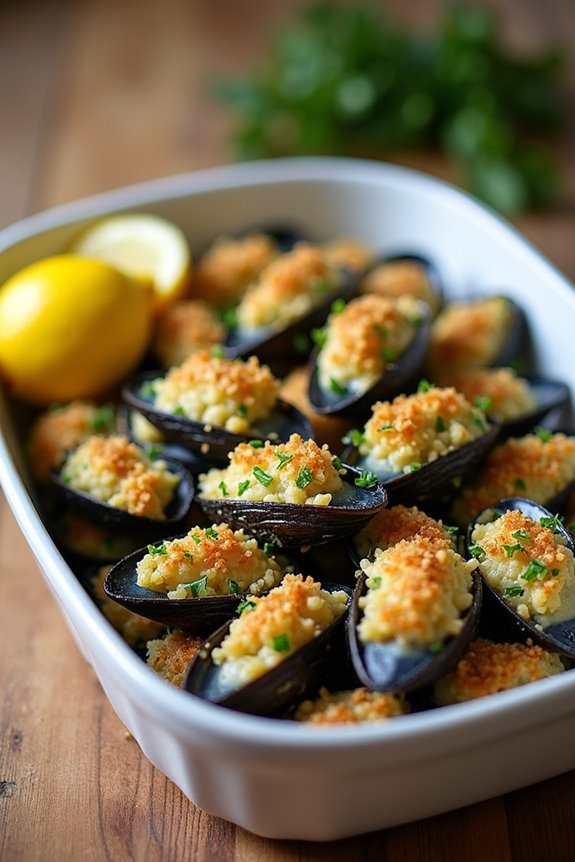
First, arrange the mussels on a beautiful platter. Trust me, presentation matters. You want your guests to say, “Wow!”
Sprinkle a little fresh parsley on top for a pop of color. For a touch of zest, offer some lemon wedges on the side. They’ll love squeezing a bit of juice over the mussels.
Plus, don’t forget some crusty bread—perfect for mopping up any leftover flavor. I always struggle with cleanup, so it’s a lifesaver.
Serve these with a crisp white wine—chardonnay is my go-to. You might even feel like a master chef as everyone digs in.
Enjoy the compliments; you deserve them!
Storage & Reheating Guide
While you might be tempted to dig in right away, knowing how to properly store and reheat your stuffed baked mussels can really save the day.
First, let them cool completely, then store them in an airtight container in the fridge. They’ll be good for about 2 to 3 days, but let’s be honest, who could wait that long?
When it’s time to reheat, preheat your oven to 350°F (175°C). Pop those beauties on a baking sheet and warm them for about 10 minutes, or until heated through.
If you want a bit of that crispy top back, broil them for a quick 1-2 minutes at the end. Just don’t walk away or you might end up with mushy mussels—yikes. Additionally, using luxury seafood cooking tools can enhance the overall experience when preparing and serving your mussels.
Final Thoughts
After taking the time to properly store and reheat those stuffed baked mussels, it’s time to sit back and enjoy the fruits of your labor.
I mean, who wouldn’t love a delightful dish that looks fancy but is surprisingly easy to whip up? As you sink your teeth into that savory mixture of flavors, you might just forget about that messy kitchen.
And let’s be real—was it worth it? Absolutely! You’ll impress your family and friends, and they’ll think you’re a culinary genius.
Just remember, you’ve made a meal that’s guaranteed to be the start of some great conversations.