When I first attempted Sole Meunière, I had no idea I’d be stepping into the world of effortless elegance. I mean, who wouldn’t love a dish that feels fancy yet is surprisingly simple? A few fillets, some butter, a splash of lemon – sounds easy, right? But trust me, there’s a magical combination that turns these ingredients into something truly special. Now, if you’ve ever been nervous about cooking fish, hang tight. I’ve got tips coming that will make you feel like a pro.
Why You’ll Love This Recipe
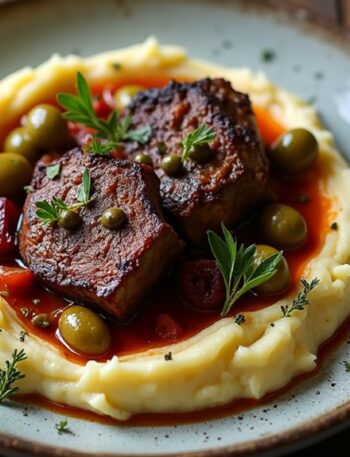
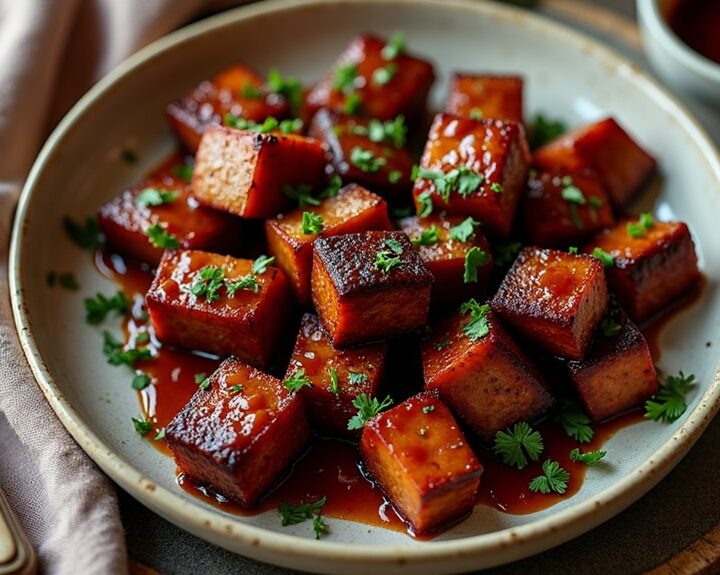
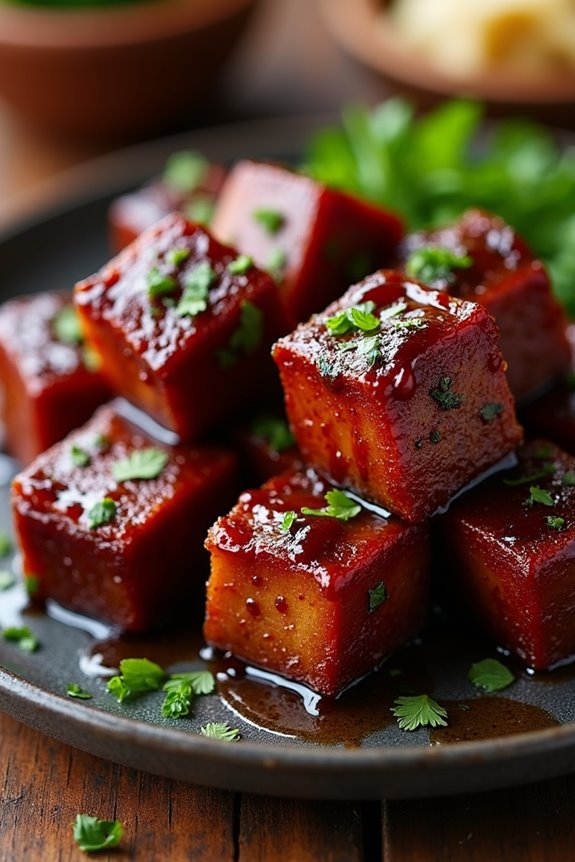
You mightn’t realize it yet, but this Beef Belly Burnt Ends recipe is about to become your new favorite dish. Seriously, once you take that first bite, you’ll be hooked. The smoky flavor dances with a sweet, sticky glaze, making it basically irresistible. What’s not to love about tender, juicy bites of beef belly, melting in your mouth? It’s perfect for impressing friends at your next barbecue or just indulging after a long week. Plus, it’s surprisingly easy—don’t worry if you’re not a grill master; I sure wasn’t at first! Timing is key and a little patience goes a long way. Trust me, you’ll feel like a culinary genius when you see everyone’s reactions. Ready to jump in?
Equipment List
Getting ready to make Beef Belly Burnt Ends means gathering some key equipment.
First, you’ll need a good smoker; trust me, a kettle grill won’t cut it here. I prefer one with a temperature gauge—nothing like guessing at 3 a.m.
Next, an aluminum pan is super handy for those saucy bits. You’ll want a sharp knife for cubing that smoky goodness; dull knives are like enemy spies, always sneaking up on you!
A probe thermometer is essential too—no one likes a surprise when cutting into dinner.
Finally, don’t forget the gloves; things can get sticky pretty fast. With this gear, you’ll be set for a mouthwatering experience, and yes, a little mess just adds to the fun, right? Additionally, considering investing in commercial steamers for bao can elevate your cooking options with delicious steamed buns.
Our Ingredients
Let’s plunge into the delicious world of Beef Belly Burnt Ends. If you’re anything like me, the thought of that rich, smoky flavor dancing on your taste buds is enough to make your mouth water.
The beauty of this dish is really in the ingredients—simple yet powerful, they come together to create a feast for the senses. So, gather ‘round, and let’s take a look at what you’ll need to whip up this delightful treat.
Here’s your ingredient list:
- 1 beef belly (4-5 lbs)
- Beef BBQ rub (something like Holy Cow or Holy Gospel works well)
- 1 cup BBQ sauce
- 1/3 cup honey
- Butter (optional, but who doesn’t love a little extra richness?)
- Aluminum pan
Now, let’s chat about these ingredients a bit. First off, choosing the right beef belly is key; you want it to have that perfect balance of meat and fat for that melt-in-your-mouth quality.
Opt for a good-quality rub; it’s basically the magic dust that makes your burnt ends sing. And for the barbecue sauce, don’t hesitate to pick your favorite—some sweetness from the honey really takes it to the next level.
If you’re feeling adventurous, you can even mix in some spices or flavors that tickle your fancy. Just remember, the right ingredients will elevate your dish, turning a simple meal into a barbecue masterpiece.
Step-by-Step Instructions
Ah, the mouthwatering world of Beef Belly Burnt Ends. This dish is the heaven of smoky flavors and tender bites, and making it at home is an adventure worth starting. Don’t worry, you won’t need to be a barbecue wizard—just follow these simple steps, and you’ll have folks drooling over your creation in no time.
Step-by-Step Instructions
1. Prep the Beef Belly: Grab your 4-5 lb beef belly and season it generously with your favorite beef BBQ rub, such as Holy Cow or Holy Gospel. Make sure to cover every inch; this is where the magic starts.
Let it rest for 15-30 minutes—this waiting time allows those glorious flavors to seep in.
2. Get the Grill Going: Preheat your smoker or grill to a steady 250-275°F. Trust me, patience is key here; a low and slow approach is what’ll give you that desirable tenderness.
3. Smoke It!: Once your grill is at the right temperature, place the seasoned beef belly fat-side down.
Smoke it until it reaches an internal temperature of 195°F, which should take about 3-5 hours. Check on it occasionally; there’s nothing wrong with peeking at your masterpiece, and the smell—oh, the smell—will have you salivating.
4. Cool and Cube: After smoking, pull it off and let the belly cool for about 15-20 minutes.
This little break is essential; it allows the juices to redistribute. Then, it’s time to cube that beauty into 1-inch pieces. Don’t stress if they aren’t perfect—rustic is charming, right?
5. Toss it All Together: Now, take an aluminum pan (it’s time to get handy) and toss the cubes with a bit more rub, 1 cup of BBQ sauce, 1/3 cup honey, and, if you’re feeling decadent, a pat of butter.
Mix everything well so the cubes are well-coated and glistening like they’ve just stepped off the barbecue runway.
6. Finish Smoking with Style: Return the pan to the smoker, and leave it uncovered for about an hour.
This is your chance to let those flavors meld and create a gloriously sticky, crispy exterior—just what the burnt ends call for. You want to watch them closely, as I can guarantee that the aroma will have you questioning your cooking skills and wondering if you can just eat them now.
And there you have it! Follow these steps, and you’ll reveal a plate of beef belly burnt ends that’ll be the star of your next barbecue gathering. Luxury seafood cooking tools can elevate your culinary experience when preparing dishes like this.
Just be ready—once you serve these, everyone will be asking for seconds and wondering how you pulled it off so effortlessly. Cooking doesn’t have to be perfect, but it should always be fun, and these burnt ends are the perfect excuse to get a little messy and enjoy.
Happy smoking!
Tips & Variations
While I might think I’ve perfected my technique for beef belly burnt ends, there’s always room to play around and make them your own.
For a unique twist, try adding some citrus zest to the seasoning. It brightens up the flavor, and trust me, it’s a game changer. Don’t forget about experimenting with different BBQ sauces; some spicy kick can really elevate the dish.
Oh, and if you’re feeling adventurous, throw in a dash of smoked paprika for that extra depth. If you’ve got herbs lying around, fresh thyme or parsley can add a lovely touch.
Just remember, cooking’s all about enjoyment, so embrace those happy accidents. You never know, it might lead to your new favorite version.
How to Serve?
When it comes to serving up Sole Meunière, presentation is key, and they deserve a little drama. I love to lay the fish on a pre-warmed platter, letting those golden crispy edges glisten.
A generous drizzle of that lovely brown butter sauce over the fish adds a huge wow factor. Don’t forget some fresh lemon wedges on the side; they really brighten everything up.
For a pop of color, scatter fresh parsley or chives on top—trust me, it makes all the difference.
As you’re serving, I recommend serving it alongside sautéed green beans or a light salad. This way, your meal looks gourmet without breaking a sweat.
Honestly, you’ll impress everyone, including yourself, with how effortless it seems.
Storage & Reheating Guide
Storing your Sole Meunière properly can make all the difference in keeping it delicious and ready to enjoy later.
First, let it cool down for a bit, then wrap it tightly in plastic wrap or foil. Don’t skip this step; trust me, no one wants dried-out fish. You can pop it in the fridge for up to two days.
When it comes to reheating, I suggest using a skillet over medium heat. Just a little butter will do—this isn’t the time to skimp! Gently warm it until it’s heated through, flipping it like you’re a pro.
Microwaving? Well, I wouldn’t recommend it unless you enjoy rubbery fish. So, stick to the skillet, and you’ll be golden. Additionally, using vacuum seal bags can help prolong the freshness when storing your fish, ensuring it remains tasty for future meals.
Final Thoughts
After taking the time to store your Sole Meunière just right, let’s reflect on all that hard work.
Cooking this dish isn’t just about the food; it’s an experience. Remember the delicate dance of that buttery, lemony sauce, and the satisfying crunch of the fish? It’s pure magic.
I mean, I’ve burnt my fair share of meals, so trust me when I say mastering this recipe feels like winning gold at the culinary Olympics.
Whether you enjoyed it solo or shared it with friends, the pleasure of great food can’t be overstated.
So, if you’re ever in doubt, just whip up this classic and watch everyone fall in love. Seriously, how can they resist?
You’ve done well, my friend.