When I first tried Hawaiian garlic shrimp, it felt like a little slice of paradise right on my plate. The garlic, butter, and soy sauce combo? Pure magic. Honestly, it’s hard to mess this dish up, even for someone with my cooking mishaps—think smoke alarms and quickly disappearing post-it notes. Want to impress your friends at dinner without breaking a sweat? Let me walk you through how to make this mouthwatering dish step by step. Trust me, you’ll want to know more.
Why You’ll Love This Recipe
You might be wondering why this simple Amish baked custard recipe can become your new favorite dessert, and honestly, I get it. I mean, who doesn’t love a dessert that’s both rich and comforting?
Imagine this: smooth, creamy custard that melts in your mouth, all thanks to just a few ingredients. I remember the first time I tasted it—my aunt made it for a family dinner, and I couldn’t get enough. It’s like a warm hug in a bowl.
Plus, it’s ridiculously easy to whip up! You just mix, bake, and chill. And let’s not forget that sprinkle of nutmeg on top—it’s the cherry on the sundae, or should I say custard?
Give this simple Amish baked custard a try; you won’t regret it.
Equipment List
When it comes to making Hawaiian garlic shrimp, having the right equipment is key to nailing those flavors.
You’ll need a big skillet—preferably non-stick—so the shrimp sizzle just right. A sharp knife is essential for chopping garlic; trust me, your fingers will thank you later.
Don’t forget a cutting board; you don’t want a mincing disaster on your countertop. A measuring spoon will help with precise ingredients, and if you have a spatula, it’s great for tossing everything together.
Oh, and a bowl to marinate those shrimp makes it so much easier. Seriously, the fewer dishes you have to wash later, the better, right? Investing in premium kitchen gadgets can truly enhance your cooking experience.
Our Ingredients
When it comes to whipping up some delicious Hawaiian garlic shrimp, having the right ingredients is key to awakening those tropical flavors. Imagine the sizzling aroma of garlic wafting through your kitchen as you prepare this dish—it’s practically a mini-vacation for your taste buds.
The best part? You might already have a few of these ingredients in your pantry. Let’s gather what you’ll need to initiate this culinary adventure.
- 1 pound shrimp, peeled and deveined
- ½ cup butter
- 8 cloves garlic, minced
- 1 tablespoon soy sauce
- 1 teaspoon paprika
- 1 lemon, juiced
- ¼ teaspoon red pepper flakes (optional, if you like a kick)
- Salt and pepper to taste
- Fresh parsley for garnish
Now, a little note about ingredient quality: fresh shrimp will always give you a better taste than frozen, although we all know life can sometimes be a bit chaotic (hey, it happens to the best of us!).
If you’re lucky enough to have access to fresh seafood in your area, definitely go that route.
And if you’re feeling adventurous, why not toss in some extra veggies like bell peppers or snap peas? They can add a nice crunch and vibrant color to your plate.
But, if you prefer to keep it classic, no worries! Sometimes simplicity is where the real magic happens.
Let’s get ready for some tasty shrimp action!
Step-by-Step Instructions
Making Hawaiian garlic shrimp is like taking a mini-vacation for your taste buds—especially when you get to the sizzling part where garlic fills the air with that irresistible aroma. It’s an easy dish to whip up, and trust me, your loved ones will think you’ve been cooking all day. Ready to embark on this delicious adventure? Let’s get started!
Step-by-Step Instructions
- Melt the Butter: Start by placing ½ cup of butter in a large skillet over medium heat. Let it melt completely, swirling it around the pan until it starts to foam. The sound of bubbling butter is like music to any cook’s ears, right?
- Sauté the Garlic: Once the butter is melted, add in 8 cloves of minced garlic. Sauté it for just about 1–2 minutes, stirring constantly. You want it to become fragrant and slightly golden but not burnt—nobody wants that bitter taste ruining your dish.
- Add the Shrimp: Next, toss in 1 pound of peeled and deveined shrimp. Cook them for about 2-3 minutes until they start to turn pink and opaque. You might want to give them a gentle stir here and there—just enough to make sure they’re getting a nice coating of that yummy garlic butter.
- Season It Up: Sprinkle in 1 tablespoon of soy sauce, 1 teaspoon of paprika, and if you’re feeling daring, add ¼ teaspoon of red pepper flakes for a kick. Season it all with salt and pepper to taste. Give it a good stir and watch as those flavors start to meld together.
- Finish with Lemon Juice: Squeeze the juice of 1 lemon straight into the pan. This brightens everything up and adds that zesty punch that’s oh-so-good. Toss everything to make sure the shrimp are perfectly coated with the vibrant mixture.
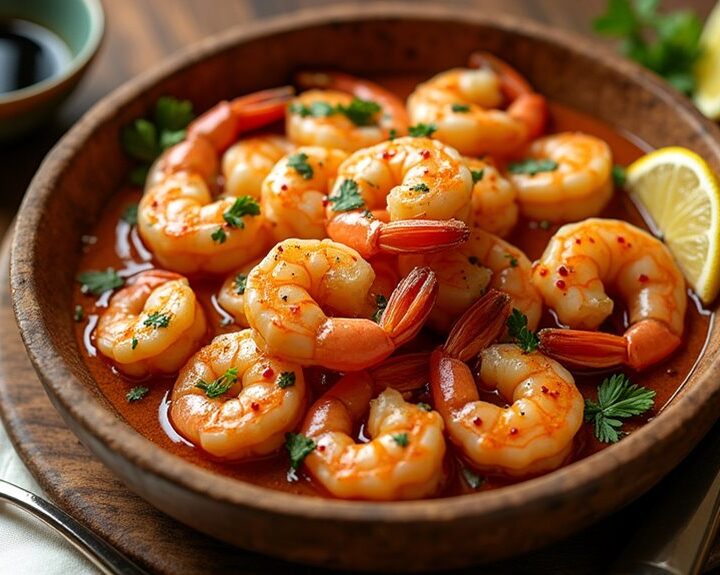
- Garnish and Serve: Once your shrimp are fully cooked (about 2 more minutes should do it), take the skillet off the heat. Serve your Hawaiian garlic shrimp hot, garnished with fresh parsley. That pop of green makes everything look so inviting, don’t you think?
And there you go! A delightful plate of Hawaiian garlic shrimp that’s perfect for a weeknight dinner or a special gathering. Don’t be surprised if you find yourself doing a little dance in the kitchen—it’s just the joyful spirit of cooking!
For the best results with your dish, consider using high-quality shrimp cooking equipment to enhance your culinary experience. Now, go ahead and taste that tropical vibe you’ve created. Wouldn’t you agree that cooking can be a little magical?
Tips & Variations
After you’ve nailed the steps to make that delicious Hawaiian garlic shrimp, you’re probably itching to know how to elevate it even further.
Trust me, I get it. One tip? Add a splash of lime juice for that zesty kick—seriously, it’s a game-changer. If you’re a spice lover like me, toss in some red pepper flakes to really heat things up.
Got leftover shrimp? Chop it up and mix it into some pasta for a quick meal.
And don’t forget about garnishing! A sprinkle of fresh parsley not only adds color but also a fresh burst of flavor.
I once forgot to add any seasoning at all—let’s just say it was a lesson learned.
Happy cooking!
How to Serve?
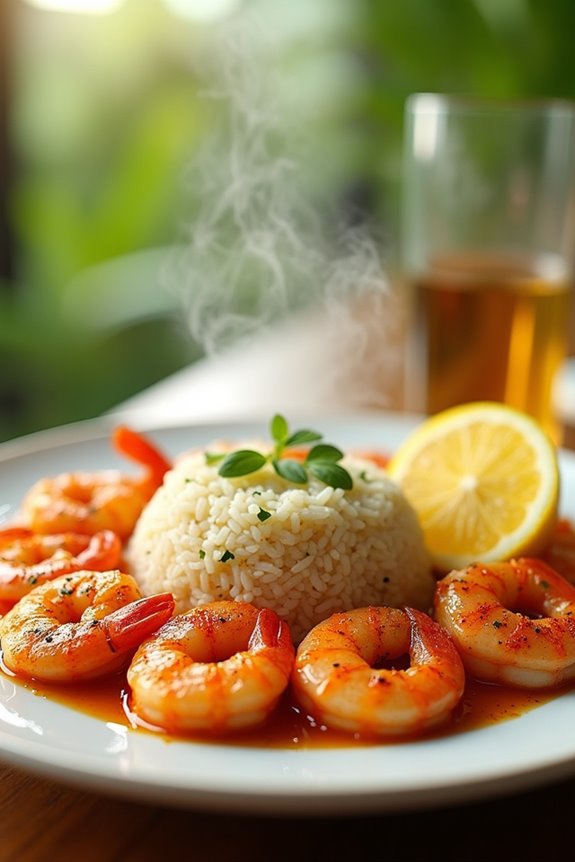
Serving up Hawaiian garlic shrimp is a feast for the eyes as much as it’s for the taste buds.
You can’t go wrong with a sprinkle of fresh parsley or cilantro on top for that pop of color. I love serving this dish alongside a mound of fluffy white rice, soaking up all that garlicky goodness.
Don’t forget a crisp, invigorating salad—maybe a simple cucumber salad to balance out the rich flavors.
Oh, and let’s be honest, I sometimes arrange my shrimp a bit artfully—because who doesn’t want to impress?
Slide a few lemon wedges on the side for that zesty kick.
Trust me, your guests will be talking about it long after the plates are clean.
It’s a crowd-pleaser.
Storage & Reheating Guide
When it comes to storing leftover Hawaiian garlic shrimp, I’ve got a few handy tips to keep your delicious meal tasting fresh. First, let it cool down to room temperature before packing it away.
I usually toss mine in an airtight container to seal in all that garlic goodness. You can keep it in the fridge for up to three days—but trust me, it’s usually gone before then!
When it’s time to reheat, I find a skillet works best. Just add a splash of water or oil, and heat it over medium until warmed through.
Oh, and don’t forget to keep an eye on it; nobody likes shrimp that’s more rubbery than tender. A good set of baking sheets can also make reheating easier and more efficient. Enjoy your culinary journey again!
Final Thoughts
Reflecting on that delightful Hawaiian garlic shrimp, it’s clear that enjoying this dish is about more than just eating—it’s an experience.
The garlic, the butter, the shrimp; they all dance together in a way that makes my taste buds sing. I can almost hear the waves crashing on the shore as I savor each bite.
And hey, even if you’re in a landlocked state like me, you can still whip this up in your kitchen and pretend you’re on a beach. Isn’t that the best?
Just don’t forget to have a napkin ready; the buttery goodness can be a little messy. Trust me, it’s worth it.