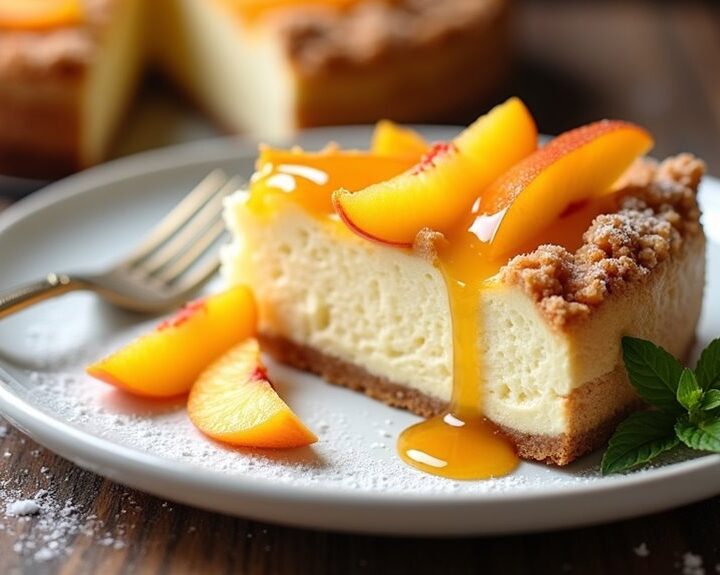
So, I’ve got this Peach Cobbler Cheesecake recipe that’s kind of a game changer for dessert lovers. Seriously, combining cheesecake with that warm, gooey peach cobbler is like a hug for your taste buds, right? I remember the first time I made it—my family thought I was some sort of dessert wizard. Let’s just say, if you’re ready to impress or simply satisfy a sweet craving, stick around; I promise this recipe is worth the time.
Why You’ll Love This Recipe
You know, when I first stumbled upon this Peach Cobbler Cheesecake recipe, I couldn’t believe the combination of two classic desserts could be so perfect.
Imagine this: the creamy richness of cheesecake blending with the warm, comforting flavors of peach cobbler. Sounds dreamy, right?
You’ll love how the crunchy graham cracker crust balances the smooth cheesecake filling. And then there’s that peach topping—oh, the juicy peaches, sweetened just right with a hint of cinnamon.
I can practically taste it now. Honestly, making this dessert is like embracing a hug from your favorite grandma.
Trust me, when you serve it up, everyone will be asking for seconds. You’ll want to save this one for special occasions—and maybe even just because.
Equipment List
When diving into the delicious world of making Peach Cobbler Cheesecake, it helps to have the right tools on hand. Trust me, it’ll make the process so much smoother.
You’ll definitely want a 9-inch springform pan for that perfect cheesecake depth. A mixing bowl, some measuring cups, and spoons are must-haves too. Don’t forget an electric mixer to beat that cream cheese into submission; your arm will thank you later.
A saucepan is essential for that warm peach topping, and a spatula helps to get every final bit of batter out. Finally, a cooling rack lets your cheesecake chill without getting soggy. Adding a potato masher can also be handy to create a smooth peach filling if you prefer a puréed texture.
I’ve made my fair share of messes, so these tools are my lifesavers. Ready to bake?
Our Ingredients
Alright, my fellow bakers, let’s dig into the deliciousness of Peach Cobbler Cheesecake!
This dreamy dessert is a blend of creamy cheesecake and sweet, juicy peaches, all on a crunchy graham cracker crust. Sounds divine, right?
Before we get lost in fantasies of that first bite, we need to gather our ingredients. Trust me, having everything ready makes the baking so much more enjoyable—and less chaotic. So, let’s get to it, shall we?
Here’s what you’ll need to whip up this scrumptious treat:
- For the Crust:
- 3 cups graham cracker crumbs
- 1/4 cup melted butter
- 1 tablespoon sugar
- Pinch of salt
- For the Cheesecake:
- 16 ounces cream cheese
- 1 ½ cups sugar
- 1 tablespoon vanilla extract
- 1/4 cup cornstarch
- 3 eggs
- ½ cup heavy cream
- For the Peach Topping:
- 2-3 peaches (fresh or frozen)
- 1 cup sugar
- 1 teaspoon cinnamon
- 1/4 teaspoon nutmeg
- 1 ½ cups water
- 1 tablespoon butter
- 1 teaspoon vanilla extract
- 2 ½ tablespoons cornstarch
- For the Crumble:
- 1 cup cake mix
- 1 tablespoon ice water
- 2 tablespoons melted butter
Now that we’ve got our ingredient lineup, let’s chat about a few little details.
First off, make sure your cream cheese and eggs are at room temperature when you’re mixing. This little tip can help you avoid those pesky lumps that sometimes pop up if you use cold ingredients.
And when choosing your peaches, ripe ones will give you the sweetest flavor, but frozen are totally acceptable if you’re in a pinch. They can still bring that lovely peachy essence that makes everything feel like summer.
Oh, and don’t be shy about adjusting the sweetness. If you love your desserts extra sweet, feel free to add a smidge more sugar to the peach topping—because who doesn’t love a little extra sweetness in their life?
Now, let’s get ready to plunge into the step-by-step instructions coming up next!
Step-by-Step Instructions
Making a Peach Cobbler Cheesecake isn’t just baking; it’s a delightful journey filled with creamy goodness and sweet, juicy peaches. Trust me, when you sink your fork into this luscious dessert, you’ll understand just how blissful it can be. So, grab those ingredients, roll up your sleeves, and let’s plunge into the step-by-step instructions for crafting this delicious treat!
1. Prepare the Crust: In a mixing bowl, combine 3 cups of graham cracker crumbs**, 1/4 cup of **melted butter**, 1 tablespoon of sugar, and a pinch of salt**. Mix them well until everything is evenly combined. You’ll want a crumbly mixture that holds together when pressed.
Now, press this mixture firmly into the bottom of a 9-inch springform pan to form a solid crust. No one likes a soggy bottom, right?
2. Make the Cheesecake Batter**: In another bowl, beat 16 ounces of cream cheese until it’s smooth and creamy—just like a cloud. Gradually add in 1 ½ cups of sugar, 1 tablespoon of vanilla extract, and 1/4 cup of cornstarch**. Keep whisking until you don’t see any lumps.
Then, add the 3 eggs**, one at a time, making sure to beat well after each addition. Finally, fold in ½ cup of heavy cream** to give that luscious texture we all crave.
3. Bake the Cheesecake: Pour this dreamy cheesecake batter over the prepared graham cracker crust in your springform pan. Place it in your preheated oven at 325°F and bake for about 1 to 1.5 hours, or until the edges are set and the center slightly jiggles. It’s like a little dance party in there!
Once it’s baked, let it cool completely before moving on. Patience is key here—avoid the temptation to plunge in just yet.
4. Prepare the Peach Topping**: While your cheesecake cools, let’s get those peaches ready. In a saucepan, combine 2-3 sliced peaches (fresh or frozen, your choice), 1 cup of sugar, 1 teaspoon of cinnamon, 1/4 teaspoon of nutmeg, and 1 ½ cups of water**. Cook this mixture over medium heat until the peaches are tender.
Stir in 1 tablespoon of butter and 1 teaspoon of vanilla extract for that extra pop of flavor. Now, mix 2 ½ tablespoons of cornstarch with a little water to create a slurry, and drizzle it into the peach mixture while stirring. Cook until the mixture thickens—this should take just a few minutes. Remove it from the heat and allow it to chill.
5. Make the Crumble**: As the peach topping cools, let’s whip up a quick crumble. In a bowl, mix 1 cup of cake mix, 1 tablespoon of ice water, and 2 tablespoons of melted butter**. Stir until crumbly.
You want that crunchy texture, so don’t overmix—just enough to combine everything.
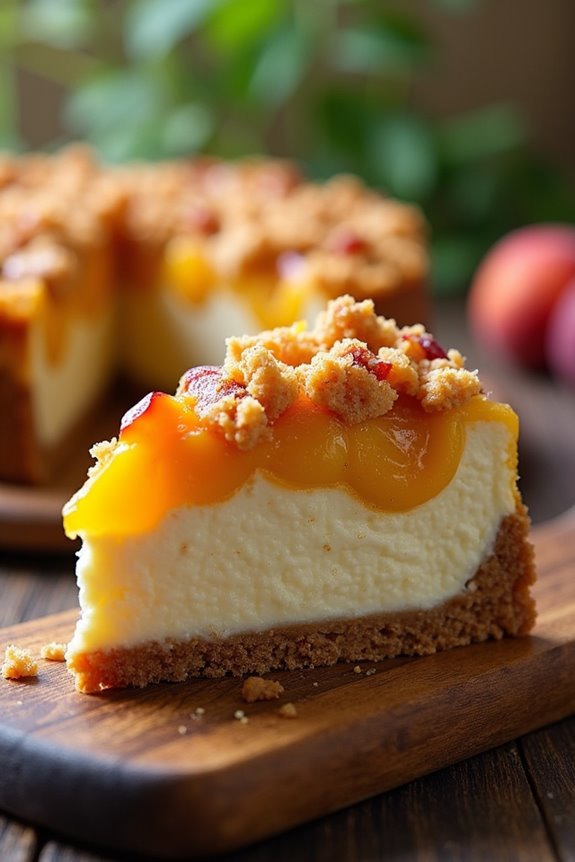
6. Add the Toppings and Bake Again: Once the cheesecake has cooled completely, it’s time to assemble. Sprinkle the crumble over the top of the cheesecake.
Next, spoon the chilled peach topping evenly on top of the crumble. Pop the whole thing back in the oven for another 15 minutes. This is where all those flavors meld beautifully—it’s just divine.
7. Cool and Serve: After baking, allow your Peach Cobbler Cheesecake to cool to room temperature. Then, pop it in the refrigerator for a few hours (or overnight if you can stand the wait) to really let those flavors settle in.
And there you have it—a Peach Cobbler Cheesecake that’s sure to impress your friends and family. Just remember to take a moment to appreciate your hard work before serving. Enjoy each creamy, fruity bite, and feel free to indulge a little—life’s too short not to treat yourself! Premium grill accessories can elevate your BBQ dessert experience even further, offering tools that can help you perfect your cooking.
Tips & Variations
How can you elevate your Peach Cobbler Cheesecake game? First off, use ripe peaches—they make a world of difference in flavor. If fresh ones aren’t in season, frozen will do nicely.
Now, for that crumbly topping, chilling the crumble before you bake it helps it stay crisp, which you definitely want. Also, let your cream cheese and eggs sit at room temperature; it makes mixing so much easier.
Want a fun twist? Try adding a splash of bourbon to your peach topping for a little kick.
And if you’re feeling adventurous, experiment with almond extract instead of vanilla in the cheesecake for a unique flavor. Trust me, these little changes can turn your dessert from good to unforgettable!
How to Serve?
Once you’ve baked your Peach Cobbler Cheesecake to golden perfection, you’ll want to serve it just right to impress your friends and family.
First things first, let it cool completely on the counter—no one likes a messy slice. I usually cut it into generous wedges; after all, we all deserve a big slice of happiness.
To make it extra fancy, I whip some cream and dollop it right on top. Oh, and don’t forget the peach topping! It’s like icing on the cake—just heavenly.
If you’re feeling daring, a scoop of vanilla ice cream never hurt anyone. Trust me, it makes every bite even more delightful.
Enjoy the smiles and compliments; you’ve earned them.
Storage & Reheating Guide
After all that hard work making the Peach Cobbler Cheesecake, you’re probably wondering how to keep it fresh and tasty for later.
First off, let it cool completely before you store it—trust me, nobody wants a soggy cheesecake. Cover it snugly with plastic wrap or aluminum foil, or pop it in an airtight container. It’ll last about four to five days in the fridge.
If you want to be a total hero, freeze individual slices. Just wrap them tightly and stash them in the freezer; they’ll be good for up to three months. Make sure to use suitable freezer containers to preserve the quality of the cheesecake.
When you’re ready to indulge again, let slices thaw in the fridge overnight. A quick blast in the microwave can warm it up right before serving. Enjoy!
Final Thoughts
Whether you’re a seasoned baker or just someone who enjoys sweet treats on occasion, making Peach Cobbler Cheesecake is a delightful journey worth taking.
Trust me, the combination of creamy cheesecake and sweet, gooey peaches is heavenly. I can’t tell you how many times I’ve mangled a recipe—especially when I tried to multitask while chasing my dog.
But this one? It’s straightforward and forgiving.
When you pull it out of the oven, it’s like a warm hug. And don’t even get me started on the crumble topping; it’s the cherry on top.
So, grab those ingredients, gather your loved ones, and prepare for some delicious moments. You won’t regret it—I promise.
Cooking doesn’t have to be perfect; it just has to be fun.