I’ve been experimenting with scrumptious desserts, and I’ve got to tell you, this Samoa cheesecake recipe is a game-changer. Imagine a rich, creamy filling that melts in your mouth, all snuggled in a buttery shortbread crust. I mean, who doesn’t love the combo of coconut, caramel, and chocolate? I won’t lie, I had to start over a couple of times, but it was totally worth it. Curious about how to make this delight? Let’s get started.
Why You’ll Love This Recipe
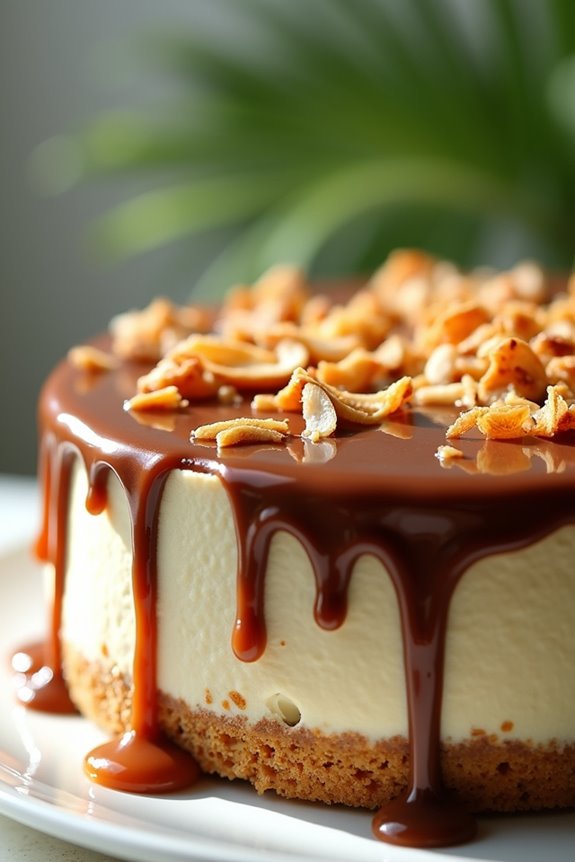
You know, when I first tried this Samoa cheesecake recipe, I didn’t realize it would change my dessert game forever. I mean, who could resist that crunchy shortbread crust, velvety cream cheese filling, and the irresistible coconut caramel topping?
It’s a party in your mouth! Every bite hits you with those classic Samoa flavors, but in cheesecake form. I find myself sneaking slices at midnight, thinking, “Maybe just one more…” Honestly, it’s that good.
Plus, it’s surprisingly easy to make off the bat. You’ll impress your friends, and they’ll beg for seconds! When you have a slice, you won’t just taste a dessert; you’ll experience pure bliss.
Trust me, this Samoa cheesecake is worth every calorie.
Equipment List
When it comes to making my Samoa cheesecake, having the right equipment really makes all the difference. First, I grab a trusty springform pan, which is essential for that perfect cheesecake release.
You’ll also need a mixing bowl—big enough to handle everything without the risk of batter explosions. A hand mixer or stand mixer is a must too, because, trust me, beating cream cheese by hand? No, thank you.
Don’t forget measuring cups and spoons for accuracy; I’ve learned the hard way that eyeballing doesn’t always work out.
Finally, having a spatula and a baking sheet on hand helps with the cleanup. Who knew baking could turn into a mini workout? Additionally, using a soufflé dish can help elevate the presentation of your cheesecake for a show-stopping dessert.
Our Ingredients
When it comes to baking, the ingredients you use can make or break your dish, right? In the case of the Samoa cheesecake, each ingredient plays an essential role in bringing that delicious, tropical flavor to life. Every layer, from the crust to the decadent chocolate drizzle, is important.
And let’s be real, nothing beats the satisfying crunch of that shortbread crust paired with the luxurious creaminess of the cheesecake. Trust me; once you try this, you’ll be craving it on repeat. Now, let’s gather what we need.
Ingredients:
- 2 ½ cups crushed shortbread cookies
- 4 tbsp melted butter
- 32 oz cream cheese, room temperature
- 1 ½ cups granulated sugar
- 4 eggs
- ½ cup heavy cream
- 2 tsp vanilla extract
- 2 ½ cups shredded coconut
- 1 ½ cups sugar (for caramel topping)
- ½ cup water (for caramel topping)
- 2 tbsp corn syrup (for caramel topping)
- 1 cup heavy cream (for caramel topping)
- 2 oz semi-sweet chocolate (for ganache)
- ¼ cup heavy cream (for ganache)
Now, while I get excited about cooking, I’ve to throw in a couple of thoughts about the ingredients here. First, opt for good quality cream cheese because it truly makes a difference in that rich, smooth texture we all adore in cheesecakes.
And then there’s the shredded coconut—the fresher, the better! It’s the star of the show, giving that chewy, sweet goodness that makes Samoa treats irresistible.
Oh, and don’t skimp on the chocolate for the ganache; it adds that final touch of decadence that will make your friends and family think you’re a culinary genius.
You know what? Even if you burn toast like me, you can still nail this cake, so don’t sweat the small stuff.
Step-by-Step Instructions
Making a Samoa Cheesecake is an adventure that combines the rich, creamy goodness of cheesecake with the iconic flavors found in those delicious Samoa cookies. Mixing the batter is quick and simple—just follow these easy steps, and before you know it, you’ll have a stunning dessert that will impress anyone who sees it (even if you normally burn toast).
Let’s explore the steps for creating this tropical delight.
Step-by-Step Instructions
1. Preheat Your Oven: Start by preheating your oven to 350°F. This warms things up just right for baking and guarantees even cooking. Trust me; you want your cheesecake to turn out perfectly.
2. Prepare the Crust: In a mixing bowl, combine 2 ½ cups crushed shortbread cookies and 4 tbsp melted butter. Mix until the crumbs are evenly coated (think of wet sand at the beach).
Next, press this mixture into the bottom of a springform pan to form a crust. You should see a nice, even layer. Bake this crust in your preheated oven for about 10 minutes or until it’s slightly golden and fragrant. Just keep an eye on it so it doesn’t burn—nobody wants a charcoal-flavored cheesecake.
3. Make the Cheesecake Filling: While your crust cools, grab a large bowl and beat together 32 oz cream cheese (make sure it’s at room temperature for a smooth mix), 1 ½ cups granulated sugar, and 4 eggs. Blend until everything is well combined and creamy.
This might take a couple of minutes, so don’t rush it—sometimes, a little extra mixing makes all the difference.
4. Add Cream and Vanilla: Now, toss in ½ cup heavy cream and 2 tsp vanilla extract. Mix again until the mixture is silky smooth.
Think of it as creating a cloud of cheesecake goodness, and feel free to sneak a taste (it’s going to be heavenly).
5. Pour and Bake: Pour the creamy cheesecake mixture over the cooled crust in your springform pan, smoothing it out with a spatula. Bake in the oven for about 1 hour or until the center is set but still jiggles slightly.
You’ll want it to look like a wobbly dream rather than an overcooked brick, so check on it periodically.
6. Cool Down: After an hour, turn off the oven and leave the cheesecake inside with the door slightly ajar for about 1 hour. This step helps prevent cracking (because let’s face it, nobody wants a lumpy cheesecake).
After that, take it out and let it cool to room temperature before transferring it to the fridge to chill overnight. Patience is key here, but I promise you’ll be grateful for the wait.
7. Prepare the Caramel Topping: Now, let’s make that gooey caramel topping that makes this cheesecake a true Samoa experience. In a saucepan, combine 2 ½ cups shredded coconut, 1 ½ cups sugar, ½ cup water, 2 tbsp corn syrup, and 1 cup heavy cream.
Cook over medium heat, stirring continuously until the mixture thickens—this should take about 10-15 minutes. Keep a close eye on it; you don’t want it to scorch (and then you’d just end up with a sad, burnt mess instead of sweet coconut goodness).
8. Chill the Topping: Once it thickens, remove the saucepan from heat and let that caramel topping cool a bit before spreading it over the chilled cheesecake.
This melding of flavors is going to blow your mind.
9. Make the Ganache: Finally, for the chocolate drizzle, melt 2 oz of semi-sweet chocolate with ¼ cup heavy cream in the microwave or over a double boiler until it’s smooth.
Drizzle this over your caramel layer like an artist finishing a masterpiece. Because let’s be real—chocolate makes everything better.
10. Final Chill: Cover the cheesecake with plastic wrap and refrigerate it again for a few hours or until you’re ready to serve.
Trust me; the longer it chills, the more the flavors meld together, resulting in pure bliss.
Voilà! You’ve now created a Samoa cheesecake! Share it with friends, family, or even keep it all to yourself—no judgment here.
Enjoy every bite, and revel in the fact that you’re now a cheesecake wizard. Silicone lids can also help keep your delicious cheesecake fresh for longer periods.
Tips & Variations
After you’ve mastered the initial steps of whipping up your Samoa Cheesecake, there’s a whole world of fun tips and variations just waiting for you to explore.
Want a richer flavor? Try adding a splash of coconut extract to the batter. It’ll blow your mind.
If you’re feeling adventurous, mix in some crushed nuts with the crust—think pecans or almonds. They add a delightful crunch.
Don’t forget to garnish! A little pile of toasted coconut on top can be heavenly.
And speaking of variations, you could swap the chocolate ganache for caramel sauce if you’re feeling sweet.
Trust me, the possibilities are endless.
Just remember, every little change is a chance to make it your own, right?
How to Serve?
Serving your Samoa Cheesecake can feel like a mini celebration, especially when it’s just been chilling overnight, waiting to wow your friends.
I like to slice mine into generous pieces; who doesn’t want a big bite of that creamy goodness?
Try letting it sit at room temperature for about 15 minutes before cutting—that way, it’s easier to slice.
As I serve it, I love to top each piece with an extra drizzle of chocolate ganache and a sprinkle of toasted coconut for that wow factor.
You could also add some whipped cream if you’re feeling fancy.
And let’s be honest, who doesn’t appreciate a little whipped cream? It’s like the cherry on top—just makes everything better, right?
Storage & Reheating Guide
Storing a delicious Samoa Cheesecake is easier than you might think, and trust me, you’ll want to enjoy every last bite of that creamy, coconutty goodness.
First, let it chill in the fridge for at least four hours or, better yet, overnight. Once it’s set, cover it tightly with plastic wrap or foil. I try to use freezer bags, too, if I’m feeling fancy. It’ll happily sit in the fridge for up to a week.
If you want to keep it longer, pop it in the freezer—just make sure it’s well wrapped. When it’s time to enjoy again, let it thaw in the fridge for a few hours. Reheating isn’t necessary; this cheesecake is best served cold, trust me! Also, consider using vacuum seal bags for optimal long-term preservation and mess-free storage.
Final Thoughts
Even if you’re not a baking pro, making a Samoa Cheesecake can feel like a little slice of heaven, or at least a delicious adventure in your kitchen. Seriously, it’s easier than it looks.
I remember the first time I attempted it; the kitchen was a mess, but oh, the joy when it all came together. From the buttery crust to the creamy filling and that glorious caramel topping, it’s a dessert that’ll win hearts and stomachs.
Plus, it’s great for sharing—if you can resist keeping it all for yourself. So, whether you’re impressing guests or treating yourself, this cheesecake is sure to delight. Just remember, there’s no shame in licking the spatula clean.
Enjoy every bite!