I’ve got to share my love for gluten-free onion rings. They’re crispy, golden, and oh-so-delicious. Trust me, they’ll give that craving for crunchy snacks a run for its money. And while I’ve burned my fair share of food in the kitchen (don’t worry, we all have those days), these onion rings are surprisingly easy. With just a few simple steps, you’ll be on your way to a perfect platter. Ready to get that batter flowing?
Why You’ll Love This Recipe
You know how some crispy snacks just have a way of making any day feel special? That’s exactly what these gluten-free onion rings do for me.
Imagine this: you bite into that crispy coating, and suddenly, it’s like all your worries disappear for a moment. Seriously, who doesn’t love crispy, golden goodness?
I’ve spent way too long searching for the perfect gluten-free recipe, and let me tell you, this one’s a winner. The rice flour and tapioca create that perfect crunch, and paired with chilled beer? It’s pure magic.
When I first made these, I couldn’t stop eating them. I even burnt my finger trying to grab one from the hot oil—totally worth it.
Trust me, you’ll love them too.
Equipment List
Getting everything you need ready makes the cooking process so much smoother, and that’s especially true for frying up these delicious onion rings.
First, you’ll want a reliable frying pan or Dutch oven—something that can hold enough oil for those crispy rings. A thermometer is essential to keep the oil at 350°F; nobody wants soggy onion rings.
I also recommend a whisk for mixing that batter, a set of tongs to flip those beauties, and a sturdy slotted spoon for the perfect drain. Additionally, using a professional bread maker can elevate your cooking game by allowing you to focus on preparing tasty sides like these onion rings.
Finally, grab a couple of paper towels to catch those drips. Trust me, having this equipment on hand means you won’t be running around, searching for that elusive spatula when you’re ready to fry!
Our Ingredients
Making gluten-free onion rings isn’t just about frying up some onions; it’s about creating a crunchy, savory treat that everyone can enjoy.
Whether you’re whipping these up as a snack for movie night or serving them alongside a juicy burger at your backyard barbecue, these onion rings are sure to impress. Let’s explore the tasty ingredients that come together to make this gluten-free delight.
Here’s what you’ll need to gather:
- 1-2 large onions
- 1 cup rice flour
- ¼ cup tapioca flour or cornstarch
- 1 tsp paprika
- ½ tsp garlic powder
- ½ tsp salt
- ¼ tsp black pepper
- ¼ tsp cayenne pepper (optional)
- 1¼ cups chilled gluten-free beer or carbonated water
- Canola or vegetable oil (for frying)
Now, let’s talk about these ingredients.
First off, the type of onion you choose can really change the flavor profile. Sweet onions like Vidalia bring a nice flavor that contrasts beautifully with the crunch of the batter.
And speaking of the batter, the mix of rice flour and tapioca flour is key. They help create that fantastic outer crunch, while the chilled beer (or soda for a non-alcoholic option) gives it a light, airy texture that’s hard to resist.
Don’t worry if you don’t have all the spices; feel free to adjust or leave out the cayenne if you’re not a fan of heat. Cooking should be fun, so personalize it however you like.
Happy cooking!
Step-by-Step Instructions
Making gluten-free onion rings is a fun way to add a crispy, delicious treat to your table. Mixing the batter is quick and simple—just follow these easy steps, and before you know it, you’ll have a platter of golden, crunchy onion rings that everyone will love.
1. Prep Your Onions: Start with 1-2 large onions, peeling them and slicing them into ½-inch rings. You can choose any type of onion, but sweet onions work beautifully for that perfect balance of flavor.
Now, when I say slice, I mean try your best to keep them uniform. No one wants half a ring and half a wedge, right?
2. Whisk the Dry Ingredients: In a bowl, whisk together 1 cup rice flour, ¼ cup tapioca flour (or cornstarch if that’s what you have), 1 tsp paprika, ½ tsp garlic powder, ½ tsp salt, ¼ tsp black pepper, and if you’re feeling adventurous, ¼ tsp cayenne pepper.
Feel free to skip the cayenne if you prefer a milder taste—this is your cooking adventure after all!
3. Make the Batter: Gradually pour in 1¼ cups of chilled gluten-free beer or carbonated water. Whisk everything together until it’s smooth and pourable.
(Avoid overmixing—the batter should have a bit of texture to create that happy crunch.)
4. Heat the Oil: Grab a pot and heat canola or vegetable oil until it reaches 350°F (177°C). You want enough oil for a depth of about 2 inches.
If you don’t have a thermometer, toss in a small drop of batter; it should sizzle and float.
5. Dip and Fry: Carefully dip the onion rings into the batter, making sure they’re well-coated. Then, in small batches (don’t crowd the pan), gently lower them into the hot oil.
Fry for about 2 minutes or until they turn golden brown and crisp. Everyone loves a good crunch!
6. Drain and Serve: Once fried to perfection, use a slotted spoon to lift the rings out of the oil. Place them on paper towels to drain the excess oil.
You might need to fight the urge to snack on them right away—you know, let them cool off a little.
And there you have it! Crunchy, golden onion rings ready to be devoured. The beauty of making these at home is you can munch on them however you like, whether it’s as a standalone snack or alongside a nice burger. Pair them with a high end cookware set to enhance your culinary experience.
Enjoy the process and happy cooking!
Tips & Variations
When it comes to gluten-free onion rings, a little creativity goes a long way.
I’ve found that experimenting with spices can really elevate the flavor. Want a kick? Toss in more cayenne pepper! Or, if you’re feeling fancy, try adding some grated cheese to the batter.
Also, don’t sweat it if the batter seems too thick. Just whisk in a bit more chilled beer or soda until it’s right. Trust me, the crunch factor matters.
Speaking of crunch, let your oil reach that perfect temperature of 350°F; it makes all the difference.
Finally, if you have leftover batter, try coating some veggies or chicken bites. Why waste it? Who knew gluten-free could bring such joy?
How to Serve?
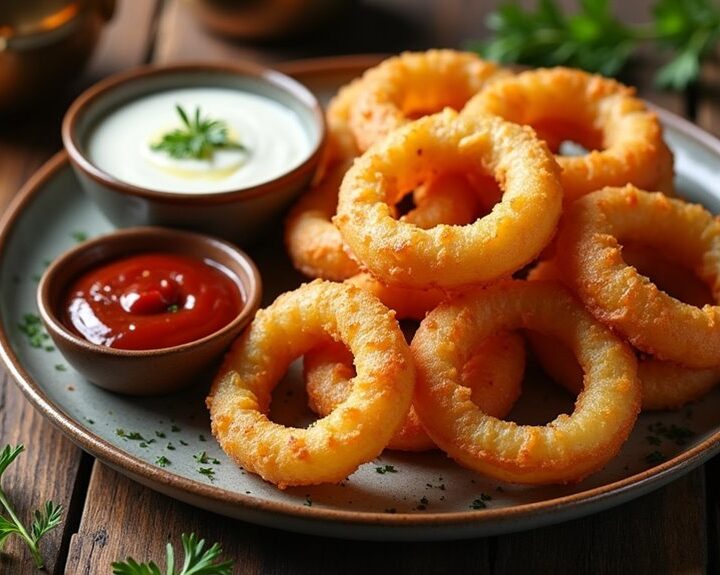
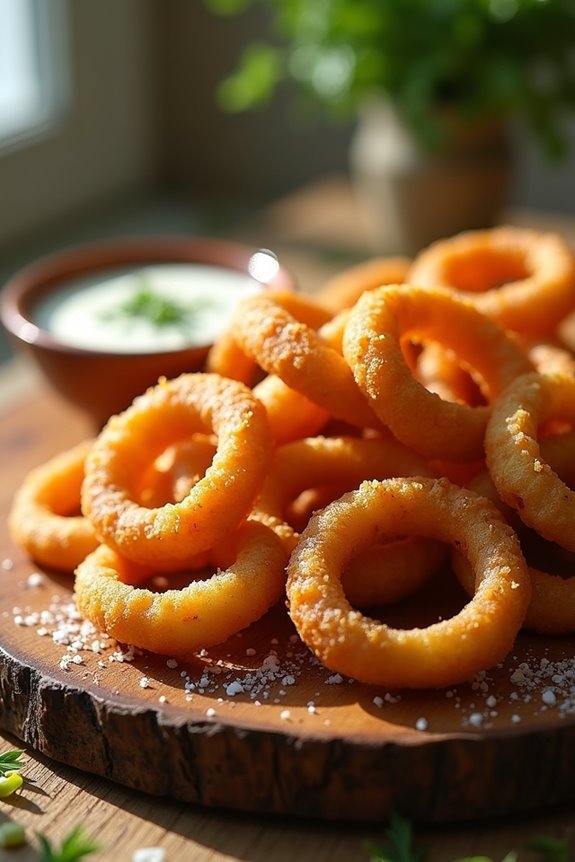
The best way to serve gluten-free onion rings is to keep things simple and fun. I usually grab a platter, stack those crispy rings high, and watch everyone’s eyes light up. A sprinkle of sea salt right before serving? Absolutely necessary.
For dipping, I love a spicy aioli or creamy ranch—maybe even a tangy barbecue sauce, if I’m feeling adventurous. Presentation matters too, so I like to add a little green garnish, just to make things pop. Trust me; it looks fancy without any extra effort.
Oh, and don’t forget napkins; these beauties can get messy. When I’m sharing them, I can’t help but feel like a rockstar in the kitchen. Who wouldn’t want to impress with simple delights?
Storage & Reheating Guide
Although I can hardly resist gobbling up a whole batch of these crunchy gluten-free onion rings in one sitting, I’ve learned the hard way that leftovers do exist and deserve some tender loving care.
To store any extras, just pop them in an airtight container and into the fridge. They’ll last for about three days, but let’s be honest—I rarely have any left after 24 hours.
When you’re ready to enjoy them again, I recommend reheating them in the oven at 375°F (190°C) for about 10 minutes. This way, they’ll regain that delightful crunch, which is way better than a soggy microwave decision. Investing in quality soup freezer containers will also help you store other delicious leftovers easily.
Trust me, your taste buds will thank you for this little extra effort.
Final Thoughts
Even if you think you might never want to leave the cozy embrace of your couch after devouring these gluten-free onion rings, I promise they’re worth that extra effort to make.
Seriously, these crispy bites aren’t just a side; they’re the star of any meal. Imagine this: crunchy on the outside, tender on the inside—heavenly!
Sure, frying can be messy, and I’ve probably burned my fingers a time or two, but hey, it’s part of the fun, right?
Plus, sharing them (or not) will definitely make you the hero of your next gathering.