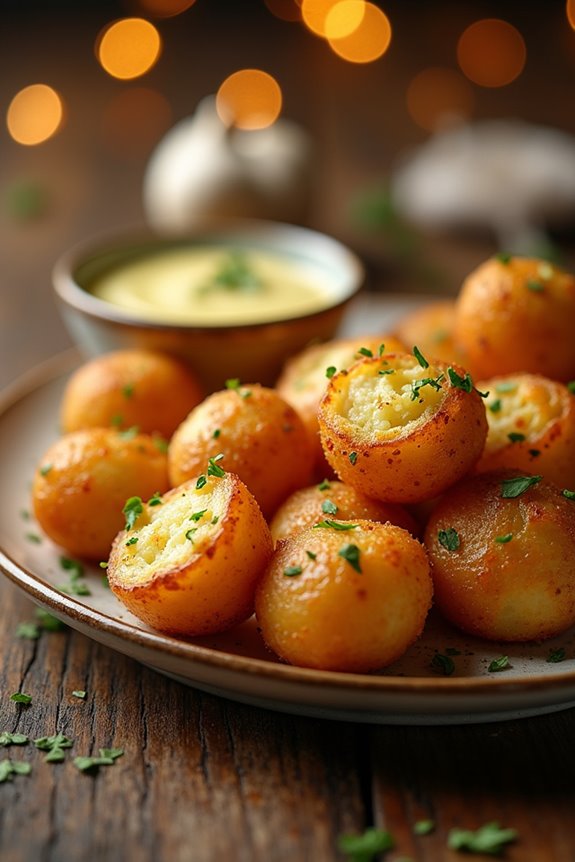
Let’s talk about Garlic Potato Pops, shall we? Honestly, they’re like little balls of happiness. Think crispy on the outside, soft on the inside, with that punchy garlic flavor that makes everything better. I remember the first time I attempted these; my kitchen turned into a floury battlefield—I roasted my potatoes like a seasoned pro, or so I thought. If you’re itching to impress, stick around to uncover the simple steps and my best-kept secrets.
Why You’ll Love This Recipe
You may find that these Garlic Potato Pops become your go-to snack, especially when you’re craving something crispy and flavorful. Seriously, they’re so good that I sometimes eat them for dinner—don’t judge.
With just a handful of ingredients, you can whip up these little bites of joy in no time. I love how the combination of garlic and spices makes each pop burst with flavor. Plus, they’ve got that satisfying crunch you crave.
Honestly, who doesn’t love a snack that’s both delicious and easy to make? When I toss them in garlic butter right before serving, it’s like giving them a warm hug.
You’ll never look at potatoes the same way again—trust me on this one.
Equipment List
Now that you’re pumped about making those crispy Garlic Potato Pops, let’s talk about what you’ll need regarding equipment.
First up, you’ll need a pot to boil those potatoes until they’re fork-tender—easy, right?
A good masher is essential; you don’t want to end up with lumpy pops. An air fryer makes this whole process a breeze, helping to achieve that perfect crisp.
Grab a mixing bowl for combining your heavenly ingredients and a baking tray, too, if you prefer oven baking.
A sturdy spatula will help you shape those little balls, and don’t forget some measuring spoons for all those spices. Plus, consider pairing your snacks with some homemade cheese for a delightful flavor boost, especially with artisan cheese making kits that can help you create your own creations right at home.
Honestly, isn’t cooking just the best?
Our Ingredients
When it comes to whipping up some delicious Garlic Potato Pops, the ingredients are key to achieving that mouthwatering flavor we all crave. Whether you’re looking for a cozy snack, a party appetizer, or just something fun to try out in the kitchen, having the right ingredients at your fingertips makes all the difference.
So let’s break down what you’ll need to bring this tasty recipe to life.
Ingredients:
- 2 large potatoes (washed, peeled, cubed)
- 1 tsp garlic powder
- 1 tsp onion powder
- 1 tsp paprika
- Salt and black pepper to taste
- 4 tsp cornflour
- 25g grated Parmesan cheese (optional for those who love extra flavor)
- Cooking spray (to help those pops get nice and crispy)
- 1/2 stick butter
- 1 tsp parsley
Now, let’s chat about those ingredients for a second. You might already have some of these staples in your pantry, especially if you enjoy cooking.
Potatoes, the stars of the dish, are naturally starchy and will give your pops that fluffy texture we all adore. And, let’s be real, garlic makes everything better, right? If you’re feeling fancy, a sprinkle of Parmesan not only boosts the flavor but also adds a wonderful extra crispness when air-fried.
Don’t skimp on the seasonings either—the paprika and garlic powder work wonders. Make sure to grab fresh parsley for that pop of color and earthy taste at the end.
Oh, and if you happen to make more than you can handle (but who could ever have too many potato pops?), you can freeze them for later. Now, how’s that for a plan?
Step-by-Step Instructions
Making Garlic Potato Pops is a fun and satisfying experience that’s sure to delight your taste buds. Follow these simple steps to whip up a batch of crispy, garlicky goodness that you can enjoy as a snack or serve to friends at your next gathering. Ready? Let’s get frying!
Step-by-Step Instructions
1. Boil the Potatoes: Start by taking 2 large potatoes, washing and peeling them, then cutting them into cubes. Place the cubed potatoes in a pot of boiling water and cook until they’re fork-tender, which should take about 15-20 minutes.
Drain the potatoes well and let them cool slightly.
2. Mash the Potatoes: In a large mixing bowl, add the drained potatoes. Sprinkle in 1 teaspoon of garlic powder, 1 teaspoon of onion powder, and 1 teaspoon of paprika.
Don’t forget to add salt and black pepper to taste! Add 4 teaspoons of cornflour for that perfect binding. If you want to indulge a little, toss in 25 grams of grated Parmesan cheese for extra flavor.
Now get in there and mash everything together until nice and smooth—this is the moment where you don’t want any lumps (but not so smooth that it becomes gluey).
3. Shape the Potato Mixture: Once your potato mixture is fluffy and well-combined, grab some of it and shape it into balls in your hands. Depending on the size you prefer, these can be about the size of a golf ball or a bit smaller.
Aim for uniformity so they cook evenly.
4. Preheat the Air Fryer: While you’re shaping your pops, preheat your air fryer to 200°C (about 400°F). This will guarantee that your pops get that lovely golden crispness when they go in.
5. Air Fry the Pops: Once preheated, arrange the potato balls in the air fryer basket. Make sure to give them some space so they can crisp up nicely.
Lightly spray them with cooking spray for added crunch. Air fry for about 15-20 minutes, shaking the basket halfway through to guarantee even cooking, because nobody wants a soggy pop.
6. Make the Garlic Butter: While your pops are cooking, melt 1/2 stick of butter in a small saucepan. Stir in 1 teaspoon of garlic powder and 1 teaspoon of chopped parsley.
This delicious mixture will add a lovely finish to your pops.
7. Toss in Garlic Butter: When your Garlic Potato Pops come out of the air fryer, they should look perfectly golden brown and crisp.
Immediately toss them in your garlic butter mixture, making sure each pop is well-coated. This is where the magic happens—your kitchen will smell divine!
8. Serve and Enjoy: Plate those delightful pops, and if you like, sprinkle a touch of extra parsley on top for presentation.
Enjoy them hot, fresh, and bursting with flavor. Honestly, if you can resist eating them all at once, I applaud you.
And there you have it, a straightforward yet rewarding venture into the world of Garlic Potato Pops. With each bite, you’ll be glad you took the time. Discover the perfect colander set to help drain the potatoes effectively. Happy cooking!
Tips & Variations
Although you could stick to the basic recipe for Garlic Potato Pops, why not shake things up a bit?
I’ve experimented with adding different herbs, like rosemary or thyme; trust me, those flavors make every bite sing.
Want a kick? Toss in some crushed red pepper flakes.
If you’re feeling adventurous, try mixing in different cheeses—cheddar’s a delight.
And let’s not forget the dipping sauces! A spicy aioli or zesty ranch can take these pops to the next level.
If you ever find leftovers (which is rare), they’re just as tasty reheated.
So, play around with these variations. After all, cooking’s about having fun, right?
Let your creativity run wild, and enjoy every scrumptious bite.
How to Serve?
Serving Garlic Potato Pops is a delightful experience that goes beyond just plopping them on a plate.
I love to arrange them in a cute, colorful bowl, making sure they’re all piled high and looking tempting. A sprinkle of fresh parsley on top gives them that gourmet touch.
Don’t forget to serve a side of your favorite dipping sauce—ketchup, garlic aioli, or even a spicy mayo can really take them up a notch.
If I’m feeling fancy, I add sprigs of rosemary or a slice of lemon for flair. Honestly, they disappear faster than I can say “Garlic Potato Pops.”
You’ll see—they’ll be the star of your gathering, even if I’m still figuring out my serving game!
Storage & Reheating Guide
When you’ve got leftover Garlic Potato Pops (which, let’s be honest, is a rare occurrence in my house), storing them properly can make all the difference in keeping that delicious flavor intact.
First, let them cool down completely. Then, toss them in an airtight container; I prefer glass to keep odors at bay.
When you’re ready to indulge again, don’t just microwave them—give them a good crispy revival. Preheat your air fryer to 180°C, pop the Garlic Potato Pops in, and fry for about 5-7 minutes, shaking halfway.
They’ll be golden, crispy, and oh-so-delicious. Trust me, nobody wants soggy potatoes. I’ve made that mistake too many times. Using silicone lids can help ensure that your leftovers are properly sealed and keep their freshness.
Enjoy these flavors like it’s the first time again.
Final Thoughts
Garlic Potato Pops are like the perfect snack-time hug; they warm you up and make everything feel a bit better. Honestly, who doesn’t love crispy, golden bites of garlic goodness?
They’re easy to whip up and are a fantastic way to impress friends. I mean, when was the last time you served something this tasty? What’s great is you can customize them—throw in some extra cheese or spices if you’re feeling adventurous.
Plus, they hold up well in the fridge, so leftovers are definitely a win. Just remember, tossing them in garlic butter takes them to a whole new level.