I’ve got to say, there’s something magical about a warm slice of egg and cheese toast fresh from the air fryer. It’s like breakfast meets a cozy hug. I always have bread, eggs, and cheese on hand—who doesn’t? Imagine this: crispy edges, gooey cheese, and perfectly cooked eggs. Trust me, you’ll want to try customizing it, too. I can’t be the only one who loves a little variety. So, are you ready to whip up your own?
Why You’ll Love This Recipe
Let me tell you, there’s something magical about the combination of eggs, cheese, and toast that just makes breakfast feel like a little celebration.
When I whip up air fryer egg and cheese toast, I’m not just making food; I’m crafting joy on a plate.
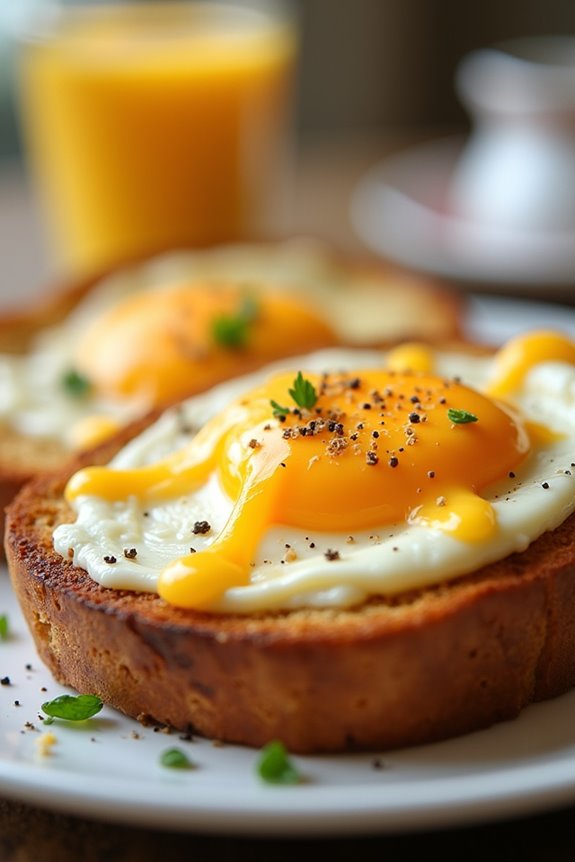
Imagine this: crispy edges, that oozing, gooey cheese melting into the soft, fluffy egg, all cradled by golden toast. It’s comfort food, but it’s quick and easy too.
What’s better? I love that my air fryer does the heavy lifting while I sip my coffee.
Honestly, it’s hard to mess it up—if I can do it, anyone can. Just remember to check the yolk to your liking.
Who doesn’t love a breakfast that feels like a hug?
Equipment List
When gearing up to make Air Fryer Egg and Cheese Toast, having the right tools in your kitchen can make all the difference.
You’ll definitely need an air fryer, of course. Mine’s like a magical little box that cooks everything perfectly. Next, grab a cutting board and a knife for slicing your bread. A glass works wonders to create those indents for the eggs. There’s also the option of a butter knife if you’re feeling fancy.
Oh, and don’t forget mixing bowls for seasoning your eggs, along with a fork for giving them a quick whisk. I’ve tried making this without the right tools, and trust me, it’s not the same. Investing in premium kitchen appliances can enhance your cooking experience significantly.
Our Ingredients
Making Air Fryer Egg and Cheese Toast isn’t just a treat, it’s a delicious way to start your day. Imagine waking up to the smell of crispy, buttery toast topped with perfectly cooked eggs and gooey cheese. I mean, who wouldn’t want that?
Plus, it’s incredibly simple and requires only a handful of ingredients that you probably already have in your kitchen. Let’s take a look at what you’ll need to whip up this breakfast delight.
Here’s your list of ingredients:
- 2 slices of bread
- 2 large eggs
- Shredded cheese (cheddar or your favorite type)
- Salt and pepper to taste
- Butter (optional)
When it comes to ingredients, flexibility is key! You can use any kind of bread you love—whether that’s whole grain, sourdough, or even gluten-free options.
And let’s not forget about the cheese; if you’re feeling adventurous, try mixing different types for a flavor explosion.
Perhaps add some spices or herbs to the eggs for a little extra oomph. The beauty of this recipe is that you can tailor it to what you already have on hand, which makes it a great choice for using up leftovers or pantry staples.
Just remember, fresh eggs will give you the best results, especially for that lovely runny yolk. Happy cooking!
Step-by-Step Instructions
Making Air Fryer Egg and Cheese Toast is an exciting and simple way to kickstart your day. It’s all about that crispy toast, perfectly cooked eggs, and gooey cheese that makes your breakfast feel special. Let’s delve into the step-by-step process of whipping up this delightful meal.
- Preheat the Air Fryer: Start by preheating your air fryer to 340°F. This helps guarantee everything cooks evenly and gets that lovely golden brown finish.
- Prepare the Bread: Take your 2 slices of bread and press a small, round indent in the center of each slice using a glass. This little indent is going to cradle your eggs beautifully. Just imagine those yummy yolks nestled in perfectly!
- Butter the Bread (Optional): If you like a touch of richness, spread a little butter around the edges of the bread. This is optional, but it can add that extra crispy, buttery goodness.
- Place Bread in Air Fryer: Carefully place the bread slices in the air fryer basket. Make sure there’s enough room for the indents to hold the eggs without spilling.
- Add the Eggs: Crack 1 large egg into the center of each indent. If you’re like me and tend to over-egg things, just stop right there and admire your work. Season the eggs with salt and pepper to taste. A little pinch goes a long way!
- Cook the Eggs: Air fry those beauties for about 6-8 minutes. Keep an eye on them, as air fryer models can vary. You want the egg whites to be nice and set. If you like a runny yolk, lean toward the lower end of the cooking time.
- Melt the Cheese: Here’s the fun part—during the last 2 minutes of cooking, sprinkle your shredded cheese of choice on top of the eggs. You want it to melt into gooey perfection, so watch for it to become oozy and inviting.
- Serve and Enjoy: Once the cooking time is up and the egg whites are set with melty cheese on top, carefully remove the toast from the air fryer. Serve it warm and enjoy every delicious bite. Trust me, once you taste it, you’ll be hooked.
And just like that, you’ve created a mouthwatering Air Fryer Egg and Cheese Toast! It’s a simple recipe that feels fancy because of the crispy edges and rich toppings. Perfect for breakfast—any time of the day! To elevate your grilling experience, consider essential accessories for your grill and smoker setup!(essential accessories for your grill and smoker setup) Happy cooking!
Tips & Variations
If you’re looking to elevate your Air Fryer Egg and Cheese Toast, there are plenty of tips and variations to contemplate.
I like to mix up my cheese game—try mozzarella for a melty stretch or pepper jack for a kick.
Don’t forget herbs! A sprinkle of chives or parsley adds freshness that sings. If you’re feeling adventurous, throw in some diced veggies like tomatoes or bell peppers before the eggs.
Now, regarding texture, check doneness early; nobody wants a rubbery egg. For a perfect yolk, adjust your time based on your air fryer.
Oh, and if you’ve got leftover bacon, chop it up and add that bliss. Trust me, it doesn’t hurt to get a little creative.
How to Serve?
Once you’ve whipped up those delicious Air Fryer Egg and Cheese Toasts, it’s time to think about how to serve them.
Honestly, I love plating them up with a sprinkle of fresh herbs, like chives or parsley, for a pop of color. You can also drizzle a bit of hot sauce on top if you’re feeling adventurous—plus, it just looks fancy.
I often pair mine with a side of fresh fruit, like berries or a banana. It makes me feel slightly healthier. Don’t forget a cup of coffee or tea—it really elevates the experience, right?
These toasts are perfect for breakfast or brunch. Just gather your loved ones and dig in; you’ll want everyone to taste these!
Storage & Reheating Guide
Storing leftover Air Fryer Egg and Cheese Toast isn’t just practical; it can actually save you from that inevitable breakfast dilemma when you’re rushing in the morning.
I mean, who doesn’t want a quick bite ready to go? Just pop your toast in an airtight container and refrigerate it. It should last about 2–3 days—if you can resist it that long.
For reheating, I usually toss it back in the air fryer for about 3–4 minutes. This keeps the toast crispy and warms the egg just right. Additionally, using premium tea brewing equipment can enhance your breakfast experience by providing a perfect beverage companion.
If you’re in a real rush, the microwave works too, but it can get a bit soggy. So, consider your options, and remember: breakfast shouldn’t be a chore, just delicious!
Final Thoughts
We’ve made it to the end of this delicious egg and cheese toast journey, and I must say, the joy of having these in your fridge is almost too good to be true.
Seriously, it’s like having a breakfast hug ready to go. I love that they’re quick and easy, not to mention super customizable.
Feeling adventurous? Try different cheeses or add veggies. I’ve been known to top mine with a slice of avocado, but let’s keep that between us.
Plus, they’re perfect for busy mornings when I can’t even.
So, whether you’re indulging or trying to impress, this recipe has your back.
Go ahead, give it a shot—your taste buds will thank you. Happy cooking!