I’ve gotta tell you, there’s something special about whipping up Delicious Raising Cane Tenders at home. You know, that perfect crunch outside with juicy goodness tucked inside. I remember the first time I tried to recreate the magic—I may or may not have underestimated the splatter from frying, and let’s just say my kitchen looked like a disaster zone. But the flavor? Totally worth it. So, ready to make your kitchen the next tender hot spot? Let’s plunge into it.
Why You’ll Love This Recipe
Why do we crave those crispy, golden chicken tenders from Raising Cane’s? It’s that crunchy coating and juicy, tender chicken that just hits the spot. I can’t be the only one who finds it hard to resist these beauties, right?
When I make raising cane tenders at home, it’s like a culinary hug. The buttermilk marinade makes them super moist, while the blend of spices gives such great flavor. Plus, I get to dunk them in that creamy Cane’s sauce, which is basically magic in a bowl.
And hey, it’s easier than you’d think. Honestly, once you’ve got your kitchen floor covered in flour (oops), it feels like a party. So why not recreate this deliciousness and impress yourself?
Equipment List
When it comes to making Raising Cane’s chicken tenders, having the right equipment makes a world of difference.
First off, you’ll need a deep fryer or a heavy pot for frying—trust me, nothing beats that crispy goodness. Don’t forget a thermometer to verify your oil’s at the right temp.
A whisk is essential for mixing the marinade and sauces, while a couple of mixing bowls help streamline the process. Got a good pair of tongs? You’ll want those for handling the chicken without getting too messy.
Oh, and a wire rack for cooling the tenders after frying is a game changer—it keeps them crispy. Who wants soggy tenders? Not me.
Additionally, investing in a quality deep fryer commercial can elevate your frying game, ensuring consistent results.
Let’s get cookin’!
Our Ingredients
When it comes to creating those iconic Raising Cane’s chicken tenders, nothing compares to using fresh, quality ingredients. You want every bite to be flavorful, juicy, and unforgettable.
So let’s take a look at the magic components that will come together to make your kitchen smell like heaven. Whether you’re planning to impress family or just satisfying a late-night craving, having the right ingredients on hand is the first step on this delicious adventure.
Ingredients:
- 2 lbs chicken tenders
- 1 large egg
- 1 ½ cups buttermilk
- 2 ½ cups all-purpose flour
- ½ cup cornstarch
- 1 ½ tsp paprika
- 1 tsp garlic powder
- ½ tsp onion powder
- 5 tsp kosher salt, divided
- Freshly ground black pepper
- Vegetable oil (for frying)
Cane’s Sauce:
- ¾ cup mayonnaise
- 3 tbsp ketchup
- 1 tbsp Worcestershire sauce
- 1 tsp garlic powder
- ¾ tsp black pepper
- ½ tsp kosher salt
- ½ tsp onion powder
Now, while I could ramble forever about how good these tenders turn out, let’s not forget some important considerations regarding these ingredients.
For instance, using fresh chicken tenders can make a huge difference in texture and taste. Forget about the frozen stuff if you can—you want tender and juicy chicken that’ll soak up all that buttermilk goodness.
And when it comes to the oil for frying, you might consider canola or peanut oil; they’re both great choices for achieving that perfect crispy crust without a greasy mess.
As for spices, feel free to adjust them based on your taste. Maybe you want a kick of heat? Toss in some cayenne! Cooking should be fun, so mix it up as you please. Happy cooking!
Step-by-Step Instructions
Making your own Raising Cane’s chicken tenders at home is like revealing a treasure chest of flavor and crispy goodness. Let’s walk through the process of bringing these mouthwatering tenders to life, step by step. Follow along, and soon you’ll have a plate full of tender, juicy glory that’ll have everyone begging for seconds (or thirds).
Step-by-Step Instructions:
1. Start with the Marinade**: In a large bowl, whisk together 1 large egg, 1 ½ cups buttermilk, 2 teaspoons of kosher salt (saving 3 teaspoons for later), and some freshly ground black pepper** to taste. This marinade is your secret weapon! It tenderizes the chicken and infuses it with flavor.
Once combined, toss in 2 lbs of chicken tenders, making sure they’re well coated. Let them marinate for about 30 minutes (or up to 24 hours in the fridge for even juicier results).
2. Prepare the Dredge**: While the chicken is soaking up that lovely buttermilk goodness, grab another bowl and mix together 2 ½ cups all-purpose flour, ½ cup cornstarch, 1 ½ teaspoons paprika, 1 teaspoon garlic powder, ½ teaspoon onion powder**, and the remaining 3 teaspoons of kosher salt.
It’s time to create that crispy, flavorful coating. Give it a good stir until everything’s evenly mixed.
3. Ready the Oil: In a large, heavy-bottomed pot or deep fryer, pour in enough vegetable oil to fill it about 4-6 cups deep. Preheat the oil to 350°F (or watch for it to shimmer if you don’t have a thermometer).
Trust me, this temperature is essential for that golden, crispy crust. It can be a little scary, but don’t worry, you got this.
4. Dredge the Chicken: Once marinated, take each chicken tender out of the buttermilk and let the excess drip off (you can be a little messy—just don’t create a splash zone).
Now, dredge the chicken in the flour mixture, ensuring each piece is completely coated.
– (Pro tip: Shake off any excess flour; you want a good coating, but not a flour avalanche).
5. Fry the Tendies: Carefully place the coated chicken tenders into the hot oil, making sure not to crowd the pan (4-6 pieces at a time works well).
Fry them for about 4-6 minutes, turning occasionally, until they’re beautifully golden brown and cooked through (a good rule is they should read 165°F internally).
6. Drain and Serve: Once they’re ready, carefully remove the tenders from the oil and place them on a wire rack or paper towels to drain off any excess oil.
This keeps them crispy—no one likes a soggy tender.
7. Whip up Cane’s Sauce**: While your chicken is cooling, let’s make that famous Cane’s sauce. In a medium bowl, whisk together ¾ cup mayonnaise**, 3 tablespoons ketchup, 1 tablespoon Worcestershire sauce, 1 teaspoon garlic powder, ¾ teaspoon black pepper, ½ teaspoon kosher salt, and ½ teaspoon onion powder until smooth.
Taste it, maybe adjust the spices a little, and just like that, you have a dipping sauce that will take these tenders to a whole new level. High end kitchen gadgets can elevate your cooking experience, making the process easier and more enjoyable.
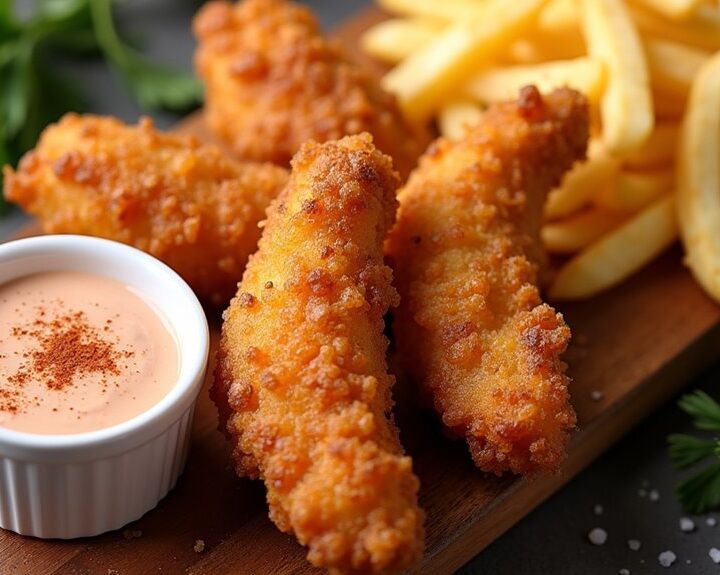
8. Enjoy: Grab your freshly fried chicken tenders, dip them in that creamy sauce, and get ready for a flavor explosion.
Serve them up with crinkle fries for the full Raising Cane’s experience—and don’t forget to share… or not!
And there you have it, folks. Perfect, homemade Raising Cane’s chicken tenders. Remember, cooking is all about having fun, so throw on some music, maybe dance a little while you cook, and enjoy every moment. Happy frying!
Tips & Variations
While I can’t guarantee that your chicken tenders will spark joy like Marie Kondo does, I can promise you that these tips and variations will definitely elevate your cooking game.
First off, marinate those tenders for at least 30 minutes, but if you can swing it, let them soak overnight. Trust me, it’s a game-changer.
Want a twist? Try substituting buttermilk with yogurt for a tangy kick or play around with spices like cayenne for some heat. I’ve also found that using peanut oil gives a fantastic flavor.
And don’t forget about the serving—pair them with crinkle fries for that complete vibe.
Experiment, have fun, and remember, it’s all about enjoying the process (even when things get a bit messy).
How to Serve?
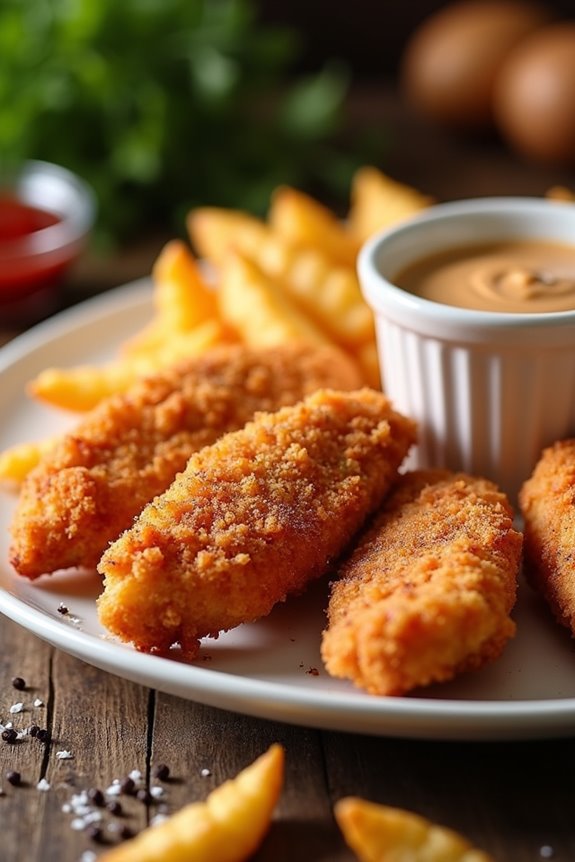
Serving up those crispy, golden chicken tenders is where the real magic happens—especially after all that marinating and frying effort.
I usually like to grab a big platter, pile those tenders high, and then gather everyone around. Let’s be honest, who doesn’t love a bit of finger food? I always whip up that creamy Cane’s sauce for dipping; it’s like the cherry on top of this delicious sundae.
I often serve ’em with crinkle fries—because, let’s face it, they’re the perfect combo. You can even throw in some coleslaw or a light salad if you’re feeling fancy.
Don’t forget to set out extra napkins; trust me, you’ll need them. It’s messy, but absolutely worth it.
Storage & Reheating Guide
Once you’ve devoured those mouth-watering chicken tenders, you might be wondering how to store any leftovers—if there are any, that is.
If you somehow manage to have some left, let’s talk storage. I usually pop them in an airtight container and shove them in the fridge. They’ll be good for about three to four days, but who’s counting, right? To maximize freshness, it’s always best to use airtight food storage solutions, ensuring your tenders stay delicious longer.
When it’s time to reheat, I swear by the oven. Set it to 350°F, place the tenders on a baking sheet, and heat for about 10-15 minutes. They come out crispy, not sad and soggy.
If you’re in a pinch, the microwave works, but don’t blame me if they lose some of that glorious crunch. Enjoy!
Final Thoughts
After enjoying those tender, crispy chicken delights, you might find yourself reflecting on what made them so irresistible. Was it the juicy flavor or that perfectly seasoned, crunchy coating?
I can’t help but think about how much fun it was to whip up this recipe in my kitchen. Sure, I’d a minor frying mishap (let’s just say the cleanup wasn’t pretty), but the taste was worth it.
Using fresh ingredients makes a huge difference, and you can customize the Cane’s sauce to your liking. Next time you make these, consider inviting friends over for a mini feast. Trust me, they’ll love it.