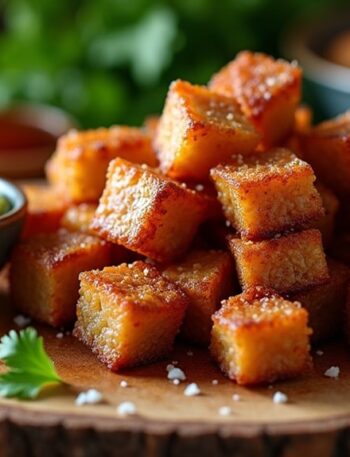
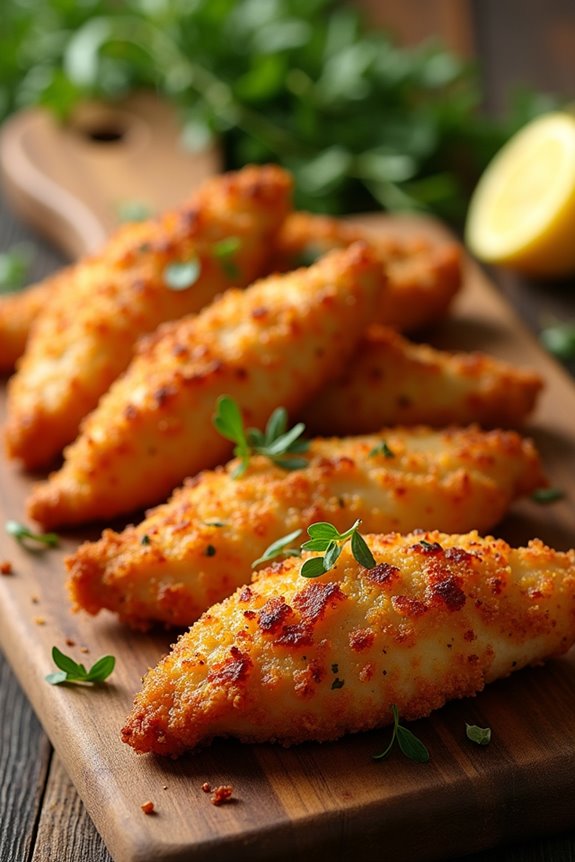
I’ve got to tell you, there’s something magical about homemade baked chicken tenders. They’re crispy on the outside, juicy on the inside—seriously, how can you beat that? I remember my first attempt; let’s just say the smoke alarm was more enthusiastic than I was. But once I nailed the seasoning and baking time, these tenders became a family favorite. So, are you ready to whip up a batch that’ll leave you wondering why you ever bought the frozen ones?
Why You’ll Love This Recipe
When it comes to comfort food, chicken tenders hold a special place in my heart. Seriously, what’s better than homemade baked chicken tenders?
They’re crispy on the outside, juicy on the inside, and totally versatile. I mean, you can dip them in anything, from ranch to honey mustard.
And the best part? Making them is a breeze. Toss some chicken with olive oil and spices—garlic powder, smoked paprika, you name it—and you’re halfway there.
Bake them, and your kitchen will smell heavenly. I’ve tried taking shortcuts, but nothing compares to that homemade goodness.
And hey, if you somehow end up with leftovers (which is rare), they store well in the fridge. Trust me, this recipe will become a family favorite.
Equipment List
To whip up these delicious baked chicken tenders, you’ll need a few trusty kitchen tools that’ll make your life a whole lot easier.
First off, grab a baking sheet—trust me, a good one that’s sturdy can withstand a lot. You’ll also want some parchment paper; it makes cleanup a breeze, and who doesn’t love that?
A mixing bowl is essential for tossing those tenders in olive oil and spices—just the right size, not too big, not too small.
Don’t forget your measuring spoons; they’re vital for getting those spices just right.
Finally, a meat thermometer is a game changer; ensuring perfect chicken every time takes the stress out of cooking. You’ll thank yourself later, I promise. Choosing the right food thermometer will help you achieve the perfect internal temperature for your chicken.
Our Ingredients
When it comes to whipping up a batch of homemade baked chicken tenders, the ingredients really do make all the difference. You want to use fresh chicken and flavorful spices to give that extra oomph and goodness. Trust me, there’s nothing worse than biting into a bland piece of chicken.
Plus, these tenders aren’t just delicious; they’re a healthier baked option compared to the frying method. So, let’s get to it and find out what goodies we need to gather from our kitchen.
Here’s the list of ingredients you’ll need:
- 1 ½ pounds chicken tenders
- 1 tbsp olive oil
- 1 tsp garlic powder
- 1 tsp onion powder
- ½ tsp smoked paprika
- ½ tsp dried oregano
- ½ tsp salt
- ½ tsp black pepper
Now, let’s talk about these ingredients for a moment. First, the chicken tenders are the star of the show, super easy to handle and quick to cook.
When it comes to spices, feel free to get creative. If you want a little more heat, try adding some cayenne pepper or chili powder—just don’t blame me if it makes you reach for the glass of water!
And if you’re feeling adventurous, consider marinating the chicken in the olive oil and spices for a few hours or overnight before baking; it can add serious flavor.
The key takeaway? Blend and adjust according to your taste. This recipe is straightforward, but there’s room to make it your own, and you might find a new favorite flavor combo along the way. Happy cooking!
Step-by-Step Instructions
Making homemade baked chicken tenders is an absolute breeze, and trust me, your taste buds will be dancing in delight. Just follow these simple steps, and you’ll have a delicious, healthier alternative to those fast-food favorites in no time. Ready? Let’s get to cooking!
1. Preheat the Oven
First things first, preheat your oven to 350°F (175°C). This is like the warm-up before the big game; it gets everything ready to perform its best.
2. Prepare the Chicken
Take 1 ½ pounds of chicken tenders and put them in a large bowl. Drizzle in 1 tablespoon of olive oil, ensuring each tender gets a nice coating. This will help the spices stick and give the tenders that lovely golden finish when they bake.
3. Mix the Spices
In a small bowl, mix together 1 teaspoon of garlic powder, 1 teaspoon of onion powder, ½ teaspoon of smoked paprika, ½ teaspoon of dried oregano, ½ teaspoon of salt, and ½ teaspoon of black pepper. This little spice medley will bring a flavor explosion that’s anything but boring.
4. Coat the Chicken
Sprinkle your spice mixture over the oiled chicken tenders. Now, toss everything together until the chicken is evenly coated, making sure that every piece gets its fair share of seasoning. This is your moment; channel your inner chef!
5. Arrange on Baking Sheet****
Grab a baking sheet and arrange the seasoned chicken tenders in a single layer. Make sure they’re not touching; give them some space to breathe. It’s like giving them their own little stage to shine on.
6. Bake
Slide your baking sheet into the preheated oven and set a timer for 20 minutes. You’ll know they’re ready when their internal temperature reaches 165°F (use a meat thermometer if you have one, it’s a game changer).
Your kitchen will start to smell incredible—seriously, I may or may not start drooling a little at this point.
7. Let Them Rest
Once they’re out of the oven, allow the chicken tenders to rest for about 2 minutes. This little pause helps keep them juicy and allows the flavors to settle in. Remember, using quality cooking equipment gourmet kitchen can elevate your dish to new heights.
And voilà! You’ve whipped up a batch of delightful baked chicken tenders that are sure to impress anyone. Don’t forget to savor the moment—but honestly, who are we kidding? They won’t last long around here. Enjoy!
Tips & Variations
After you’ve whipped up those irresistible chicken tenders, there’s always room for a little creativity in the kitchen.
You can play with spices; try adding cayenne for a kick, or even some Parmesan cheese for extra flavor. I once accidentally dumped in too much paprika, but you know what? It turned out deliciously smoky.
Also, if you’re feeling adventurous, swap out the olive oil for melted butter—it gives the tenders a rich, buttery finish.
And leftovers? Store ‘em in an airtight container for up to five days, or freeze for three months.
Who doesn’t love reimagining last night’s dinner? Mixing things up keeps meals exciting, and trust me, your taste buds will thank you for it.
How to Serve?
Serving those homemade baked chicken tenders is where the fun really begins. I love to lay them out on a big platter, all golden and crispy, and watch everyone’s eyes light up.
You can serve them with dipping sauces like honey mustard, ranch, or even BBQ—whatever tickles your fancy. Get a colorful side salad going or some crispy French fries to really round it out. And let’s be honest, fried potatoes always win.
I often add some fresh veggies on the side, too, to pretend I’m being healthy. If I’m feeling fancy, I might sprinkle some parsley for flair. It’s about making the meal inviting—who doesn’t love a feast for the eyes and taste buds?
Enjoy every bite.
Storage & Reheating Guide
When it comes to storing those delicious homemade baked chicken tenders, I always think about how I can keep that crispy goodness intact for later enjoyment. After they’ve cooled down, I pop them into an airtight container, which helps keep them fresh for up to five days.
If I can’t eat them all that week, I freeze them for future cravings; they last about three months without losing too much charm. Using soup freezer containers is a great option for freezing tenders effectively.
When it’s time to reheat, I aim for the oven. I preheat it to 375°F and pop those tenders in for about 10-15 minutes—just enough to bring back that crunch.
Microwaves are tempting, but they turn crispy into soggy faster than a soggy sock in the rain.
Final Thoughts
There’s something special about homemade baked chicken tenders that makes them a comforting staple in my kitchen. Honestly, they’re foolproof, quick, and make me feel like a culinary genius every time I whip them up.
Who doesn’t love a crispy outer layer and tender inside? When I’m in a cooking rut, these are my go-to. Plus, they’re super versatile. You can pair them with almost anything—salads, pastas, or just some good ol’ dipping sauce.
Seriously, what’s not to love? And let’s be real; I often enjoy sneaking leftovers straight from the fridge. So, if you haven’t tried making these yet, go for it. Trust me, your taste buds will thank you, and you’ll impress whoever’s lucky enough to share them!