Have you ever bitten into a perfectly crafted chocolate eclair and wondered how something so divine could exist? I know I have, especially when my attempt at making them turned into a gooey disaster more than once. But trust me, these little pastry wonders are worth the effort. They start with a light, crispy shell, followed by smooth pastry cream, and finish with a glossy chocolate glaze. Sounds perfect, right? Let’s explore how we can make these delicious treats together.
Why You’ll Love This Recipe
You know how sometimes you just need a little pick-me-up? That’s where chocolate eclairs swoop in like superheroes.
They’re these wonderful little pastries, crisp on the outside and soft on the inside, filled with creamy goodness that makes you feel like you’ve won the dessert lottery.
I remember the first time I tried making them; it was a delightful mess, flour flying everywhere. But the taste? Worth every bit of chaos.
Picture biting into that shiny chocolate glaze, and the pastry cream just melting in your mouth. Seriously, who can resist that?
Once you master this recipe, you’ll be the go-to dessert hero among friends. Trust me, whether it’s a bad day or a celebration, chocolate eclairs are always the answer.
Equipment List
Before diving into making those heavenly chocolate eclairs, it’s essential to have the right tools by your side. First, grab a mixing bowl for that luscious dough—trust me, you don’t want it flying everywhere.
You’ll need a whisk for blending the ingredients and a spatula to scrape every last bit out (because wasting food is a no-no, right?). A piping bag is vital for that classic eclair shape—don’t worry if you don’t have one; a zip-top bag with a corner cut off works just fine.
An oven, obviously, for baking perfection. Finally, a cooling rack means those bad boys won’t get soggy. Investing in premium baking equipment can elevate your baking game significantly.
Now that we’re equipped, let’s get ready to indulge in some sweet, sweet chocolatey goodness.
Our Ingredients
Making chocolate eclairs is like a dance between science and art. You gather your ingredients, and before you know it, you’re crafting a delicious pastry that’s a feast for both the eyes and the stomach.
But before we set off on our culinary adventure, let’s take a look at what you’ll need. These ingredients are the stars of our show, each playing a crucial role in achieving that flaky exterior and creamy filling we all dream about.
Here’s your handy list of ingredients for those delightful chocolate eclairs:
- 1 cup of water
- ½ cup of unsalted butter
- ½ teaspoon of salt
- 1 cup of all-purpose flour
- 4 large eggs
- ½ cup of granulated sugar
- ¼ cup of cornstarch
- 1 ½ cups of whole milk
- 4 egg yolks
- 2 tablespoons of unsalted butter (again, because the more butter, the better)
- 1 teaspoon of vanilla extract
- 2 ounces of semisweet chocolate
- 4 tablespoons of heavy cream
- 1 cup of confectioners’ sugar
Now, let’s chat about those ingredients a bit more. You might be tempted to substitute some of these, especially with butter and sugar, but I recommend sticking to the list whenever you can.
Each ingredient works together in harmony to create the perfect eclair. Think of the butter: it’s not just a fat; it brings richness and flakiness that will make your pastries rise to buttery glory.
And the eggs? Well, they’re the superheroes of texture, giving us that light, airy quality! And don’t forget, a good quality vanilla extract makes a world of difference.
Step-by-Step Instructions
Making chocolate eclairs is a delightful journey into the world of pastry. And don’t worry; we’re about to tackle it together, step by step. With a few ingredients at hand, you’ll be creating light and airy pastry shells filled with creamy goodness and topped off with a luscious glaze. Ready? Let’s get started!
1. Prepare the Pastry Dough: Begin by heating 1 cup of water**, ½ cup of unsalted butter, and ½ teaspoon of salt** in a medium saucepan. Stir this mixture over medium heat until the butter melts and the water starts to simmer.
Next, add in 1 cup of all-purpose flour**** all at once. Stir vigorously with a wooden spoon until the dough forms a ball and pulls away from the sides of the pan, creating a lovely, smooth consistency (this should take about 3-4 minutes). Let it cool slightly, just enough so you don’t burn your fingers off when you add the eggs.
2. Incorporate the Eggs: Once your dough has cooled, it’s time for the magic ingredient—4 large eggs****. Crack them in one at a time, mixing well after each addition until the dough is shiny and smooth. If you’re feeling fancy, use a mixer; otherwise, that elbow grease is going to pay off.
3. Pipe the Dough: Preheat your oven to 425°F (220°C). Line a baking sheet with parchment paper. Then, with a piping bag (or a sturdy zip-top bag with a corner snipped off if you’re improvising like I often do), Pipe the Dough into long lines, about 4 inches long and spaced out well on the baking sheet.
Aim for about 12 stylish little eclairs that will puff up beautifully in the oven.
4. Bake the Eclairs: Pop the baking sheet into your preheated oven and bake for approximately 20 minutes. You’ll know they’re ready when they puff up and turn a lovely golden brown.
Don’t open the oven door during baking; this is a delicate process, and we don’t want those beautiful pastries deflating.
5. Make the Pastry Cream: While your eclairs cool, let’s whip up the filling. In a medium bowl, whisk together ½ cup of granulated sugar** and ¼ cup of cornstarch**.
In a saucepan, combine this mixture with 1 ½ cups of whole milk** and 4 egg yolks**. Stir over medium heat until the mixture thickens and starts to bubble—this will take about 5-7 minutes.
Once thickened, remove it from the heat and mix in 2 tablespoons of unsalted butter and 1 teaspoon of vanilla extract. Allow the pastry cream to chill in the fridge.
6. Fill the Eclairs: Once your eclairs have cooled completely (don’t rush this, or you’ll melt the cream), use a small knife to poke a hole in the side of each eclair.
Then, fill a piping bag with your chilled pastry cream and gently pipe it into each eclair until they feel nicely plump but not bursting at the seams.
7. Make the Chocolate Glaze**: In a heat-proof bowl, combine 2 ounces of semisweet chocolate with 4 tablespoons of heavy cream**.
Microwave the mixture in short bursts (about 20 seconds at a time) until melted and smooth. Stir in 1 cup of confectioners’ sugar**** until combined. Let it cool slightly—it should be pourable yet thick enough to coat the tops of your eclairs.
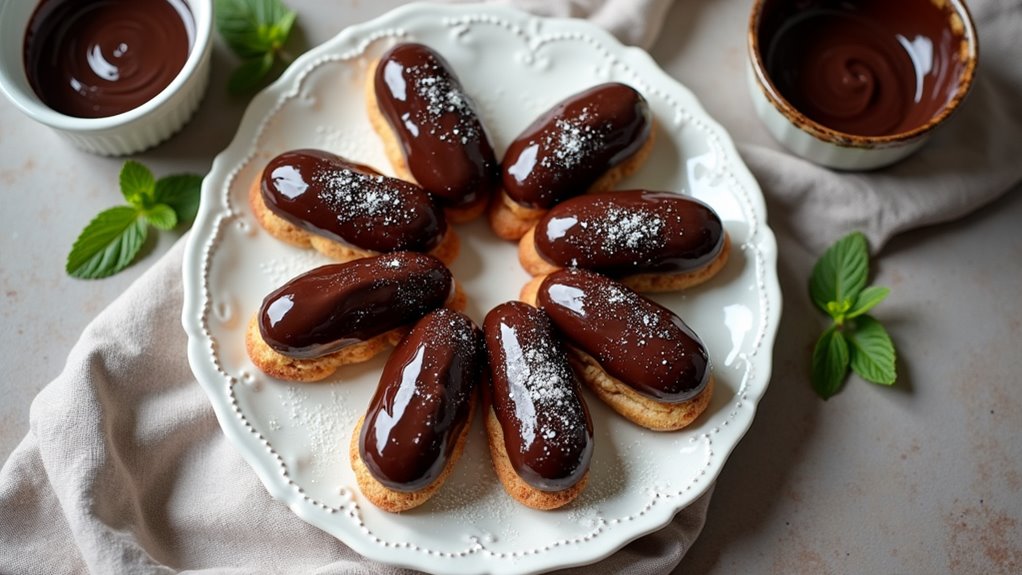
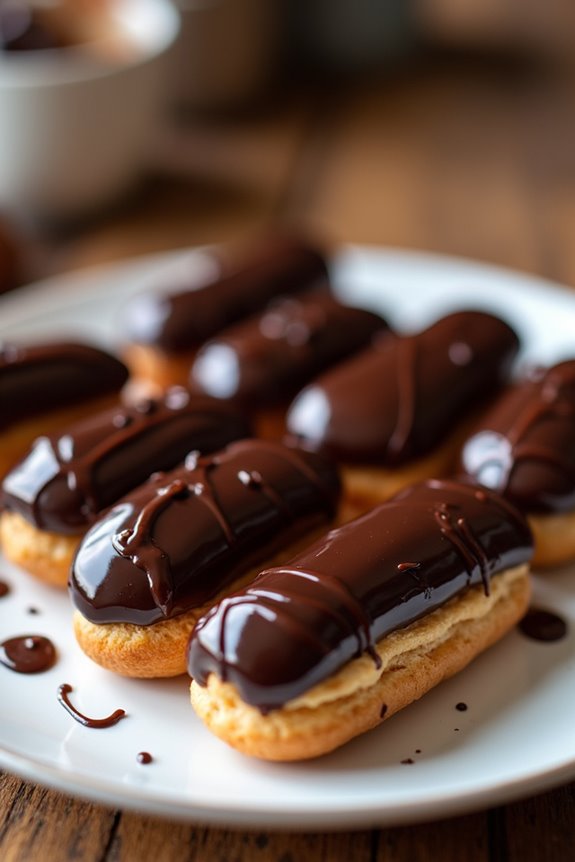
8. Glaze Your Eclairs: Dip the top of each filled eclair into the chocolate glaze, allowing any excess to drip off.
If you’re feeling adventurous, you could drizzle some extra chocolate over the top for added flair.
And voilà! Your chocolate eclairs are ready for admiration—and of course, devouring. They might take a little time and patience, but trust me, the journey is worth every single bite. Happy eating! Additionally, having the right cheese making equipment can enhance your overall culinary experience in the kitchen.
Tips & Variations
What if I told you that perfecting chocolate eclairs could be as simple as following a few handy tips?
For starters, always chill your filling well before piping it into the eclair shells. Trust me, it makes a huge difference.
And when glazing, dip the tops instead of spreading—this gives a beautiful finish without the mess.
Feeling adventurous? Try adding a splash of espresso to the chocolate glaze for a mocha twist, or sprinkle some sea salt on top for that sweet and salty combo that’s oh-so-popular.
I might’ve tried to wing it once and ended up with flops instead of eclairs, so take your time.
You’ll enjoy the process and savor the results, I promise.
How to Serve?
When it comes to serving chocolate eclairs, presentation really counts, doesn’t it?
I like to arrange them on a beautiful platter, maybe sprinkle some edible gold dust or chocolate shavings on top for that extra wow factor—you know, just a little something to impress.
Don’t forget to add fresh berries or a dollop of whipped cream on the side. This adds color and makes it look like I actually know what I’m doing in the kitchen.
If I’m feeling fancy, I might even drizzle a bit of chocolate sauce over the eclairs for dramatic flair.
Just remember, enjoy this moment. It’s all about savoring the decadence and sharing the joy with friends (or keeping them all for myself).
Storage & Reheating Guide
After whipping up a stunning batch of chocolate eclairs and presenting them like a pro, you might wonder how to keep these decadent delights fresh for later enjoyment.
Trust me, I’ve been there—staring at leftover eclairs, afraid they’ll turn soggy! Here’s my go-to tip: store them in an airtight container in the fridge. They’ll last about three days, but honestly, they rarely stick around that long.
If you want to indulge later, just gently reheat them in the oven at 350°F for about 5 minutes. This makes ’em crispy again!
Don’t even think of microwaving—nobody likes a sad, soggy eclair. Additionally, consider using soup freezer containers for longer storage options if you ever decide to freeze your eclairs. So go ahead, save some for a rainy day. You deserve it.
Final Thoughts
While chocolate eclairs can seem like an intimidating treat to make, I promise they’re worth every bit of effort—and trust me; if I can whip these up without launching them across the kitchen, so can you.
Envision this: warm, airy shells filled with silky cream and topped with glossy chocolate—who wouldn’t want that? It might take a bit of patience, but every sticky finger and flour-dusted countertop will lead you to a sweet victory.
These little pastries are perfect for parties, impressing family, or just treating yourself after a long day. When you take that first bite, you’ll be hooked.