I’ve got to tell you, Decadent Italian Cream Bombs are the kind of treat that make your taste buds dance—seriously. Fluffy dough wrapped around creamy custard? Yes, please. I remember the first time I tried these little delights; I nearly passed out from bliss. Now, I’m here to guide you through making these pastries while sharing some fun twists. So, are you ready to impress your friends with a culinary masterpiece? Let’s get started.
Why You’ll Love This Recipe
If you’ve ever wondered what it feels like to sink your teeth into a cloud of sweetness, then this Italian Cream Bombs recipe is about to make all your pastry dreams come true.
Seriously, these bomboloni alla crema are like little bites of heaven. You’ll love the way the warm, fluffy dough gives way to a creamy custard filling that’s as smooth as silk.
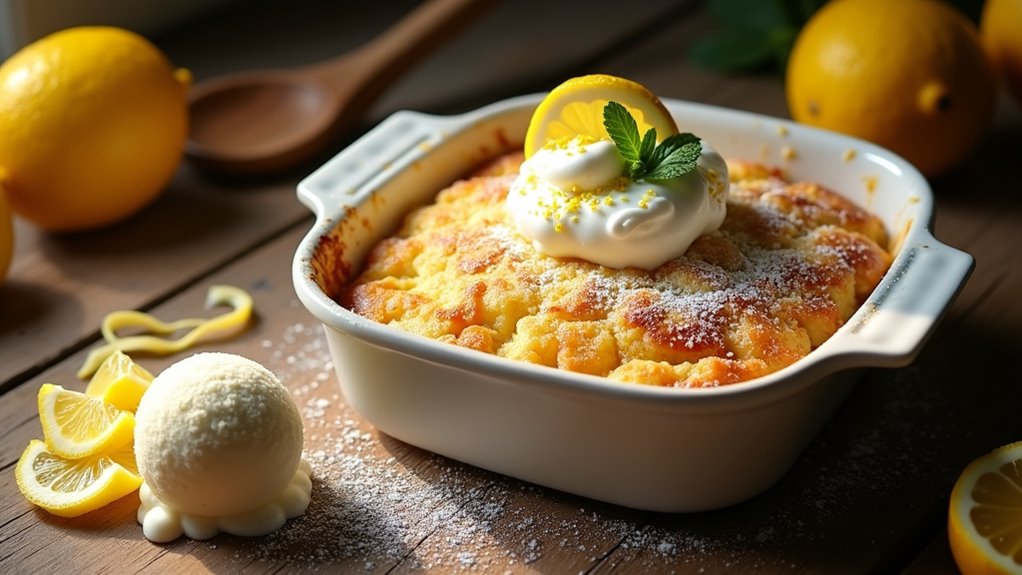
There’s something magical about dusting them with powdered sugar—it feels like a confetti celebration for your taste buds. Plus, who can resist that delightful crunch when they’re fried to perfection?
Trust me, your friends and family will think you’ve become a pastry wizard. And you know what? You’ll finally find an excuse to wear those flour-covered pajamas.
Equipment List
When it comes to whipping up these decadent Italian Cream Bombs, having the right equipment is essential for achieving that perfect fluffy texture and creamy filling.
You’ll need a large mixing bowl for your dough and a whisk for those eggs and sugar—trust me, a good whisk makes all the difference. A rolling pin will help with cutting those lovely circles, and don’t forget a sharp knife!
You’re gonna want a frying thermometer, too; no one wants burnt bomboloni, right? A sturdy slotted spoon is great for fishing them out of the oil, and a piping bag is key for that custard filling.
Honestly, I’ve used a zip-top bag in a pinch—just cut off a corner. Total game-changer. Also, using a professional kitchen torch can elevate your dessert presentation with a perfect caramelized finish.
Our Ingredients
When it comes to making those mouth-watering Italian Cream Bombs, the ingredients really set the stage for success. Just picture it: light, fluffy dough enveloping a dreamy custard that oozes with every bite. It sounds heavenly, right?
But before you plunge in, let’s gather everything you’ll need. That way, you won’t find yourself halfway through and suddenly realize you’re missing the essential sugar or, heaven forbid, the yeast. Trust me, I’ve totally been there, and it’s not a fun moment in the kitchen.
Here’s the list of ingredients you’ll need for these delightful treats:
- 2 cups bread flour
- 2 cups all-purpose flour
- 1 packet active dry yeast (2 1/4 tsp)
- 1/3 cup sugar
- 1/2 tsp salt
- 2 eggs, beaten
- 1 tsp vanilla extract
- 2 oz unsalted butter, softened
- 1 cup warm milk
- Oil for frying
- Powdered sugar for dusting
For the custard cream filling:
- 3 egg yolks
- 1/4 cup sugar
- 1/4 cup flour
- 1 tbsp cornstarch
- 1 tsp vanilla extract
- 2 cups warm whole milk
Now, let’s chat a bit about these ingredients. You might notice we’re using two types of flour: bread flour and all-purpose flour. This combo helps give the bomboloni that perfect structure — chewy on the inside but light and fluffy on the outside.
And as for the custard, oh boy, it’s what dreams are made of. Don’t skimp on the vanilla extract; it lifts that custard from plain to sublime. If you want to get fancy, you could even add a dash of lemon zest for a revitalizing twist or a sprinkle of cinnamon to the dough for that cozy feeling.
But hey, no pressure. There’s plenty of deliciousness happening without those extras, too. Ready to turn these into actual bomboloni? Let’s move on to step-by-step instructions, because this is where the magic happens!
Step-by-Step Instructions

Making Italian Cream Bombs, or Bomboloni alla Crema, is an experience that combines the joy of baking with the thrill of creating something utterly delightful. Mixing the batter is quick and simple—just follow these easy steps, and soon you’ll have fluffy dough filled with a creamy custard that will make your taste buds dance.
- Dissolve the yeast: In a bowl, combine 1 packet (2 1/4 tsp) of active dry yeast with 1 cup of warm milk (not too hot, or you’ll zap those little yeasties). Give it a gentle stir and let it sit for about 5–10 minutes until it’s frothy. This is how you know your yeast is alive and kicking!
- Mix the dry ingredients: In a large mixing bowl, combine 2 cups of bread flour, 2 cups of all-purpose flour, 1/3 cup of sugar, and 1/2 tsp of salt. Whisk them together until well blended. This step is essential because it guarantees an even distribution of flavors.
- Combine wet and dry: Now, pour in the yeast mixture along with 2 beaten eggs, 1 tsp of vanilla extract, and 2 oz of softened unsalted butter. Using a wooden spoon or your hands, mix until the dough starts to come together. Don’t worry if it’s a bit sticky; this is where the magic begins.
- Knead the dough: Transfer the dough onto a floured surface and knead it for about 8–10 minutes until it becomes smooth and elastic. (Feel free to imagine you’re a master baker while doing this—it sure helps.) If the dough is too sticky, sprinkle a little flour, but be cautious not to overdo it!
- Let the dough rise: Place your beautiful dough ball in a lightly greased bowl, cover it with a clean kitchen towel, and let it rise in a warm area for about 1 hour, or until it has doubled in size. Patience is key here, and the aroma will be rewarding.
- Shape the bomboloni: Once the dough has risen, punch it down (not too hard, though, we don’t want it to feel bad) and roll it out on a floured surface to about 1/2 inch thick. Use a round cutter (about 3 inches in diameter) to cut circles from the dough. Gather any scraps and re-roll to cut out more.
- Second rise: Place the dough circles on a floured baking sheet, cover them loosely with a towel, and let them rise again for about 30 minutes. They should puff up nicely during this time, which means they’re ready to be fried.
- Fry until golden: In a deep pot, heat oil for frying to about 350°F (175°C). Carefully drop a few dough circles into the hot oil, frying until they turn golden brown on both sides, about 2–3 minutes per side. Keep an eye on them so they don’t overcook. Use a slotted spoon to remove them and let them drain on paper towels.
- Prepare the custard: While the bomboloni are cooling, it’s time to whip up that luscious custard filling. In a saucepan over medium heat, whisk together 3 egg yolks, 1/4 cup sugar, 1/4 cup flour, and 1 tbsp cornstarch until smooth. Gradually add 2 cups of warm whole milk while stirring continuously. Cook this mixture until it thickens and bubbles, about 5–7 minutes. Stir in 1 tsp of vanilla extract and let it cool before filling your bomboloni.
- Fill and dust: Using a piping bag (or a Ziploc bag with the corner snipped off, if you’re feeling crafty), fill each warm bomboloni with the custard. Dust them generously with powdered sugar before serving. And do take a moment to appreciate your work—because they look as good as they taste.
And there you have it! Those gorgeous little Italian Cream Bombs are ready for you to indulge in. Just imagine the delightful surprise of that creamy filling when you take that first bite. Enjoy the bliss, and remember: the mess in the kitchen is just evidence of your culinary adventure. High-end waffle makers can elevate your breakfast experience to new heights. Happy cooking!
Tips & Variations
After your bomboloni have puffed up nicely and are ready for frying, it’s time to embrace some tips and variations that can bring a delightful twist to this classic treat.
First, don’t skip measuring the oil temperature—aim for that magical 350°F.
If you’re feeling adventurous, why not mix things up with flavored custards? I’ve had great luck with orange zest or a hint of espresso.
And for a real showstopper, try adding a chocolate drizzle on top right after dusting with powdered sugar.
I once tried not to burn myself while filling them, as I’m pretty clumsy in the kitchen, and yes, it was a mess.
But hey, it’s all about the fun, right? Happy frying!
How to Serve?
Serving Italian Cream Bombs can be just as delightful as making them, especially if you want to impress friends or family.
I like to arrange them on a platter, dusted generously with powdered sugar—because who can resist that snowy touch?
Offer a side of rich chocolate sauce or fresh fruit compote for dipping, and watch everyone indulge.
If you’re feeling extra fancy, sprinkle some crushed nuts on top for that added crunch.
And here’s a tip: serve them warm. Trust me; it’s worth it!
I once made a batch for a gathering, and they disappeared faster than I could say “Bomboloni.”
Just be ready for compliments, and maybe a few requests for the recipe, too.
Storage & Reheating Guide
Once you’ve wowed your friends and family with those delightful Italian Cream Bombs, you might find yourself with a few leftover treats. Honestly, I never thought I’d have leftovers, but life happens.
To store, place them in an airtight container and keep them in the fridge for up to three days.
If you’re like me and prefer that fresh taste, you can freeze them too. Just wrap each bomb tightly in plastic wrap before tossing them in a freezer bag.
When you’re ready to indulge again, thaw them in the fridge overnight and pop them in a 350°F oven for five to seven minutes. They’ll taste like they just came out of the fryer—totally worth it. Enjoy your sweet stash! Remember, using a deep fryer commercial can help achieve that perfect crispy texture when making these treats.
Final Thoughts
While you might think making Italian Cream Bombs is intimidating, the truth is, once you plunge in, it’s surprisingly straightforward—and so rewarding.
Trust me, the first time I tried, I thought, “What have I gotten myself into?” But then, as I rolled out the dough and watched those little clouds puff up, I felt like a kitchen magician.
The custard filling? Pure magic. Honestly, what could be better than biting into a warm bombolone dusted with powdered sugar?
You’ll impress your friends, or at least, bribe them with sweets when they ask for your secret. So, give it a go next weekend. Embrace the chaos, enjoy the process, and prepare for bliss.
You won’t regret it; it’s a tasty journey.