Tandoori chicken has this magical way of turning any ordinary meal into something special, doesn’t it? I remember the first time I attempted this recipe; let’s just say, it was a comedy of errors involving too much yogurt and an unfortunate spice mishap. But when that chicken came out of the oven, sizzling and fragrant, it was worth every laugh. Let’s chat about how to create that tender, juicy goodness and maybe avoid my earlier fumbles.
Why You’ll Love This Recipe
If you’re wondering why you’ll love this Tandoori Chicken recipe, let me tell you—it’s packed with flavor and so easy to make that even I can manage it without turning my kitchen into a disaster zone.
You’ll wonder how something so delicious can come from simple ingredients like yogurt and spices. Honestly, the marinade works wonders, transforming an ordinary chicken into an oven roasted tandoori chicken that’ll impress your family and friends.
The combination of spices adds warmth, while the yogurt gives it that tender, juicy goodness. Plus, there’s something therapeutic in smothering that chicken with the marinade—you might even feel like a cooking ninja.
Trust me, once you try it, you’ll be coming back for more.
Equipment List
When it comes to making this mouthwatering Tandoori Chicken, having the right equipment can make all the difference—trust me, I learned that the hard way.
First off, you’ll need a sturdy baking tray and a wire rack for that crispy finish—because soggy chicken is just sad. A sharp knife is essential for spatchcocking the chicken, and trust me, don’t skimp on that.
A large mixing bowl makes marinating a breeze, while a meat thermometer guarantees you won’t serve chicken that’s too rare.
And oh, don’t forget some cling film to keep that marinade sealed tight in the fridge. I once did, and let’s just say my fridge had an unexpected makeover. You’ll thank yourself later. Plus, using a nonstick loaf pan can make cleanup much easier after cooking.
Our Ingredients
When it comes to preparing a flavorful and authentic Tandoori Chicken, the ingredients you choose can make all the difference. Just think about it, a simple combination of spices and ingredients can transform a whole chicken into a dish that dances with flavor.
Trust me, you’ll want to gather these ingredients well ahead of time so you can dive right into the marinating process without any hiccups. Plus, having everything laid out makes it feel like you’re a master chef about to set out on a culinary adventure.
Here’s your shopping list to get started on this delicious journey:
- Whole chicken (you can spatchcock it or leave it whole)
- Yogurt (the tangy base of our marinade)
- Lemon juice (for that zesty kick)
- Ginger garlic paste (because who doesn’t love that aroma)
- Kashmiri chili powder (this gives it the gorgeous color and mild heat)
- Ground coriander (for a hint of sweetness)
- Garam masala (a blend that adds complexity)
- Ground cumin (earthy and warm)
- Turmeric (for a dash of golden flair)
- Black pepper (the trusty spice)
- Salt (enhances all the flavors)
- Green cardamom powder (just a pinch for that aromatic touch)
- Kasuri methi (dried fenugreek leaves that bring a unique flavor)
- Vegetable oil (to help the marinade stick and add moisture)
While collecting these ingredients, keep in mind that the quality matters! Fresh herbs, good yogurt, and spices that haven’t lost their punch are essential for that authentic taste.
Don’t have time to hunt down fancy spices? No worries, your local grocery store will likely have what you need. And if you can’t find kasuri methi, it’s okay to skip it—or if you’re feeling adventurous, you could try substituting with a bit of fresh fenugreek if it’s available.
Step-by-Step Instructions

Making Tandoori Chicken at home is a delightful process that promises not just an amazing meal but also a fun culinary adventure. You’ll be mixing a vibrant marinade and roasting a whole chicken that’s packed with flavor. Trust me, this homemade version is worlds away from anything you’d get at a restaurant.
Step-by-Step Instructions
1. Prepare the Chicken: Start with a whole chicken (about 3-4 pounds), either spatchcocked or left whole. Pat it dry with paper towels, then make deep slits on the legs and breast. This will help the marinade penetrate better.
Next, rub the chicken with 2 tablespoons of lemon juice and a generous sprinkle of salt and 1 tablespoon of Kashmiri chili powder. This won’t only flavor the chicken but also begin the brining process. Let it chill in the refrigerator for about an hour to dry out a bit.
2. Mix the Marinade: In a large bowl, combine 1 cup of yogurt, 3 tablespoons of ginger garlic paste, 3 tablespoons of lemon juice, 1 teaspoon of black pepper, 1 teaspoon of salt, 1 tablespoon of ground coriander, 1 tablespoon of garam masala, 1 tablespoon of ground cumin, 1 tablespoon of Kashmiri chili powder, 1 teaspoon of turmeric, 1 teaspoon of green cardamom powder, 2 tablespoons of kasuri methi (if using), and 2 tablespoons of vegetable oil.
Whisk everything together until it’s a smooth, rich marinade, perfect for smothering on your chicken.
3. Marinate the Chicken: Take the chicken out of the fridge and generously coat it with that fabulous marinade. Get in there with your hands, making sure it gets into those slits you made earlier.
Once the chicken is well-coated, cover it and return it to the fridge to marinate. Aim for at least 8 hours, but if you can let it sit for 24 hours, that’s even better—your patience will be rewarded.
4. Preheat and Roast: When you’re ready to cook, preheat your oven to a hearty 425°F (220°C). Place a rack over a baking tray—this will allow the chicken to cook evenly and catch any drippings.
Arrange the marinated chicken on the rack and roast it for 30 minutes to start. The skin should begin to look golden and crispy.
5. Flip and Continue Cooking: After the first 30 minutes, carefully flip the chicken over. Roast for another 30 minutes.
If you enjoy a bit of char, you can roast the chicken for an additional 15 minutes on the original side, or turn on the broiler for a few minutes at the end to get that beautiful charred finish.
6. Check for Doneness: Now, here’s where a meat thermometer comes in handy. The internal temperature should read between 165-170°F (75°C).
Once it hits that sweet spot, take the chicken out of the oven and let it rest for 15-20 minutes. This resting time allows the juices to redistribute, making for a much juicier bite.
And there you have it, a mouthwatering roasted Tandoori Chicken that’s sure to impress. Savor every bite, and remember, you’ve just created a fantastic dish from scratch! Isn’t it great to think that all this deliciousness started with careful prep and a few simple ingredients? Also, using a professional kitchen torch can enhance your cooking experience, giving you the ability to achieve restaurant-quality finishes at home.
Tips & Variations
If you want to take your Tandoori chicken to the next level, you’ve got to think about some tips and variations that can really spice things up.
For a more authentic texture, consider removing the skin—it might sound crazy, but trust me. Plus, letting the chicken rest after cooking crisps up that skin beautifully.
If you want a kick, throw in some extra Kashmiri chili powder, or even some smoked paprika for a smoky flavor. I often add a dash of honey in the marinade for a subtle sweetness.
Oh, and don’t forget to clean your surfaces! Raw chicken is no joke.
These little tweaks can really elevate your dish and impress everyone at the dinner table.
How to Serve?
Serving Tandoori chicken can be an experience in itself, and I’ve got a few ideas that’ll make it truly memorable.
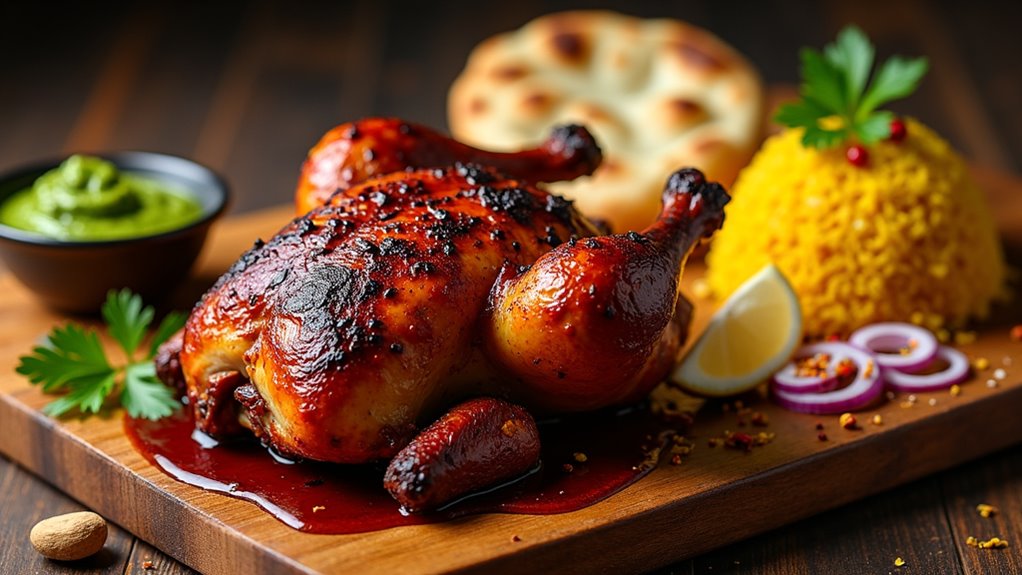
Imagine this: I like to slice the juicy chicken into pieces and arrange them on a vibrant platter. Maybe I throw in some fresh cilantro for a pop of color. Serve it alongside fluffy naan or basmati rice, and don’t forget a tangy yogurt sauce for dipping. It’s all about layers of flavor.
Oh, and I can never resist adding some grilled veggies on the side. They soak up those spices and look fantastic.
Want to impress? Use your best dishes! Trust me, presentation elevates the whole meal. Who knew chicken could be so glamorous?
Storage & Reheating Guide
When I whip up a batch of tandoori chicken, I always find myself wondering—what’s the best way to store those delicious leftovers?
First off, I let the chicken cool completely before diving into storage mode. A good airtight container is my go-to—preferably glass, if I’m feeling fancy. This way, I can keep the chicken in the fridge for up to three days. To maximize freshness, consider using produce storage containers designed to keep moisture levels just right.
For longer storage, I wrap it tightly in plastic wrap and toss it in the freezer. When I’m ready for round two, I simply thaw it overnight in the fridge.
Reheating? I pop it in the oven at 350°F (175°C) till it’s heated through. Nothing beats that crispy skin again, and trust me, it’s worth the wait.
Final Thoughts
Storing those leftover tandoori chicken pieces right can set you up for culinary success later on.
Seriously, if you don’t deal with them properly, they could become sad little dried-out remnants of glory. Trust me, I’ve been there. If I forget to wrap them up tightly, they start to taste like regret.
So, after you’ve savored your feast, pop the leftovers in an airtight container and into the fridge.
They’ll keep for about four days, perfect for meal prep. Reheating them in the oven restores that crispness you love.