I’ve got to say, there’s something irresistibly delightful about Oreo Cheesecake Cups. They’re like little bites of happiness, easy enough for even me to whip up. I mean, who doesn’t love a treat that requires no baking and comes together with just a few simple ingredients? Plus, I can’t resist a good layering game—it’s like edible art! Curious about how these cups come together and just how quickly they can disappear? Let’s get into it.
Why You’ll Love This Recipe
When you think about dessert, who doesn’t love something that’s rich, creamy, and just downright delicious?
That’s exactly what you get with these Oreo no-bake cheesecake cups. I mean, who can resist that combo of crushed Oreos and creamy cheesecake filling? It’s like a party in your mouth with every spoonful.
Not to mention, they’re super easy to whip up—perfect for those nights when you want a fancy treat without the hassle. Plus, they chill in the fridge, so you can just kick back and relax while they set.
I’ve made these for friends and family, and let me tell you, they disappear fast. You’re gonna fall in love with these little cups of joy; trust me on this.
Equipment List
To whip up these delightful Oreo cheesecake cups, you’ll need just a few key pieces of equipment that make the process smooth and easy.
First, grab a zip-top bag and a rolling pin; smashing those Oreos is oddly satisfying. You’ll also need six cups—preferably clear so everyone can admire your creation—because who doesn’t love a good presentation?
A mixing bowl is essential for the filling; a whisk or electric mixer will do the trick for whipping the cream cheese. Stainless steel mixing bowls are particularly great because they are durable and easy to clean.
Finally, don’t forget a spatula for folding in that fluffy Cool Whip. It feels like you’re doing magic in the kitchen. Trust me, I’ll never underestimate the power of a simple spatula again.
Ready to get started?
Our Ingredients
Making these Oreo cheesecake cups is an absolute treat, and trust me, you don’t need to be a baking guru to pull this off. With just a handful of delicious ingredients, you’ll create a dessert that looks as good as it tastes.
Why complicate things when you can keep it simple and still wow your friends and family? In the world of no-bake goodies, this recipe is like hitting the jackpot. Ready to gather your supplies? Let’s plunge into what you’ll need!
- 25 Oreo cookies (plus extra for topping)
- 1 block (8 oz) cream cheese, softened
- 1 cup Cool Whip (8 oz)
- 2/3 cup powdered sugar
- Whipped cream for topping
Now, before you dash off to the kitchen, let’s talk a bit about these ingredients. First off, if you’re a die-hard Oreo fan, you can mix things up and use different Oreo flavors, like mint or peanut butter—imagine that. You’ll really make this dessert all your own.
And don’t skimp on the whipped cream; it adds that extra layer of indulgence we all crave. Just remember to soften that cream cheese before you start mixing, or else you’ll be elbow-deep in lumps, and nobody wants that.
Step-by-Step Instructions

Making these No-Bake Oreo Cheesecake Cups is a delightful adventure that’ll leave you feeling like a dessert champion. Mixing the batter is quick and simple—just follow these easy steps, and before you know it, you’ll have a sweet treat that looks and tastes impressive. Ready to jump in? Let’s turn those ingredients into something magical!
1. Crush the Oreos: Grab your 25 Oreo cookies and toss them into a zip-top bag. Use a rolling pin to crush them into fine crumbs. It’s a bit like a workout, but trust me, it’s worth it for the glorious flavor.
Bonus tip: you’re welcome to let off some steam here; just make sure to seal the bag properly so cookie crumbs don’t explode everywhere!
2. Prepare the Cups: Set up six cups or small dessert glasses for your cheesecake. Press about 1½ to 2 tablespoons of those crushed Oreos into the bottom of each cup. Feel free to really pack it down; you want a solid crust that holds together when you dig in later.
3. Mix the Filling: In a mixing bowl, take your 1 block (8 oz) of softened cream cheese and the 2/3 cup of powdered sugar. Beat them together with an electric mixer on medium speed until the mixture is smooth and creamy (think of it as frosting in training).
You want to give it a good mix, but if you see lumps, it means the cream cheese wasn’t soft enough—so don’t skip that step next time!
4. Fold in the Cool Whip: Gently fold in 1 cup of Cool Whip (that’s 8 oz) into the sweet cream cheese mixture. This part is vital; you want to maintain that airy fluffiness, so go slowly.
Fold carefully; it should look nice and fluffy, almost like a cloud.
5. Combine with Oreos: Now, add in the remaining crushed Oreos from earlier (they’ll add that signature cookie crunch). Carefully fold those into the filling until evenly distributed.
Just imagine how delicious this layer will be!
6. Fill the Cups: Divide the cheesecake filling evenly into each prepared cup, pressing gently to help it set but remember, don’t squish! Each cup should be filled to the top, showcasing that delightful mixture.
7. Chill Out: Place your filled cups in the refrigerator and let them chill for at least 1 hour. This step is important because it helps the cheesecake to firm up, giving it that creamy texture.
You can take this time to maybe binge-watch a few episodes of your favorite show—pure bliss.
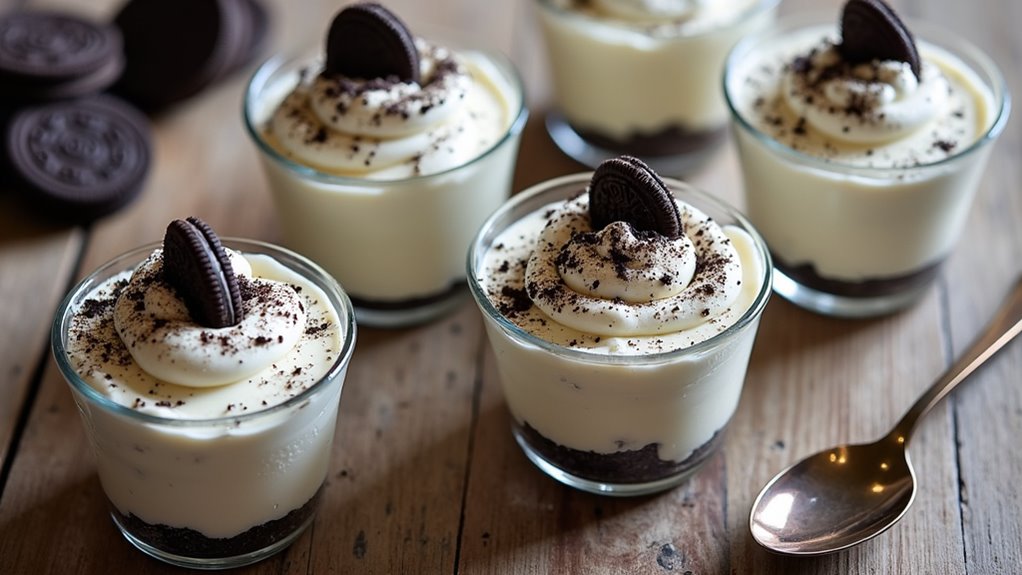
8. Serve with Style: When you’re ready to serve, top each cup with a dollop of whipped cream and sprinkle over the extra crushed Oreos for that added crunch.
It’s the cherry on top, even though it’s actually whipped cream—because who needs cherries when you’ve got Oreos working their magic, right?
And there you have it—everything you need to create these scrumptious Oreo Cheesecake Cups. They’re perfect for gatherings, or simply for indulging in a little dessert love all by yourself. Plus, having the right premium baking equipment can elevate your baking experience even further.
Often, the simplest recipes bring the greatest joy, and this one is definitely up there. Happy chilling!
Tips & Variations
When it comes to No-Bake Oreo Cheesecake Cups, I’ve got some sweet tips and tasty variations to share. First off, chilling these cups well is key; it helps the creamy texture shine through.
Have you ever had a soggy dessert? Not fun. If you’re feeling adventurous, switch up the Oreos—try mint or peanut butter for a fun twist.
And don’t skimp on the whipped cream; it’s like a cherry on top of a sundae, but better. My own experience? The first time I made these, I forgot to chill them long enough—oops.
Trust me, it makes all the difference! Play around with toppings, but no matter what, you’ll end up with a delicious treat that’s sure to impress.
How to Serve?
Serving No-Bake Oreo Cheesecake Cups is all about presentation and fun. I like to pull them out of the fridge and arrange them on a colorful platter. It’s such a simple detail, yet it makes everything feel so much more special.
I usually add a dollop of whipped cream on top and sprinkle some crushed Oreos for that extra touch. If you’re feeling fancy, you can even pop in a few mini chocolate chips or a cute edible decoration.
Got friends over? Encourage everyone to dig in right away; nothing’s worse than waiting for dessert. And don’t forget to snap a few pics—these little gems are almost too pretty to eat…almost. You just can’t go wrong with these!
Storage & Reheating Guide
Though these No-Bake Oreo Cheesecake Cups are so delicious you might devour them in one sitting, you’ll want to know how to store any leftovers—if there are any.
First, pop the cups into the fridge, covered tightly with plastic wrap or in an airtight container. They’ll keep fresh for about 3-4 days, but trust me, they’re best enjoyed within the first couple of days when they’re super creamy. To maximize their freshness, consider using produce storage containers that are designed to maintain the ideal environment for your desserts.
Now, reheating? These babies are meant to be chilled, so skip the heat. Just grab a spoon straight from the fridge and dig in.
If you find yourself staring at some leftover cups, consider it a win. You can always share… or not. No judgments here.
Final Thoughts
As you plunge into these delightful No-Bake Oreo Cheesecake Cups, you might find it hard to believe how easy they were to whip up. Trust me, you don’t need to be a baking wizard to impress your friends.
With just a handful of ingredients, you’re one step closer to dessert glory. I mean, who doesn’t love Oreos and cheesecake together? If you’re like me, the hardest part is waiting for them to chill—seriously.
But when you finally dig in, the creamy goodness will make it all worth it. Use this recipe as your base, then feel free to get creative with different Oreo flavors.
Let’s be real, experimenting is half the fun. Enjoy those sweet moments; you deserve them.