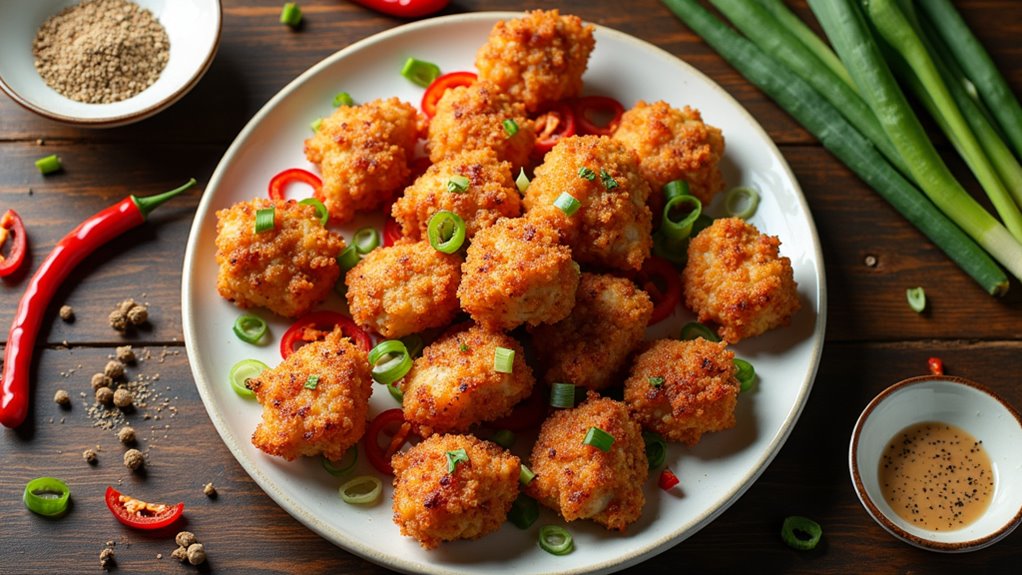
Have you ever taken a bite of something so crispy and delicious that it feels like a little party in your mouth? That’s exactly what Crispy Chicken Katsu does for me. I honestly can’t get enough of that golden crunch paired with tender chicken. It’s easy to make too—I promise I’m no Michelin star chef, so if I can do it, you can too. Let’s get into the details, and I’ll share my secrets to making this dish shine.
Why You’ll Love This Recipe
If you’re anything like me, there’s just something about crispy chicken katsu that grabs your attention and doesn’t let go.
The golden, crunchy exterior gives way to tender, juicy chicken that’s simply irresistible. I mean, who wouldn’t fall in love at first bite?
When I first tried making this recipe, I was convinced it would be a disaster, but surprise—I nailed it. It’s surprisingly easy, even if you’ve never fried anything before.
Plus, panko breadcrumbs are like magic; they make everything crispy, and what’s not to love about that?
Trust me, this crispy chicken katsu can elevate any weeknight dinner. Pair it with some slaw or rice, and you’ll be the star of your kitchen.
Don’t miss out on this crunchy joy.
Equipment List
When it comes to making crispy chicken katsu, having the right equipment can make all the difference. You’ll need a few key tools.
First, get a large, heavy-duty skillet for frying. Trust me, a flimsy pan won’t cut it. You’ll also want tongs for flipping those golden beauties without a splatter party.
And don’t forget a meat mallet; pounding the chicken might feel a bit aggressive, but it’s essential for tenderness. A shallow bowl for the flour, another for the eggs, and a plate for the panko are all must-haves too.
Oh, and paper towels for draining—nobody enjoys soggy chicken! With these tools in hand, you’re ready to make some crunchy magic happen. Additionally, using quality seafood cooking gear can enhance your overall frying experience and ensure even better results.
Our Ingredients
Making crispy chicken katsu is a delightful experience, and having the right ingredients is key to achieving that perfect crunch. When you bite into that golden, crispy exterior, you’re immediately transported to a world of amazing flavors and textures. You might be wondering, “What do I need to whip up this mouthwatering dish?”
Let’s break it down so you’ll be fully prepared for your own culinary adventure.
Here’s what you’re going to need:
- 2 pounds chicken breast or thighs, pounded thin
- Salt and pepper to taste
- 2 cups all-purpose flour
- 4 eggs, beaten
- 2–2½ cups panko breadcrumbs
- Vegetable oil for frying
Now, let’s chat a bit about these ingredients. Chicken is the star of the show here, and while you can use either breasts or thighs, don’t forget, pounded thin equals tenderness.
That’s where the meat mallet I mentioned earlier comes into play. Trust me, giving your chicken a good whack not only helps with tenderness but also guarantees even cooking.
And oh, those panko breadcrumbs are a game-changer. They bring that extra crunch that regular breadcrumbs just can’t compete with. Otherwise, you’re left with some soggy sad chicken, and nobody wants that at dinner, right?
Step-by-Step Instructions
Making Crispy Chicken Katsu isn’t just a cooking endeavor; it’s a culinary experience that’ll have your taste buds dancing with joy. The good news? It’s incredibly simple and fun. Follow these easy steps, and soon you’ll be savoring that crunchy, golden goodness straight from your own kitchen.
1. Prepare the Chicken: Start with 2 pounds of chicken breast or thighs that you’ve pounded thin. This is your moment—give that chicken a good whack to tenderize it. Trust me, it makes a world of difference, and it’ll cook evenly too.
After you’re done, sprinkle salt and pepper to taste on both sides. Ah, the simple things in life.
2. Dredging Station: Set up a little assembly line. In one bowl, place 2 cups of all-purpose flour. In another bowl, crack and beat 4 eggs until they’re nice and frothy.
Finally, grab 2–2½ cups of panko breadcrumbs and pour them into a third bowl. You want to make sure everything is handy, because it’s about to get a bit messy.
3. Coat the Chicken: Take each piece of seasoned chicken and dredge it in the flour first, making sure to coat it evenly. Shake off any excess flour.
Then, dip it into the beaten eggs, letting any extra drip off. Finally, roll it in the panko breadcrumbs until it’s covered all over. (Panko is your secret weapon for that ultimate crunch—don’t skip it!)
4. Heat the Oil: Now, grab a skillet or a deep pan and heat up vegetable oil over medium heat. You’ll need enough oil to cover the bottom of the pan—about ½ inch should do.
To know it’s ready, toss in a breadcrumb or two; they should sizzle when the oil is hot enough.
5. Fry Your Chicken: Gently place the coated chicken pieces into the hot oil. Fry them for about 4–5 minutes on each side, or until they’re golden brown and cooked through.
You’ll know it’s time to flip when you see that gorgeous golden crust forming. (Your kitchen will smell heavenly right about now.)
6. Finish Up: Once your chicken is cooked, remove it from the oil and let it drain on paper towels. This is key—nobody wants greasy chicken.
Give it a moment to rest while you contemplate, “How did I get so lucky today?”
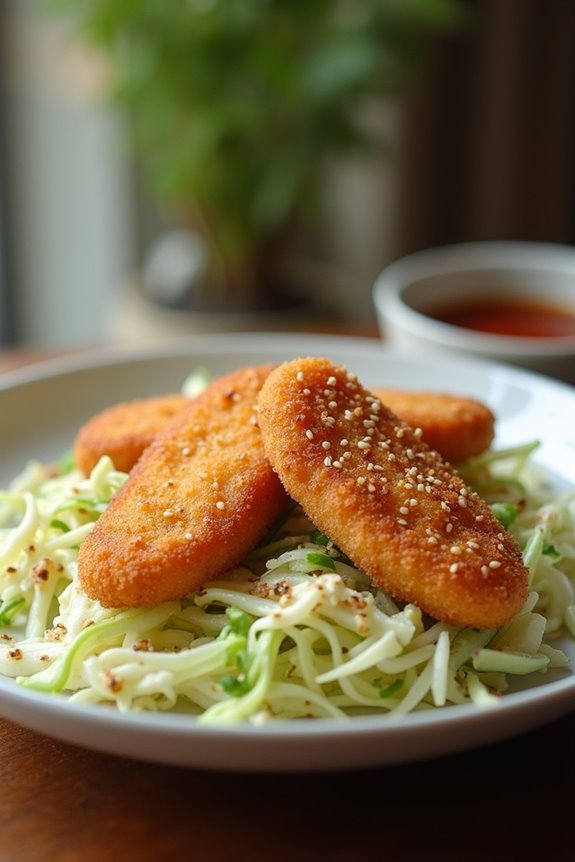
And there you have it—a plate of perfectly crispy chicken katsu ready to be devoured. Serve it with some invigorating cabbage slaw or steaming rice for a meal that’ll impress just about anyone.
Grab your favorite dipping sauce, and enjoy every last crumb. Cooking doesn’t get much better than this, does it? Plus, using premium baking tools can elevate your cooking experience even further!
Tips & Variations
While it might seem straightforward to whip up crispy chicken katsu, there are plenty of little tips and variations that can take your dish from good to absolutely unforgettable.
First off, don’t skip the panko—its crunch is what dreams are made of. And remember, frying at medium heat is key; too high, and your chicken might end up resembling a dry sponge!
If you want to mix it up, try adding spices like garlic powder or paprika to the flour for a flavor boost.
Oh, and when you’re frying, consider using a cast-iron skillet; it’ll keep the oil temperature steady.
Trust me, I’ve made the mistake of not trying these tips, and boy, did I regret it.
Enjoy experimenting!
How to Serve?
When it comes to serving up your crispy chicken katsu, presentation can be just as important as the flavor, and trust me, we eat with our eyes first.
I like to slice the chicken into bite-sized pieces—it’s a crowd-pleaser. Arranging it on a colorful platter gives it that “wow” factor. I often serve it alongside a fresh cabbage slaw for crunch and color.
A splash of tonkatsu sauce drizzled over the top adds flavor and flair. Trust me, it looks like a restaurant dish but it’s just you in the kitchen.
Want to be fancy? Plating it with some lime wedges or pickled ginger always impresses.
Just remember: the only thing better than a crispy chicken katsu is a beautifully presented one.
Storage & Reheating Guide
If you think crispy chicken katsu is just a single-day dish, think again.
I’ve discovered that it stores pretty well. After enjoying your feast, let the chicken cool completely, then pop it in an airtight container. It’ll hang around in the fridge for about three days before it starts to lose its mojo. For optimal freshness, use airtight food storage solutions to keep it tasting great.
When you’re ready for round two, don’t just microwave it; that can turn it into a soggy mess. Instead, heat a little oil in a pan and warm the chicken over medium heat until it’s crispy again.
Trust me, it’ll taste almost as good as fresh. For a quick bite, chop it up and toss it in a stir-fry. It’s a win-win situation, really.
Final Thoughts
Cooking crispy chicken katsu is one of those joyful adventures in the kitchen that can really make your day. There’s something about that crunchy panko coating that instantly elevates your mood.
Trust me, when you’ve mastered this dish, even the toughest days feel a bit lighter. And hey, if I can turn a simple chicken breast into something that makes my friends rave, you can too.
Don’t worry if things get a bit messy; flour explosions are just part of the fun, right? Remember, practice makes perfect.
Try pairing it with a crisp cabbage slaw or a side of rice—it’s a game changer. So grab that chicken and let the frying magic happen; you’ll be so proud of your creation.