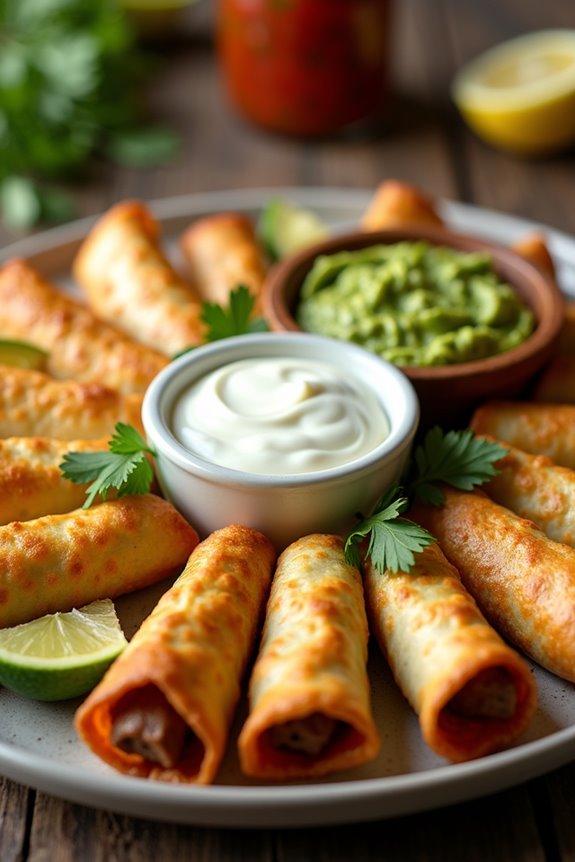
Let’s chat about beef taquitos, shall we? These crispy little rolls are honestly one of my favorite snacks. I mean, what’s not to love? Savory ground beef wrapped in a crunchy shell—it’s like a party for your taste buds. I remember the first time I made them; let’s just say, my kitchen looked like a food tornado hit it. But trust me, the deliciousness is worth a little chaos, and you’ll want to stick around for the tips I’ve got!
Why You’ll Love This Recipe
You know, every time I make these beef taquitos, I wonder why I don’t whip them up more often.
Seriously, they’re a total game changer. The crispy outer layer is like a warm hug, while inside, the seasoned beef and melted cheese dance around in harmony.
It’s one of those recipes that makes my kitchen smell amazing in no time. Plus, they’re super customizable; maybe throw on some guacamole or pico de gallo for an added kick.
I mean, who doesn’t love a good taquito? On busy days, they’re perfect for a quick snack or even dinner.
Every bite feels like a little celebration. Trust me, these beef taquitos will have your taste buds cheering for more.
Equipment List
When it comes to whipping up these delicious beef taquitos, having the right equipment is half the battle. First up, you’ll need a good skillet for browning that beef and onion. A wooden spoon or spatula helps stir things up effectively. Trust me, you don’t want a boring old fork here.
Next, grab a pot for simmering the beef broth—something that can handle the heat. Don’t forget the frying pan or deep pot for getting those taquitos crispy! A slotted spoon or tongs are lifesavers when it comes to flipping them without a mess.
Finally, some paper towels are essential for draining. With the right gear, you’ll feel like a taquito pro in no time, even if it’s your first attempt. Plus, having a good cutting board set can make chopping ingredients a breeze!
Our Ingredients
When it comes to making beef taquitos, having the right ingredients is key to achieving that perfect flavor and texture. You want your taquitos to be well-seasoned, which means you need spices that pack a punch as well as quality meats and cheeses. Trust me, no one wants a bland taquito.
You’ll be amazed at how the combination of spices and fillings brings everything together for a tasty treat that’ll have everyone asking for seconds—and maybe even thirds!
Here’s what you’ll need to gather:
- 1 lb ground beef
- 1 chopped onion
- 1 tbsp minced garlic
- 1 tsp cumin
- 2 tsp chili powder
- 1 tsp dried cilantro
- 1/2 tsp salt and pepper
- 1 cup beef broth
- White corn tortillas
- Shredded Monterey Jack cheese
- Oil for frying
Now, let’s talk about some ingredient considerations. While ground beef is the star of the show here, don’t shy away from swapping in other proteins if that’s your thing—chicken or even beans can do the trick!
Also, feel free to mix up the spices if you have favorites. Maybe you want a little more kick? Just throw in some extra chili powder or a pinch of cayenne.
Oh, and while Monterey Jack cheese is a fantastic choice for that melty goodness, you could mix in some cheddar or pepper jack for a different flavor approach.
The beauty of cooking lies in the ability to personalize, so don’t hesitate to experiment. After all, cooking should be fun, right?
Step-by-Step Instructions

Making Beef Taquitos is a delightful endeavor—once you master the steps, you’ll want to whip these up every week. With a savory filling and crispy exterior, they’re the ultimate crowd-pleaser! So, roll up your sleeves and let’s get cooking with this simple guide.
- Start by frying the beef: In a large skillet over medium-high heat, add 1 lb of ground beef with 1 chopped onion. Cook this mix until the beef is brown and the onions are softened, which should take about 5-7 minutes. (Just imagine the aroma filling your kitchen—I promise, it’s hard to resist.)
- Drain the fat: Once the beef is cooked, you’ll likely find some grease in the pan. Drain this excess fat—nobody wants greasy taquitos. Trust me, your stomach will thank you later.
- Add the flavor: Now, toss in 1 tbsp of minced garlic, 1 tsp of cumin, 2 tsp of chili powder, 1 tsp of dried cilantro, and 1/2 tsp of salt and pepper. Stir everything together and let those spices mingle for about a minute or until fragrant (you’ll know it’s working when you feel a little tingle in your nose).
- Simmer with beef broth: Pour in 1 cup of beef broth. Stir to combine, then let it simmer on low heat until the broth reduces by about half—this should take about 5-10 minutes. (You want it thick enough to hold its shape when you roll it up in the tortillas. No soggy taquitos here!)
- Prepare the tortillas: While your beef mixture is simmering, warm up your white corn tortillas. You can wrap them in foil and place them in a warm oven or dry them on a skillet for a few seconds on each side. Either way, making them pliable is key, so they don’t crack when you roll them.
- Fill and roll: Once your beef mixture is ready, take a warm tortilla and place a couple of tablespoons of the beef filling along with a sprinkle of shredded Monterey Jack cheese in the center. Roll the tortilla tightly, tucking in the ends as you go to keep everything inside. Easy peasy, right?
- Fry to perfection: Heat some oil in a frying pan over medium heat. Once the oil is hot (you can test it by dropping in a tiny piece of tortilla—if it bubbles, it’s ready), gently place your rolled taquitos seam-side down in the oil. Fry them for about 3-4 minutes on each side or until they turn crispy and golden brown. (Don’t walk away—you want that crispiness, not burnt offerings.)
- Drain and serve: After frying, take the taquitos out and let them drain on paper towels. This will help remove excess oil and keep them from getting soggy. Serve them up with your favorite dips like sour cream, guacamole, or pico de gallo for an extra burst of flavor. Additionally, pairing these taquitos with essential kitchen appliances will elevate your breakfast cooking experience.
And there you have it—delicious Beef Taquitos ready to impress! You might want to grab a plate and settle in because these little beauties have a way of disappearing quickly. Enjoy every bite!
Tips & Variations
While you might think that taquitos are the same everywhere, I promise you there’s room to play with this recipe.
For instance, why not swap out the beef for shredded chicken or even black beans if you’re feeling adventurous? You could toss in some finely chopped peppers or corn to mix up the filling.
And let’s talk about cheese—Monterey Jack is great, but have you tried pepper jack for a little kick?
If you’re in a rush, bake them instead of frying for a healthier twist. Just remember, crispy is key.
Oh, and don’t forget the dipping sauces; they can make or break the snack experience. Sour cream, guacamole, the works—let your taste buds lead the way.
How to Serve?
Serving taquitos is where the fun really begins, don’t you think? I love laying out a colorful spread with all the fixings.
Imagine fresh guacamole, a generous dollop of sour cream, and zesty pico de gallo just waiting for those crispy taquitos. It’s like a taquito party on your plate.
I usually set up a DIY station, so everyone can customize to their liking. Who doesn’t love building their own snack masterpiece?
And I’ve learned the hard way—having extra napkins is a must. Trust me, taquitos can get a bit messy.
Don’t be shy; jump in, roll those taquitos off your plate, and enjoy every crispy bite. It’s snack time bliss, pure and simple!
Storage & Reheating Guide
Once you’ve whipped up a batch of those crispy beef taquitos, you’ll probably find yourself wondering how to keep them fresh for later. Trust me, I’ve been there.
I like to let them cool completely before I stash them in an airtight container. They’ll last about three to four days in the fridge—perfect for snacking later.
If you’re feeling ambitious, you can freeze them too. Just layer some parchment paper between them and pop them in a freezer bag.
When it’s time to reheat, I toss them in the oven at 375°F for about 15-20 minutes. You’ll get that crispy texture back. Microwaving’s a no-go; we don’t want sad, soggy taquitos, right? For optimal storage, consider using a Lazy Susan Organizer to keep your snack area neat and accessible.
Final Thoughts
If you’ve ever dived into the world of taquitos like I have, you know just how satisfying that crunchy bite is—especially when it’s packed with delicious beef and gooey cheese.
Making these little gems is like a culinary hug; they’re comforting and remind me of family gatherings. I can’t tell you how many times I’ve burnt my fingers trying to snatch one from the pan.
But hey, some sacrifices are worth it, right? Don’t forget to serve them with sour cream or guacamole; that’s a game-changer.
Trust me, once you try your homemade beef taquitos, you’ll wonder why you didn’t start making them sooner.


